Step 1 of 7Shipping (per job)
A shipment is a destination; a box is a box
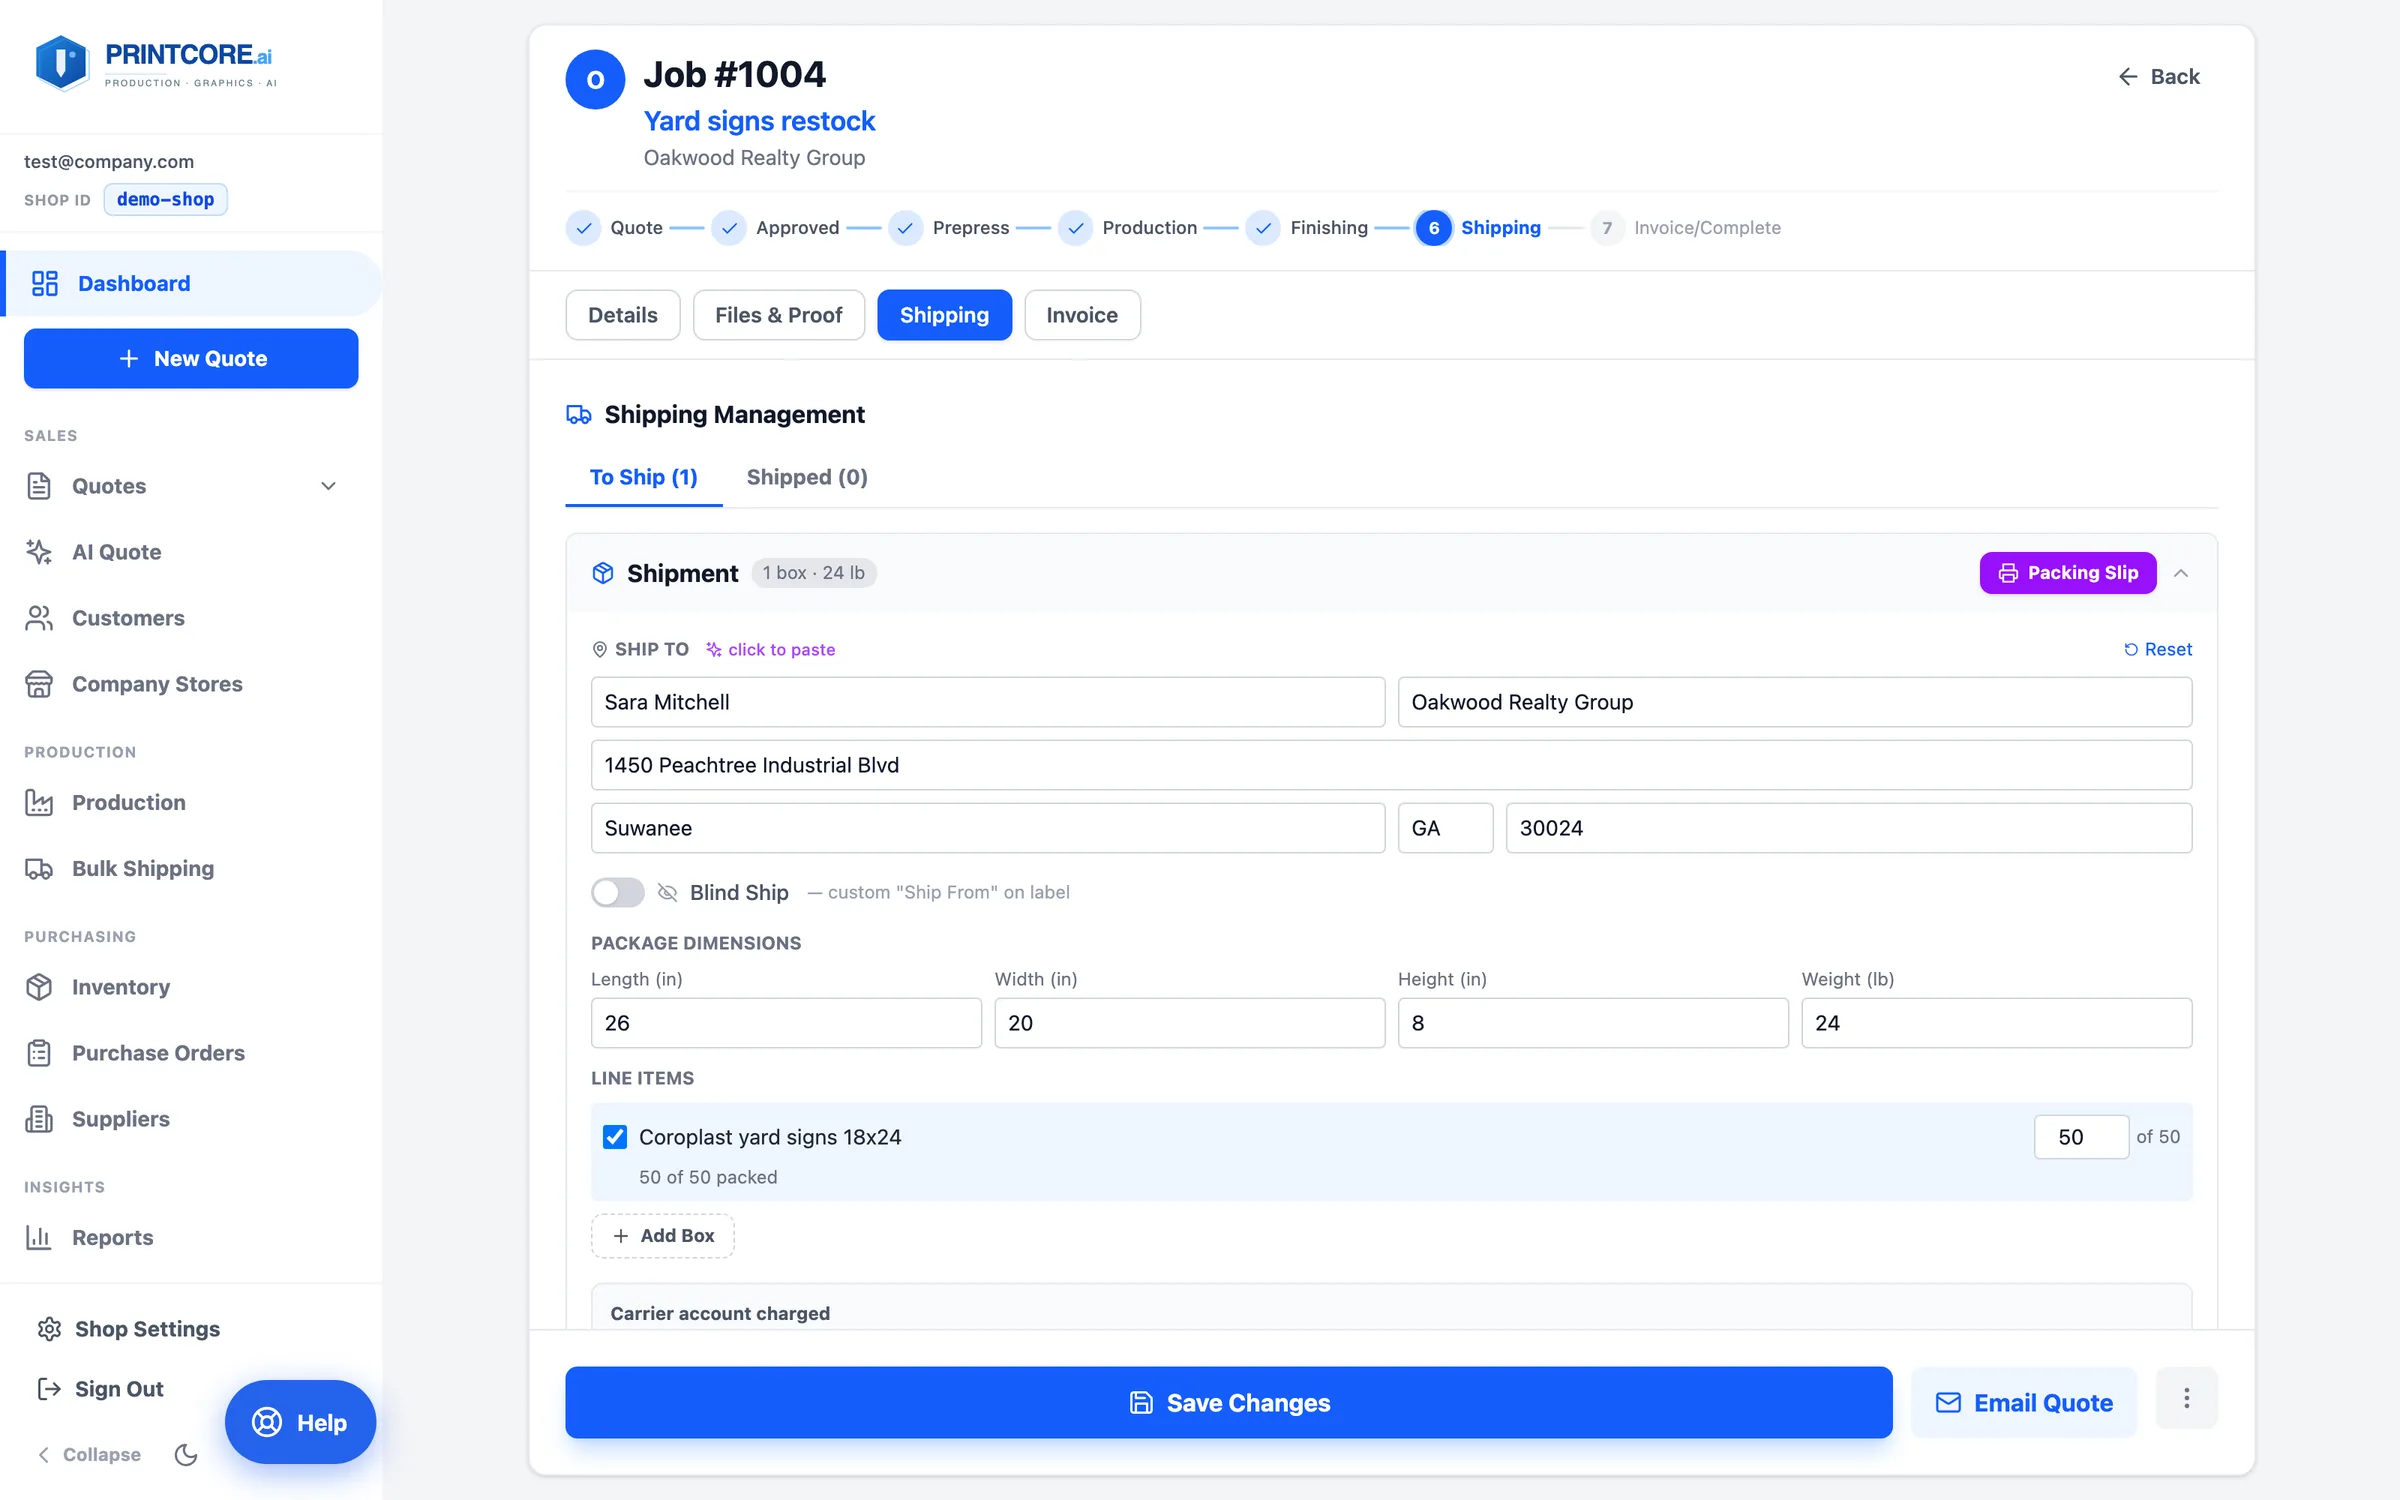
Open the job's Shipping tab. A shipment is one address and can hold as many boxes as the order needs. Address, carrier account, and the customer charge live on the shipment; dimensions, weight, and contents live on each box.
app.printcore.ai/jobs/1004
What to do
Confirm the Ship To address — it comes from the Ship To you set on the quote, then add boxes with Length, Width, Height, and Weight.
Why it matters
Four banners and two rollup stands going out as three boxes used to mean three addresses, three rate lookups, and three handling fees. Now it's one.
Step 2 of 7Shipping (per job)
Pack the boxes
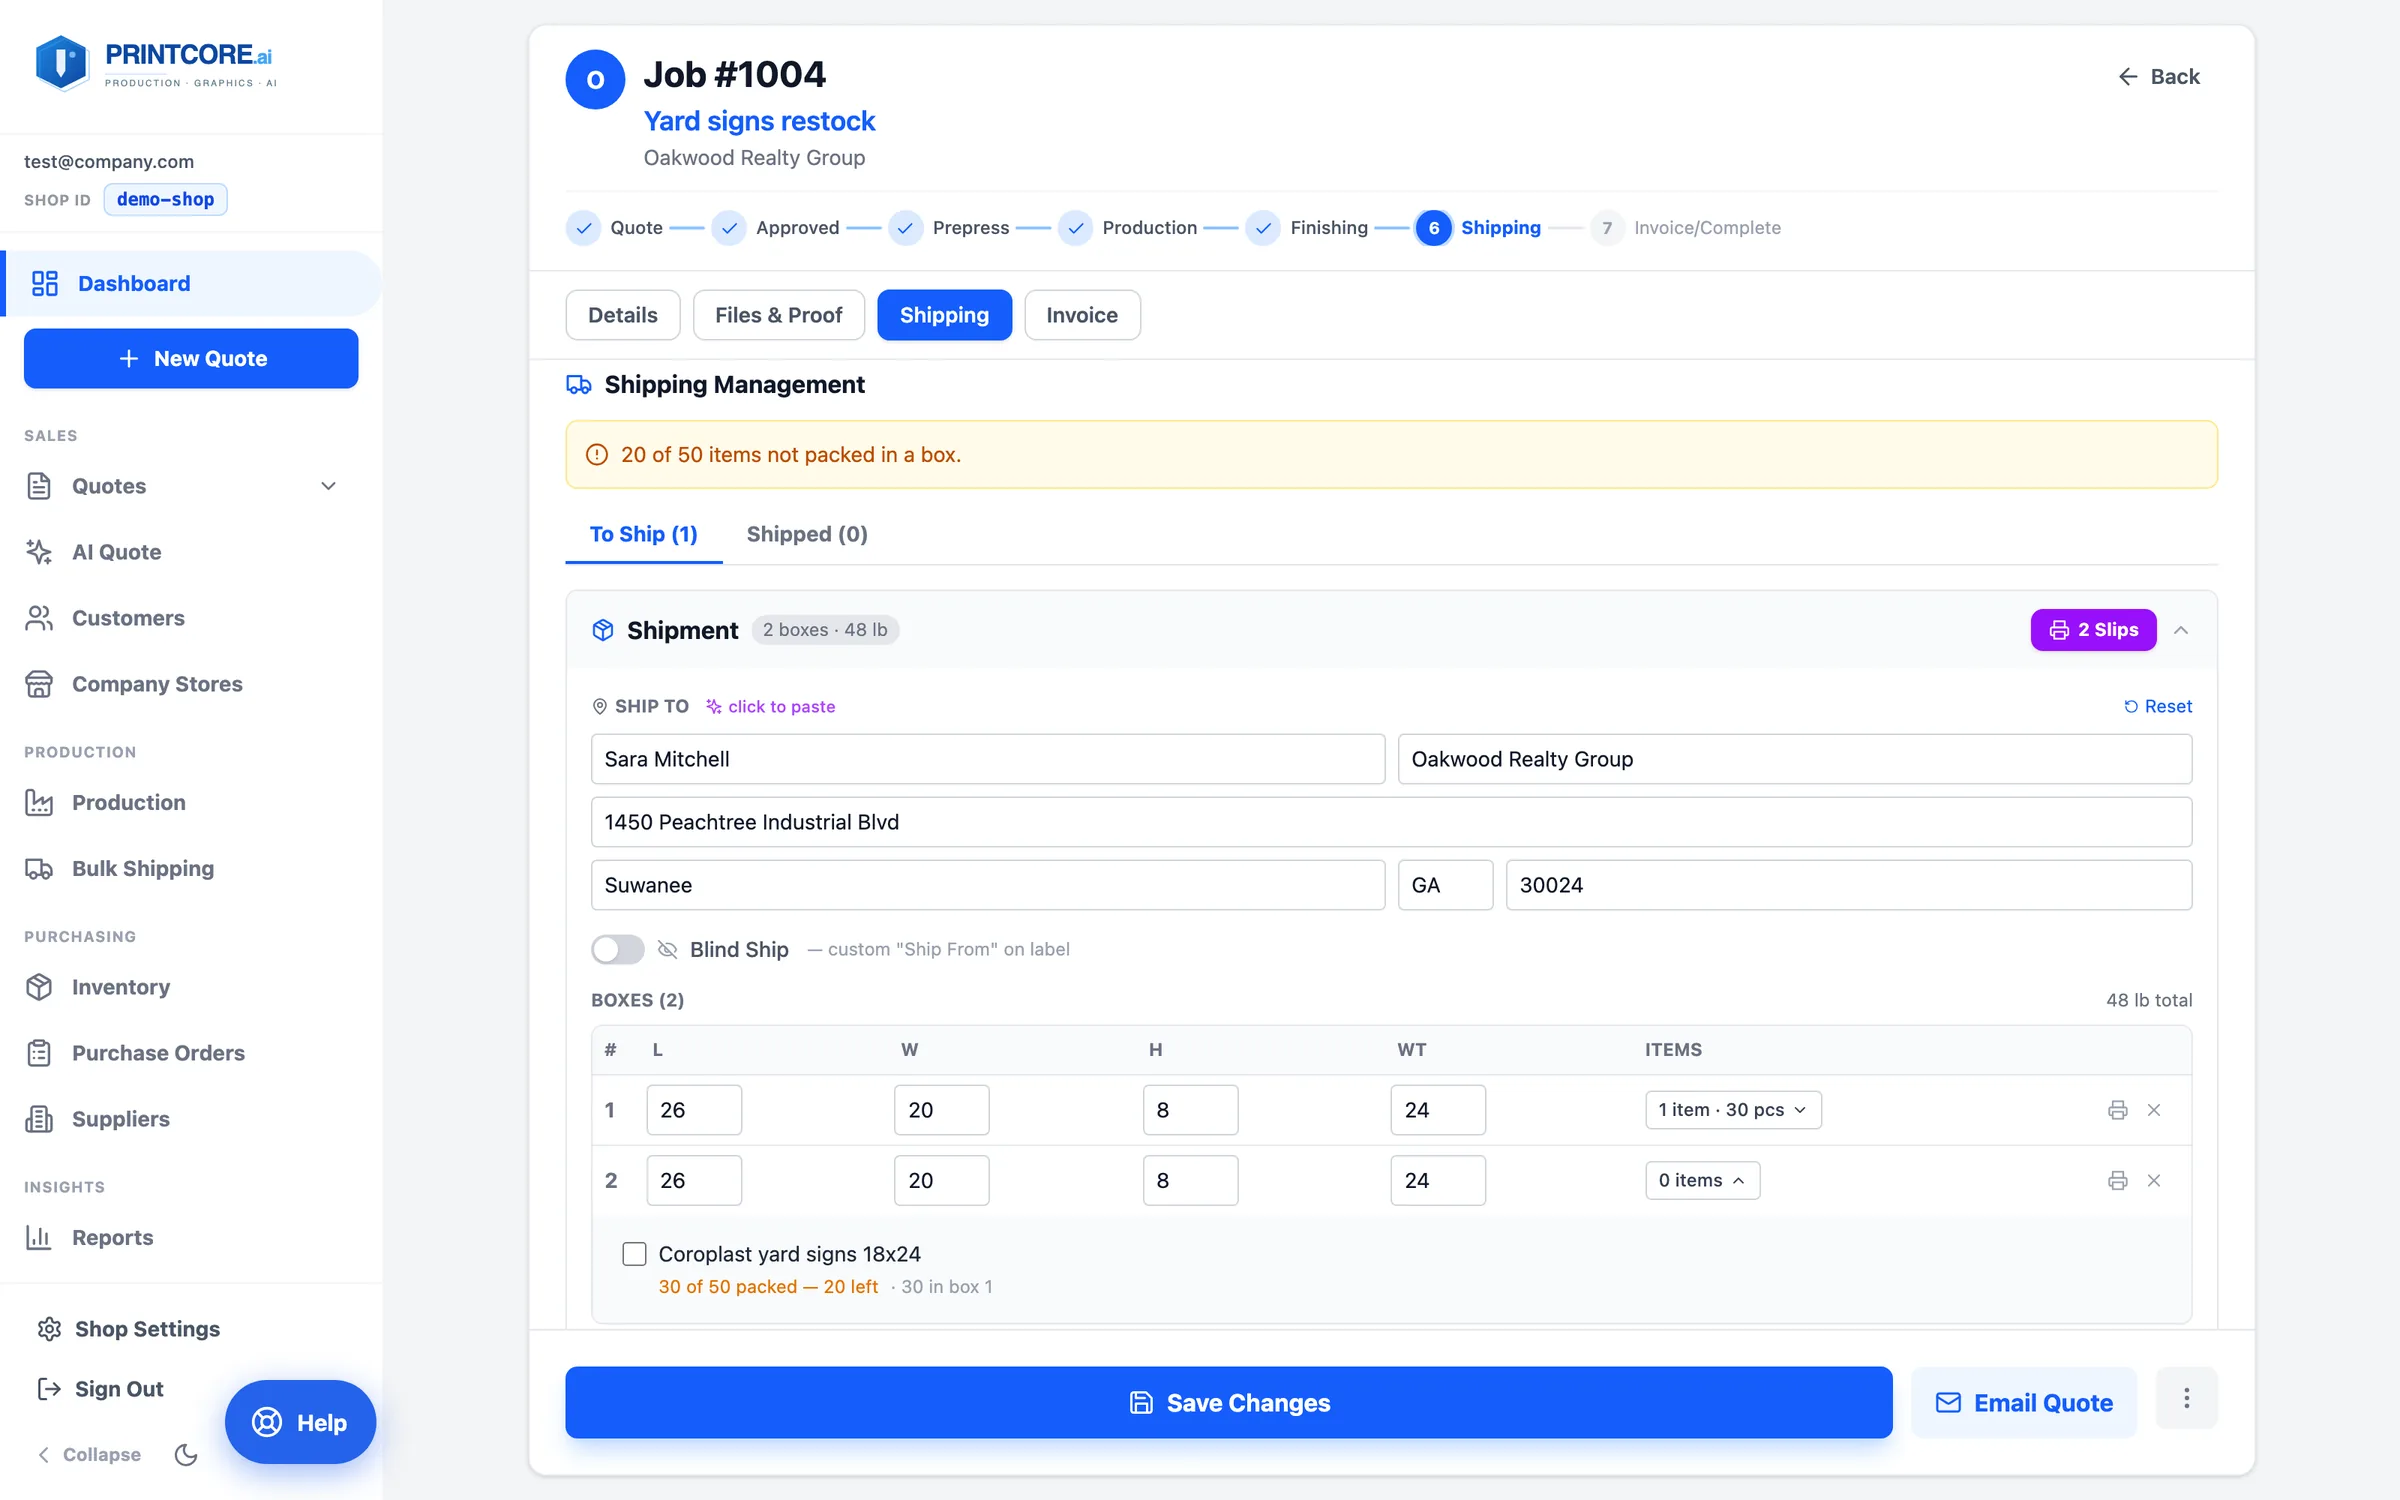
Assign items to boxes. A line item's quantity can be split — six yard signs in one box, four in another — and each item shows how many are packed and how many are left.
app.printcore.ai/jobs/1004
What to do
Use the item picker on each box; set a quantity for anything ordered in multiples. The warning counts pieces, so a line with 6 of 10 boxed is flagged short until the rest are packed.
Why it matters
The packing slip and the customer's tracking email both reflect exactly what went in each box.
Step 3 of 7Shipping (per job)
Rate the destination and buy labels
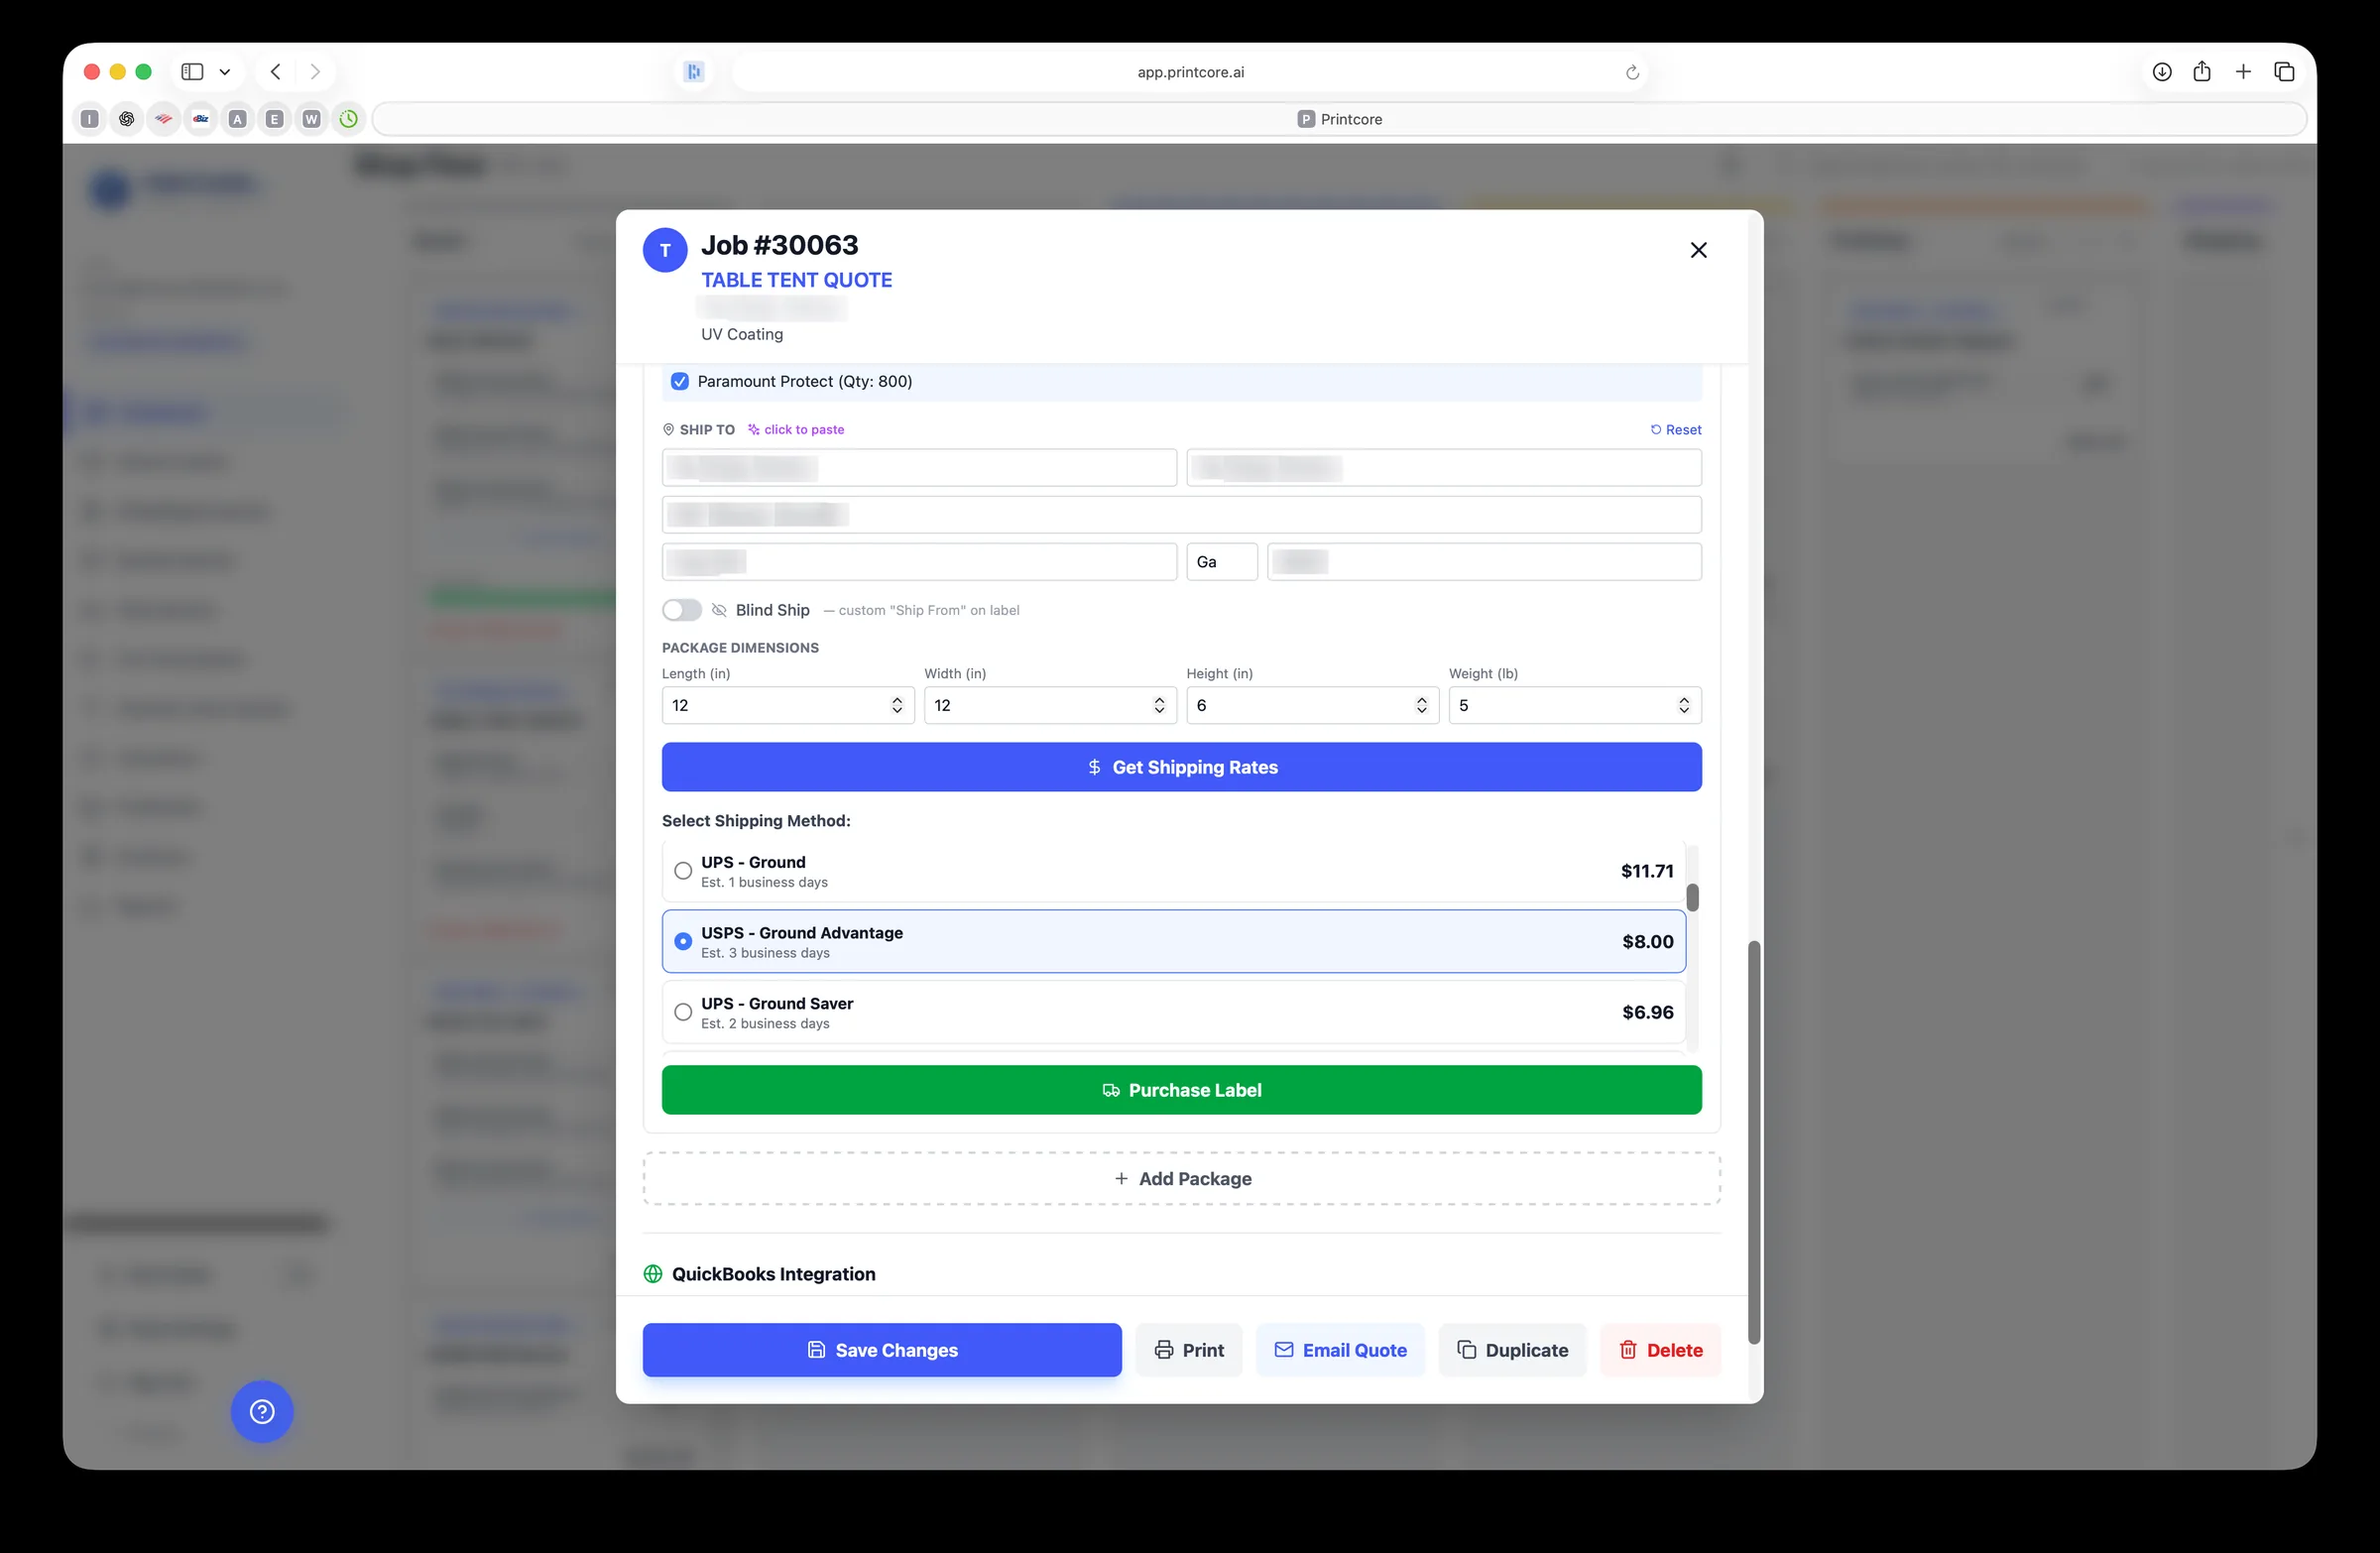
One Shippo call rates the whole destination across USPS, UPS, and FedEx; multi-box shipments are priced as multi-piece where the carrier supports it. Each rate row previews what the customer will be billed.
app.printcore.ai/jobs/1112
What to do
Pick a rate and click Purchase Labels. A label is generated per box and every tracking number is saved on the job. To bill the customer's own UPS/FedEx account instead, choose it under Bill shipping to.
Why it matters
No alt-tabbing to a carrier's website, and the customer is charged one handling fee per destination, not one per box.
Step 4 of 7Shipping (per job)
Print packing slips — before the labels
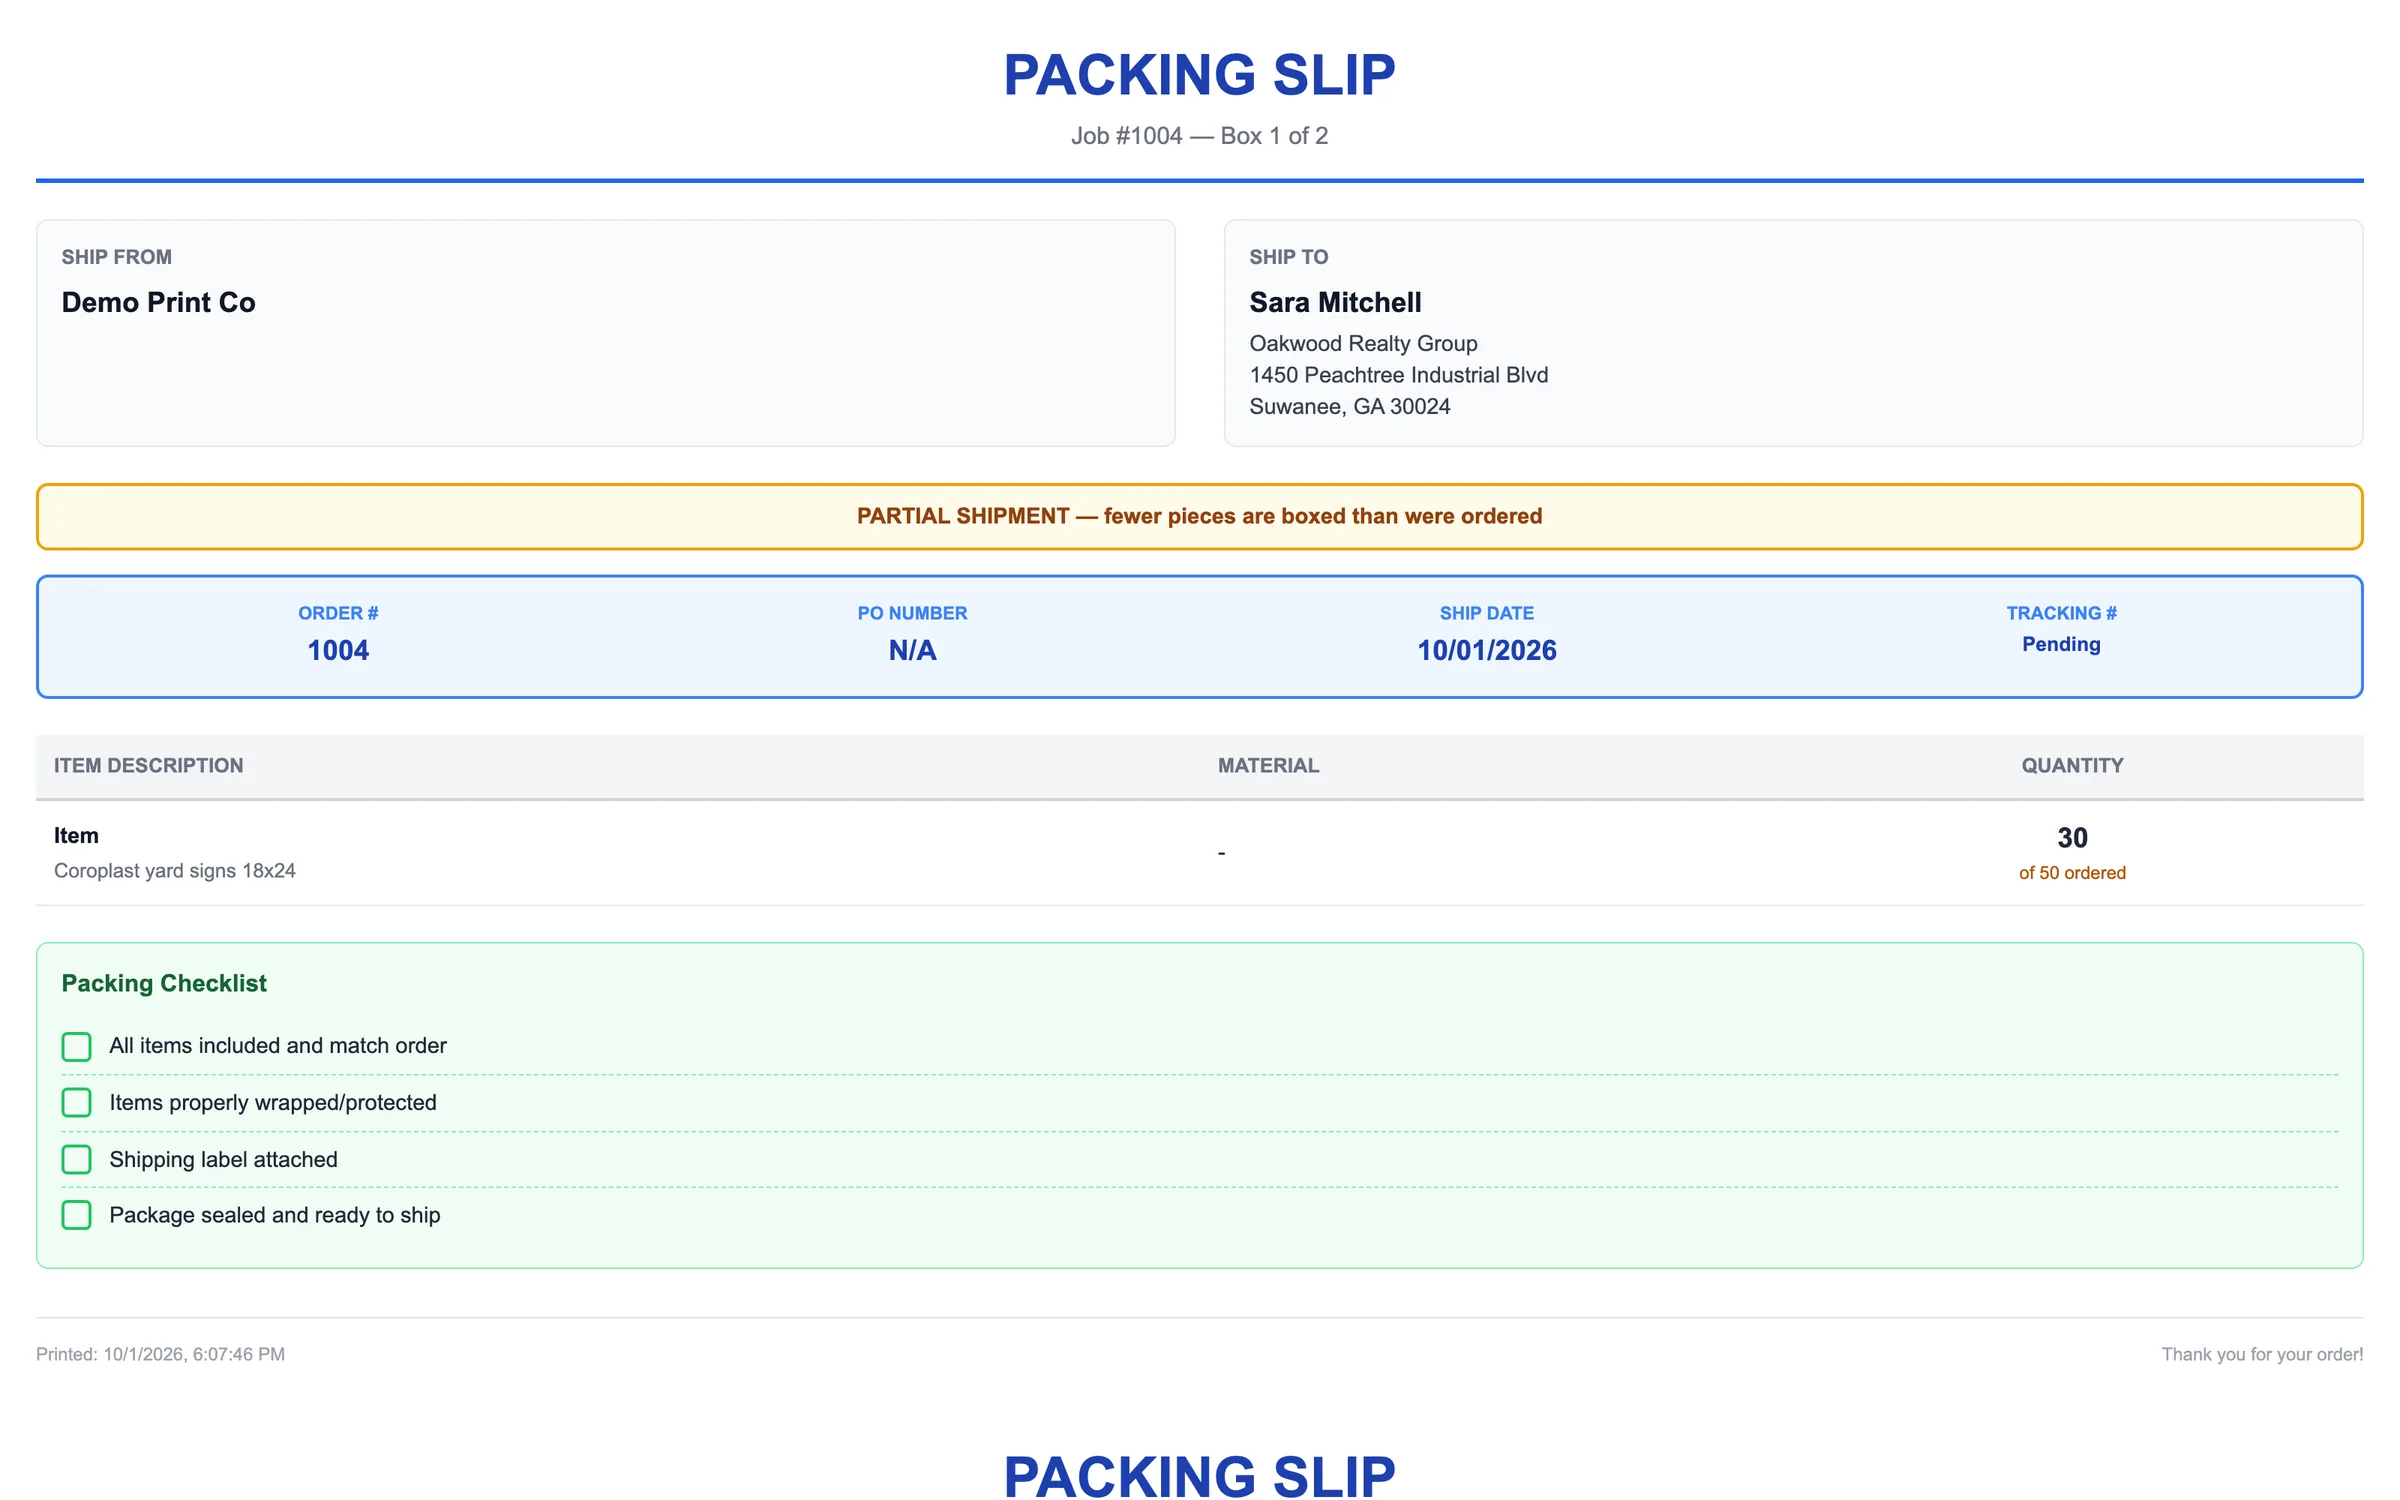
Each box has a printer icon for its own slip ("Box 2 of 3"), and the destination header prints the whole stack as one print job. Per-box quantities are editable.
app.printcore.ai/jobs/1004
What to do
Click the printer icon on a box, or Print all N slips on the shipment. Tuck each slip into its box.
Why it matters
Boxes get packed before labels are bought, so the slips are where you need them — and the popup blocker never eats box two and three.
Step 5 of 7Shipping (per job)
What the customer pays for shipping
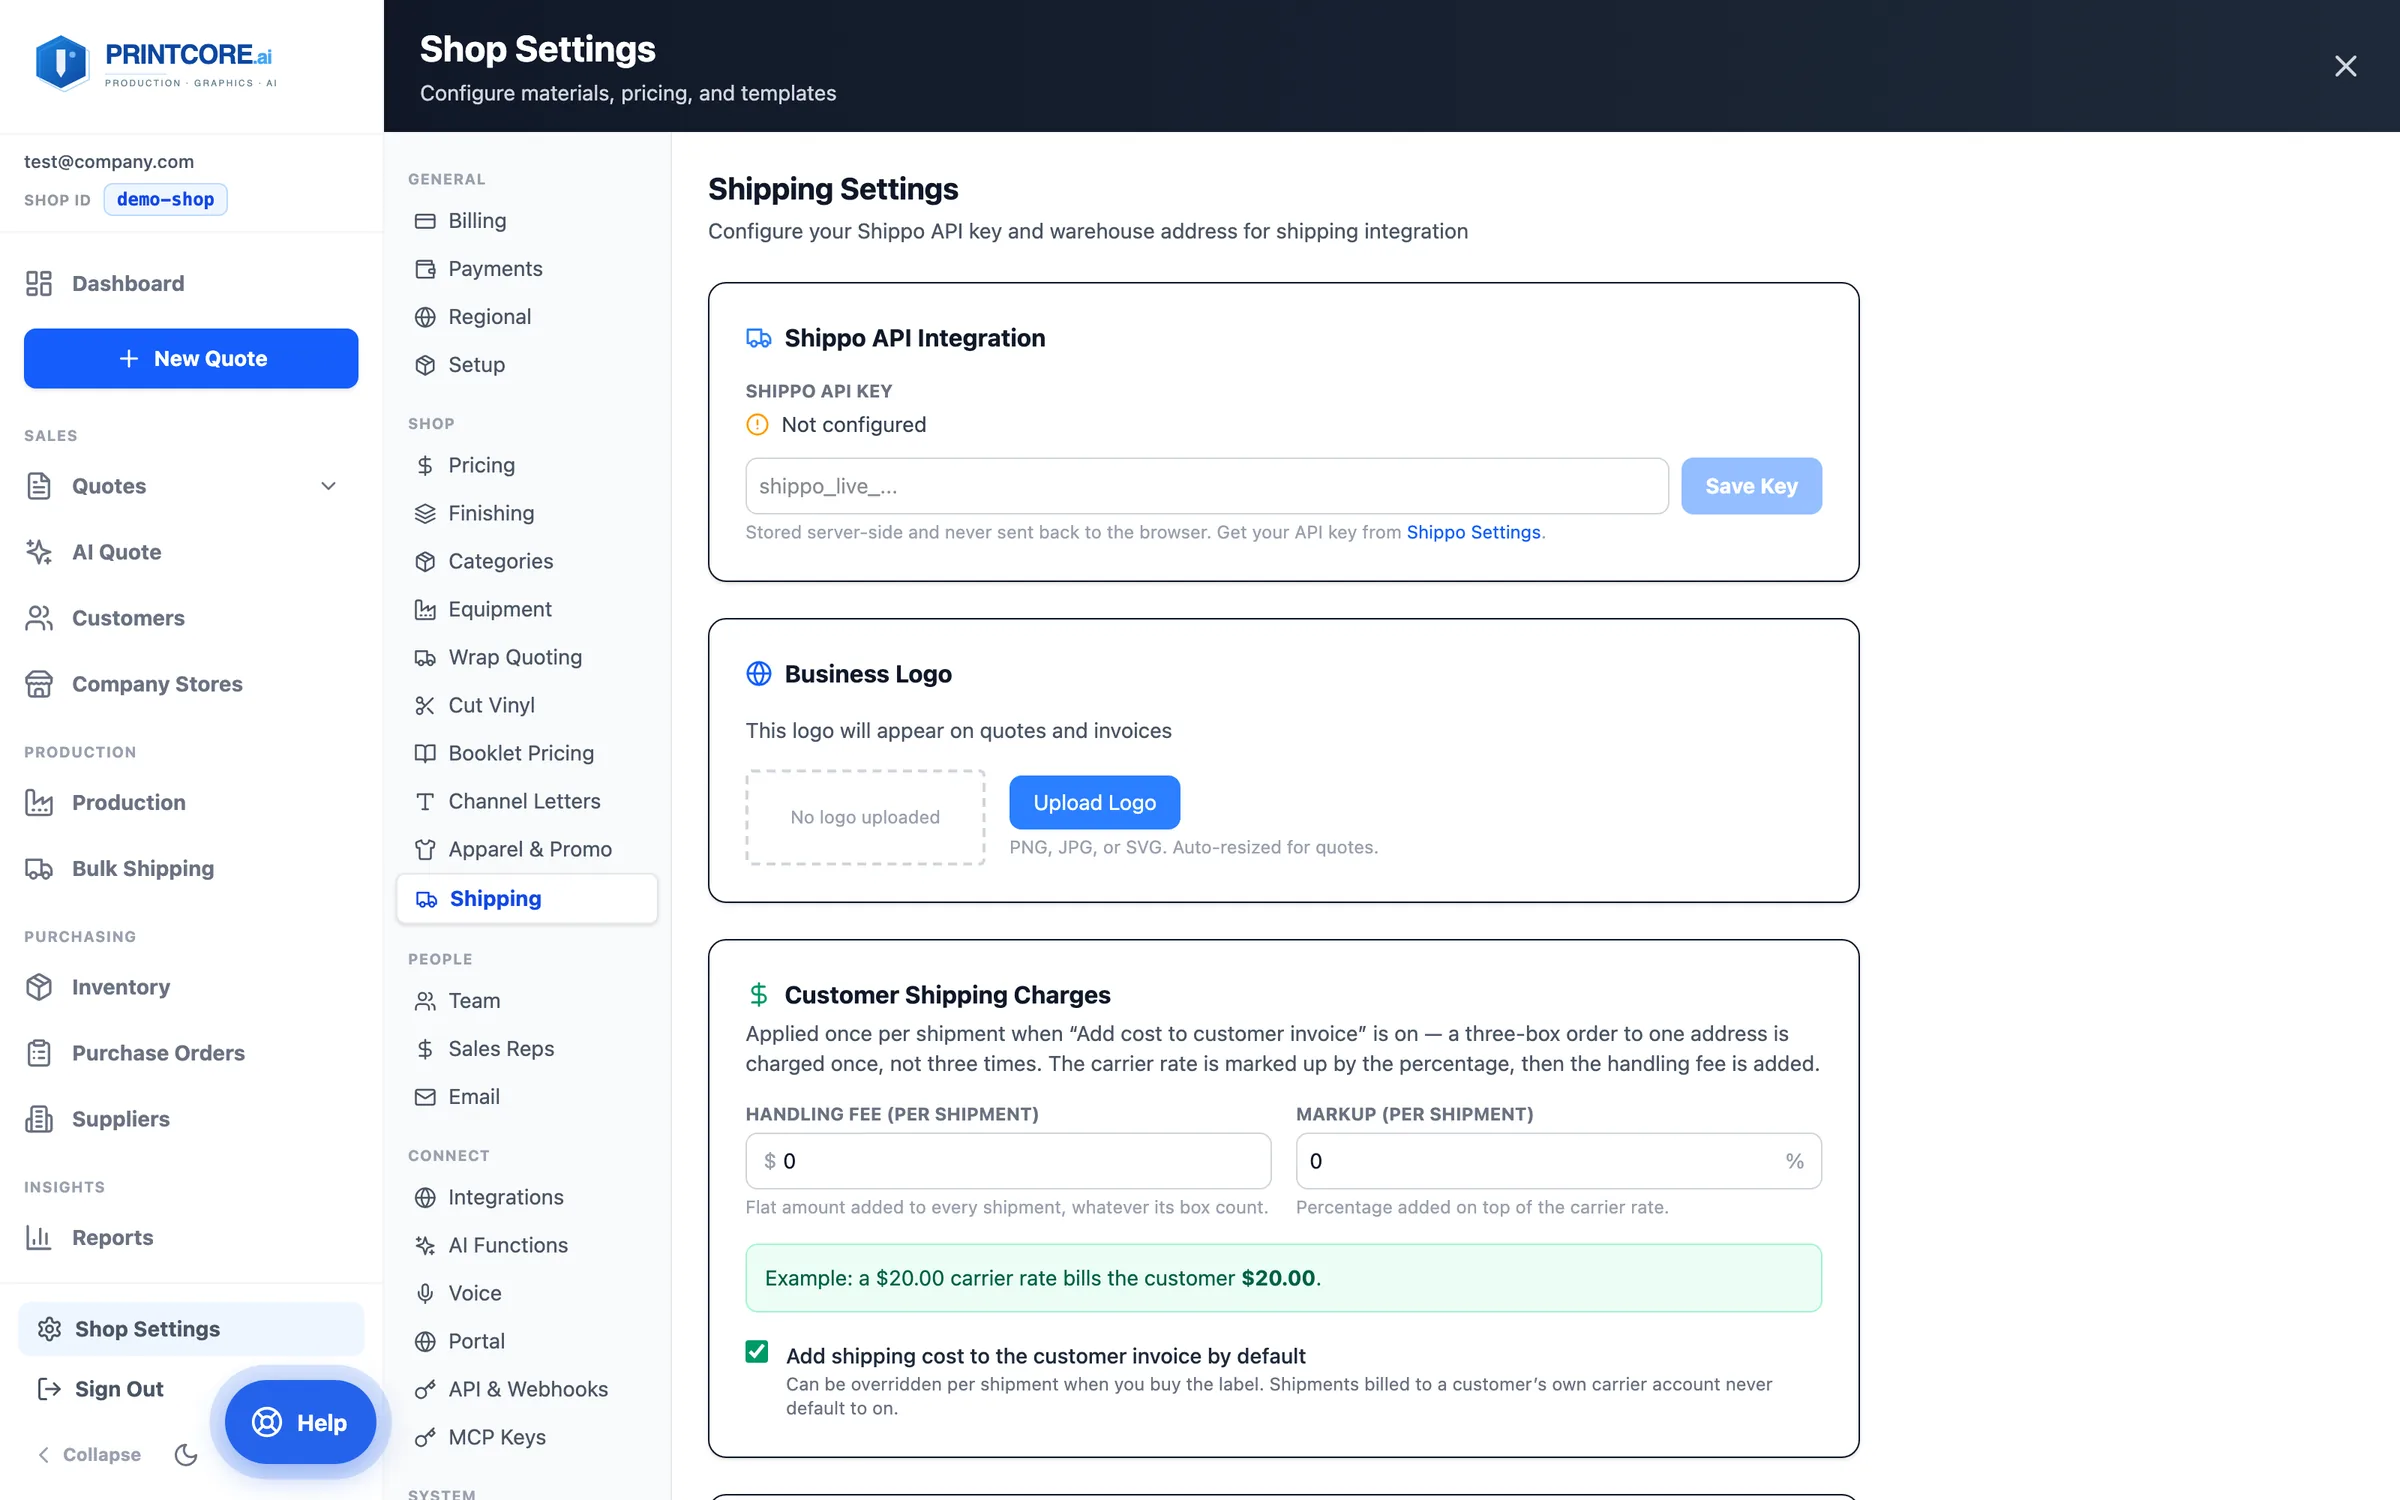
Shop Settings → Shipping → Customer Shipping Charges sets a flat handling fee and/or a percentage markup, and whether shipping lands on the invoice by default. Each shipment has an Add cost to customer invoice toggle.
app.printcore.ai/settings/shipping
What to do
Set your defaults once. On a job, flip the toggle off for a shipment billed to the customer's own carrier account so they're never double-charged.
Why it matters
The Shipping line on the invoice is built only from shipments you flagged, with the markup snapshotted at purchase time.
Step 6 of 7Shipping (per job)
Notify the customer & track
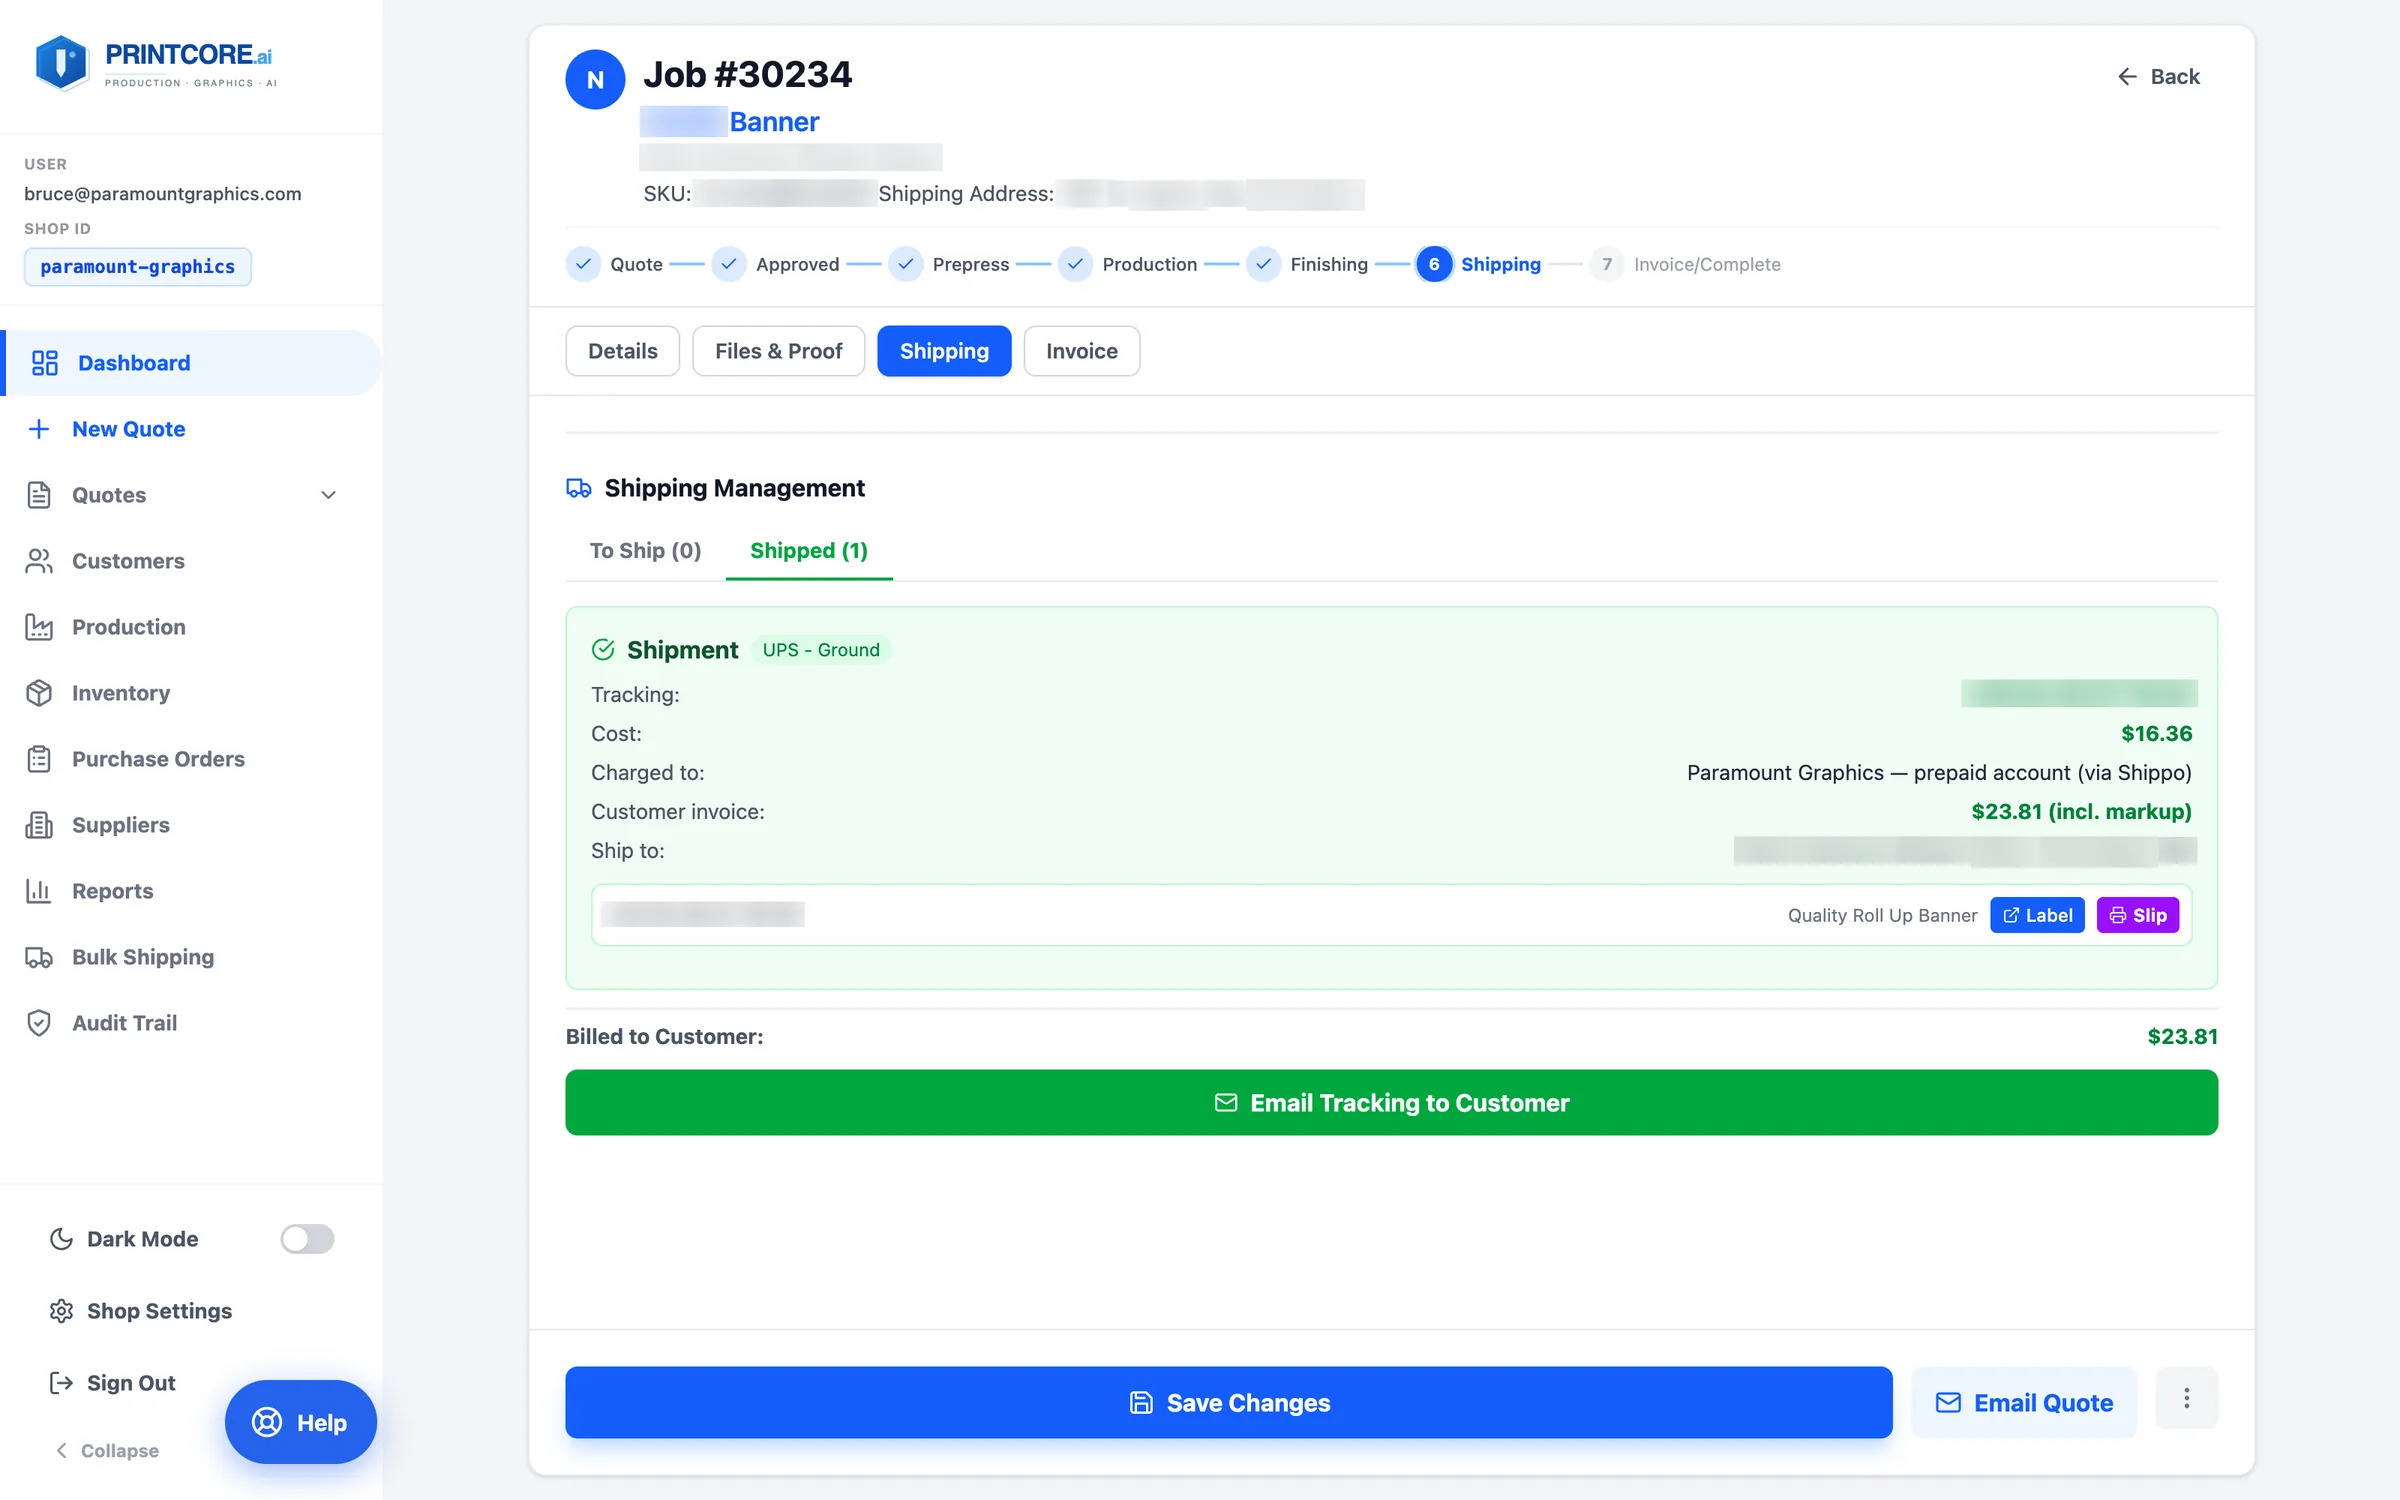
Once shipped, the package moves to the Shipped tab. Tracking numbers, cost, and ship-to are all visible; the tracking email groups the boxes together and goes to the order contact.
app.printcore.ai/jobs/1112
What to do
On the Shipped tab, click Email Tracking to Customer. Customers also see tracking links in the portal.
Why it matters
"Where's my order?" calls drop sharply once customers see proactive tracking. The job ticket holds the full shipping history for any future questions.
Shipping is automated 📦
Next — Shop Settings, where you connect integrations and tune your defaults.