Step 1 of 10Shop Settings
The settings page
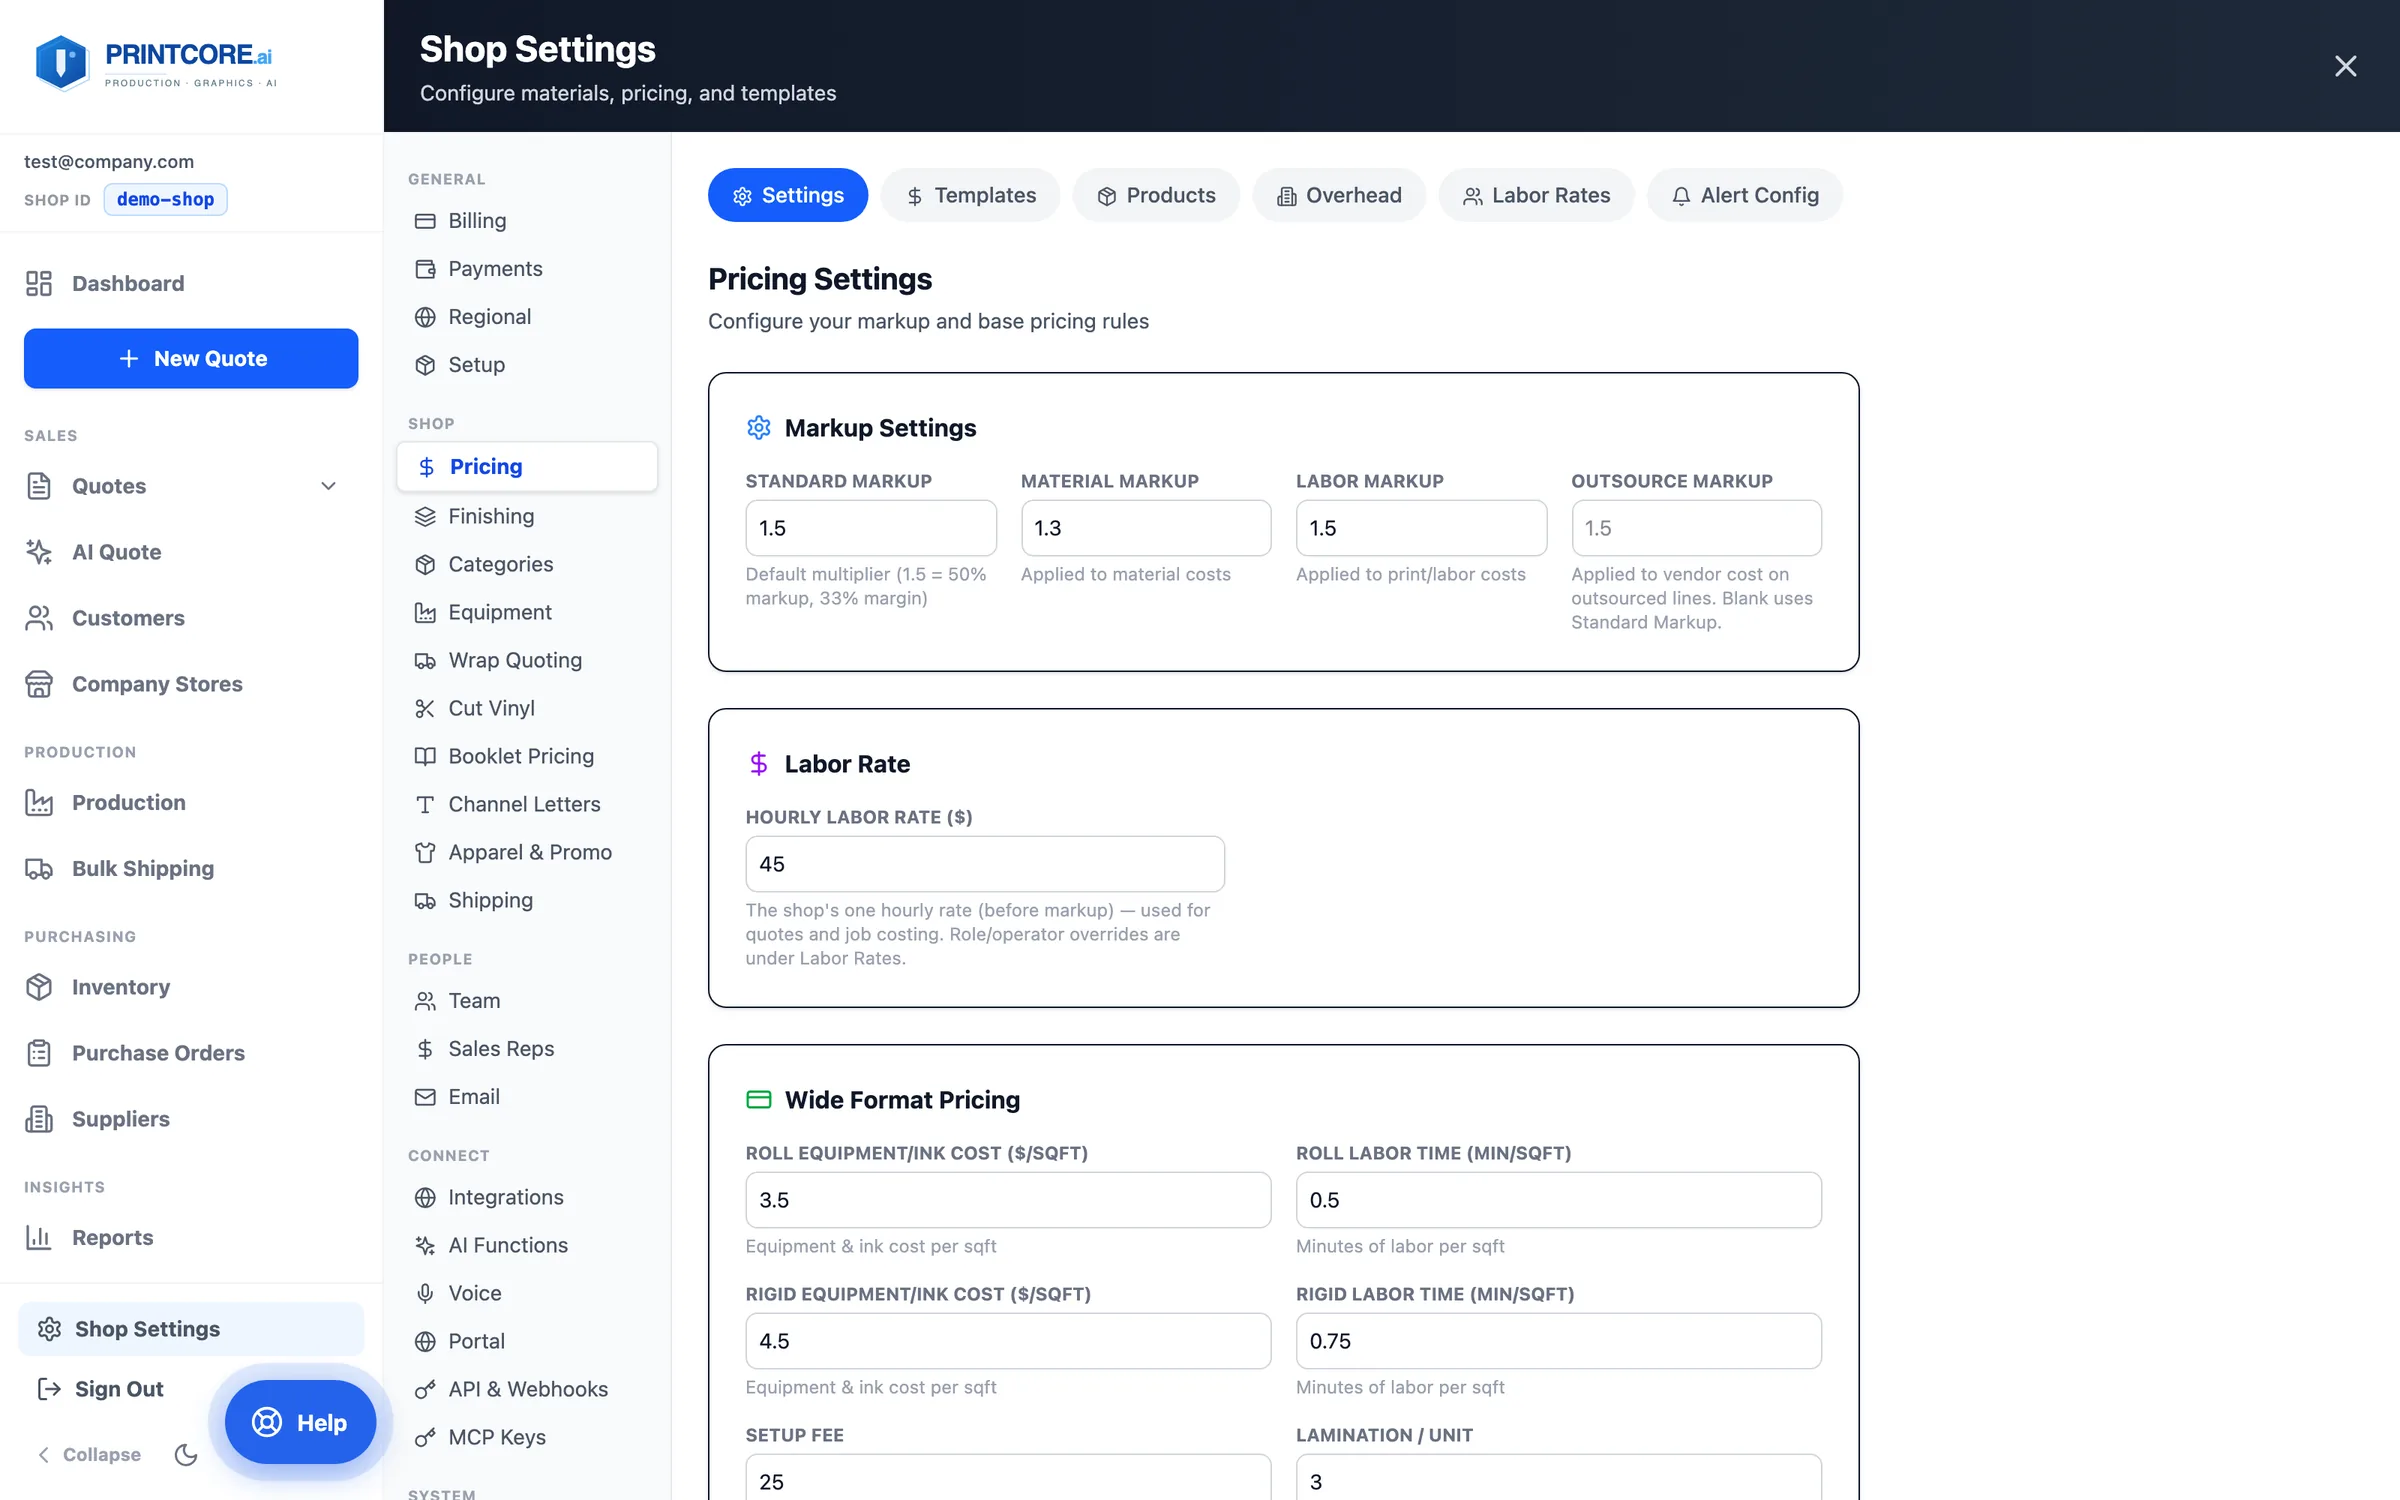
Settings is a full page at /settings/<section>, grouped into General, Shop (Pricing, Finishing, Categories, Equipment, each quoter, Apparel & Promo, Shipping), People, Connect, and System. Every section has its own address, so help links and bookmarks open it directly.
app.printcore.ai/settings
What to do
Click Shop Settings at the bottom of the side menu.
Why it matters
You'll come back here as your shop changes — adding presses, raising prices, adding team members.
Step 2 of 10Shop Settings
Pricing
Markups (standard, material, labor, and the outsource markup for vendor work), your one shop Hourly Labor Rate, setup fee, roll panel overlap, volume discount tiers, pricing templates, your Products catalog, monthly overhead, and margin-alert thresholds.
app.printcore.ai/settings/pricing
What to do
Adjust your default markup and setup fee. Add tier discounts (e.g. 10% off at 500 units). Saves are confirmed on screen; a failed save rolls the field back rather than pretending it worked.
Why it matters
Your pricing changes over time. Centralizing it here means every new quote uses the latest rules.
Step 3 of 10Shop Settings
Labor rates: one shop rate, optional overrides
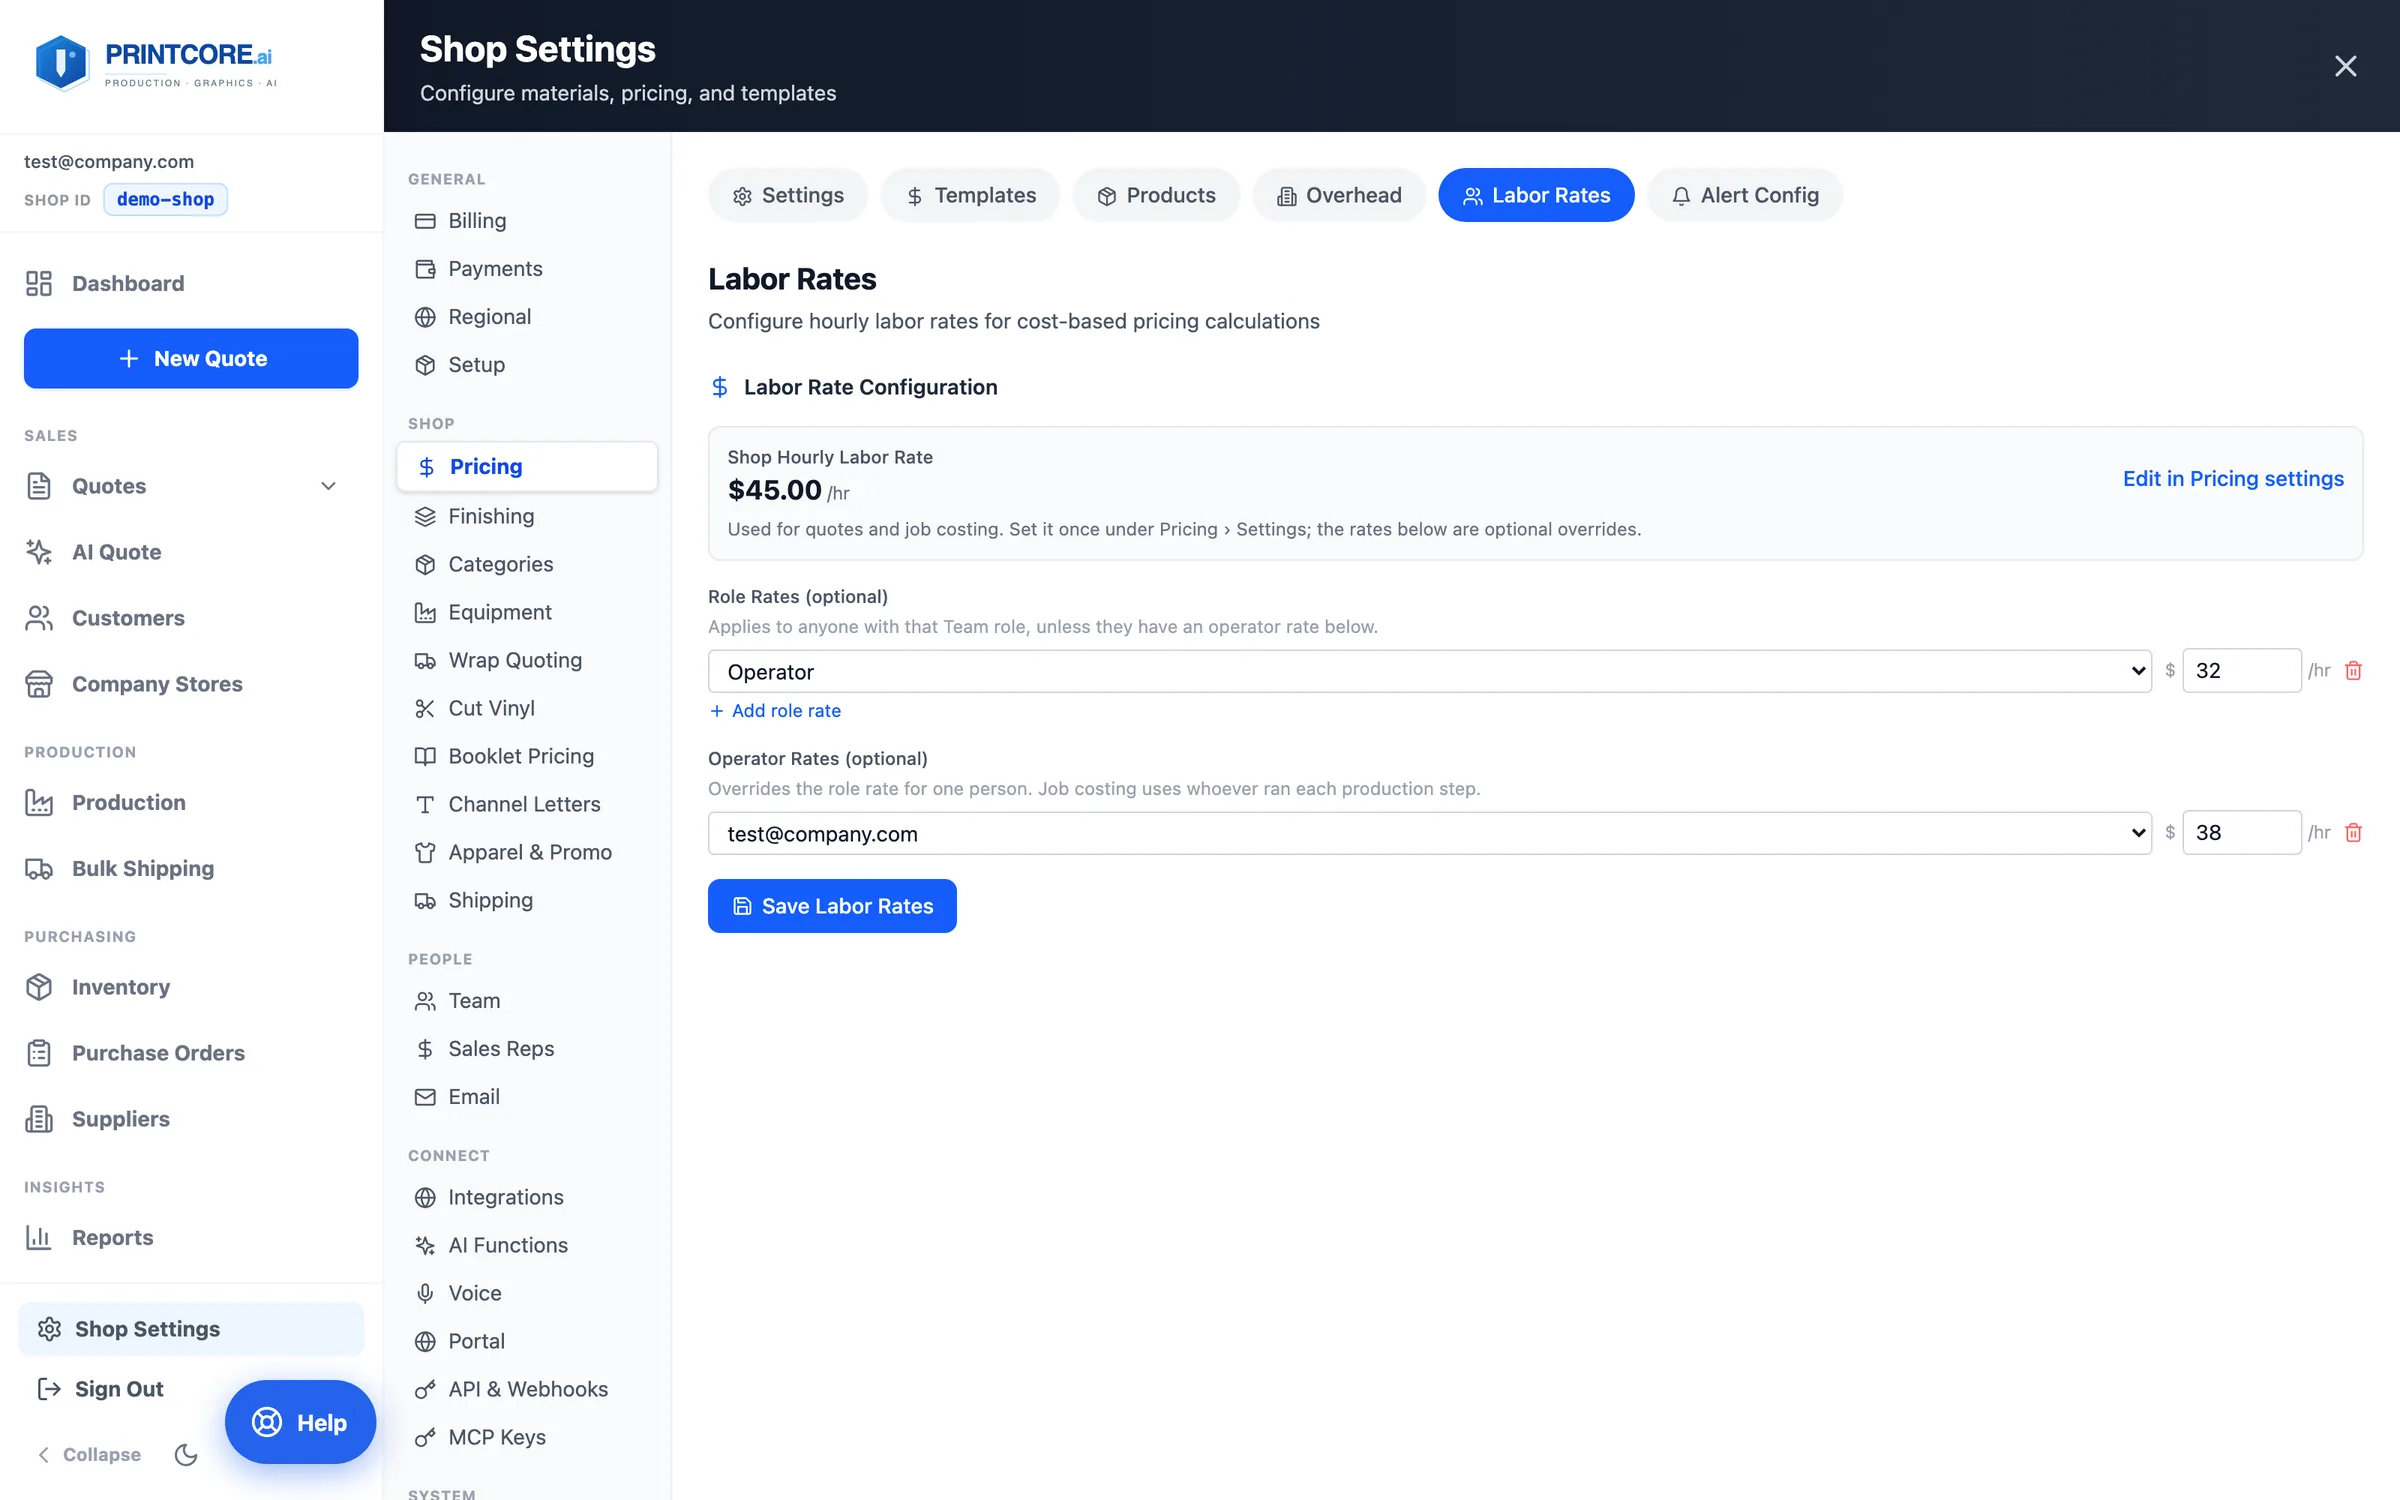
Pricing → Labor Rates shows the shop rate from Pricing Settings — the single rate quotes, AI price suggestions, and job costing all use — and lets you add role rates (from your Team roles) and operator rates (for one person).
app.printcore.ai/settings/pricing
What to do
Change the shop rate with Edit in Pricing settings. Add a role rate (e.g. Operator $32/hr) or an operator rate for a senior press operator, then Save Labor Rates.
Why it matters
Job profitability costs every production step at the rate of whoever ran it — operator rate first, then role rate, then the shop rate — so your margins reflect who actually did the work.
Step 4 of 10Shop Settings
Finishing
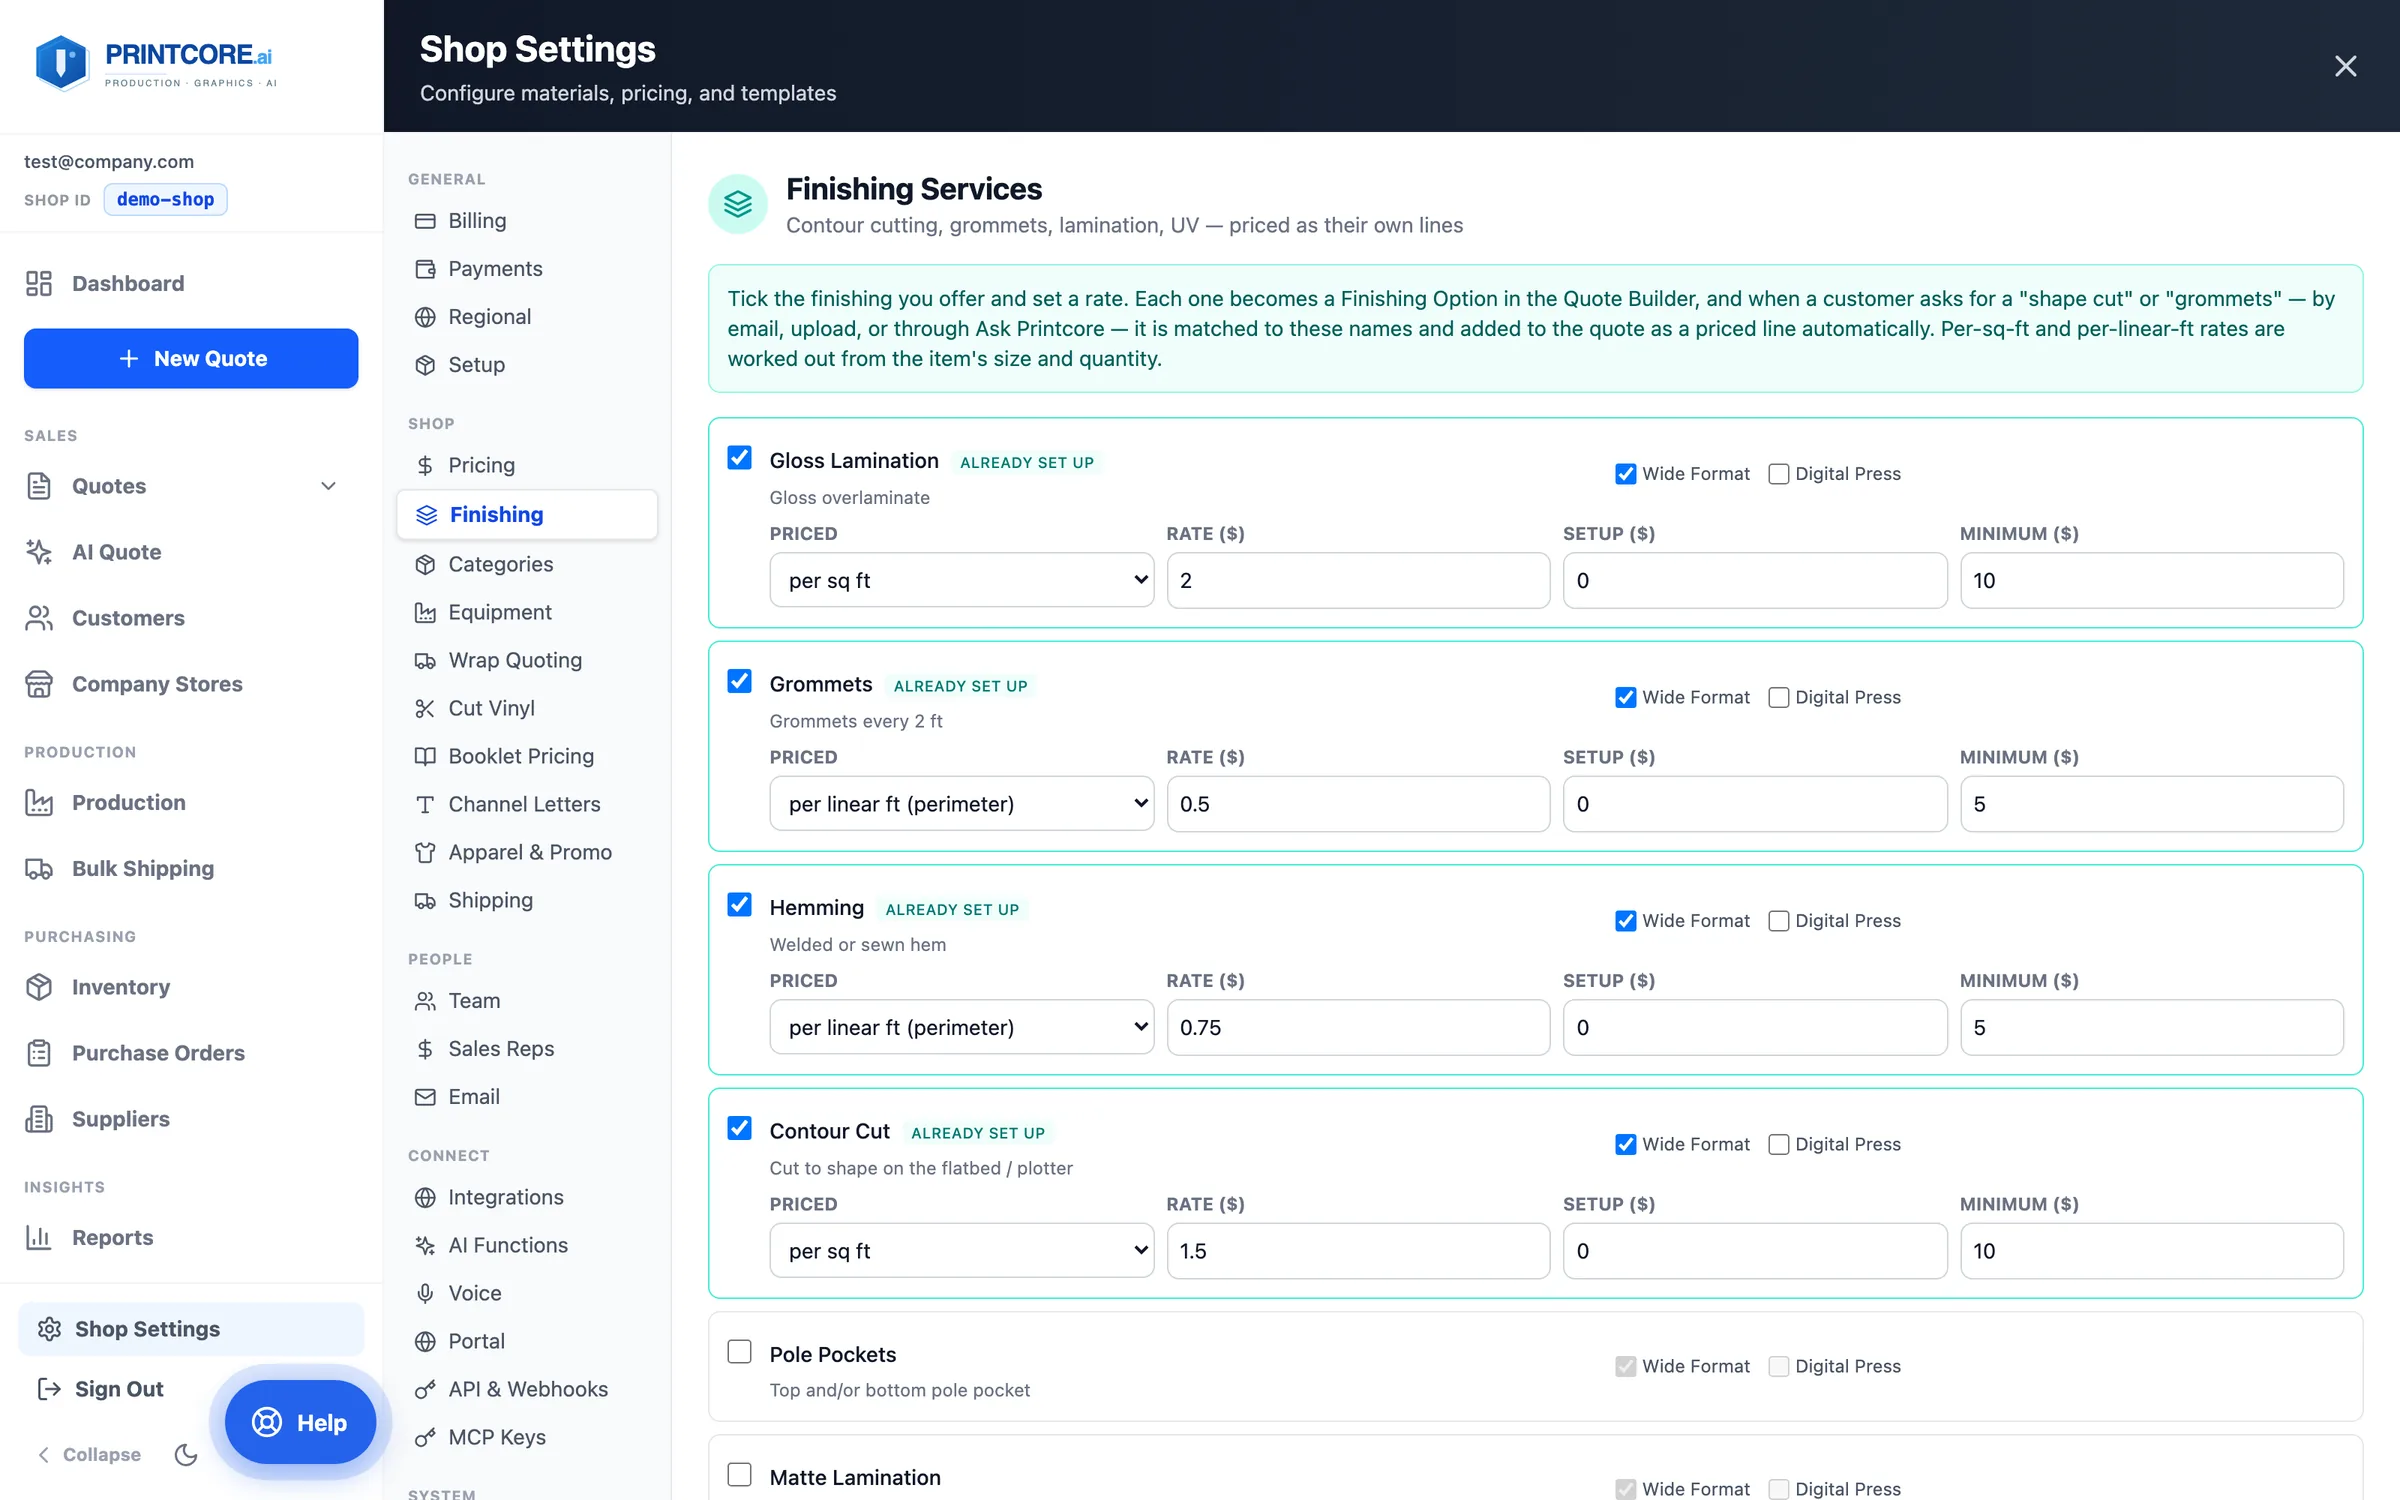
Shop → Finishing is where contour cutting, grommets, hems, pole pockets, lamination, UV, and the rest are priced — each as its own quote line, priced per piece, per square foot, or per linear foot of perimeter, with a setup and a minimum.
app.printcore.ai/settings/finishing
What to do
Tick the finishing you offer, choose which quote tabs it applies to, and set the rate. It's the same panel as the setup wizard's Finishing step, so you can add or re-price finishing any time.
Why it matters
When a customer writes "shape cut" or "grommets", AI Quote and Ask Printcore match it to these names and add the priced line for you.
Step 5 of 10Shop Settings
Categories and substrate categories
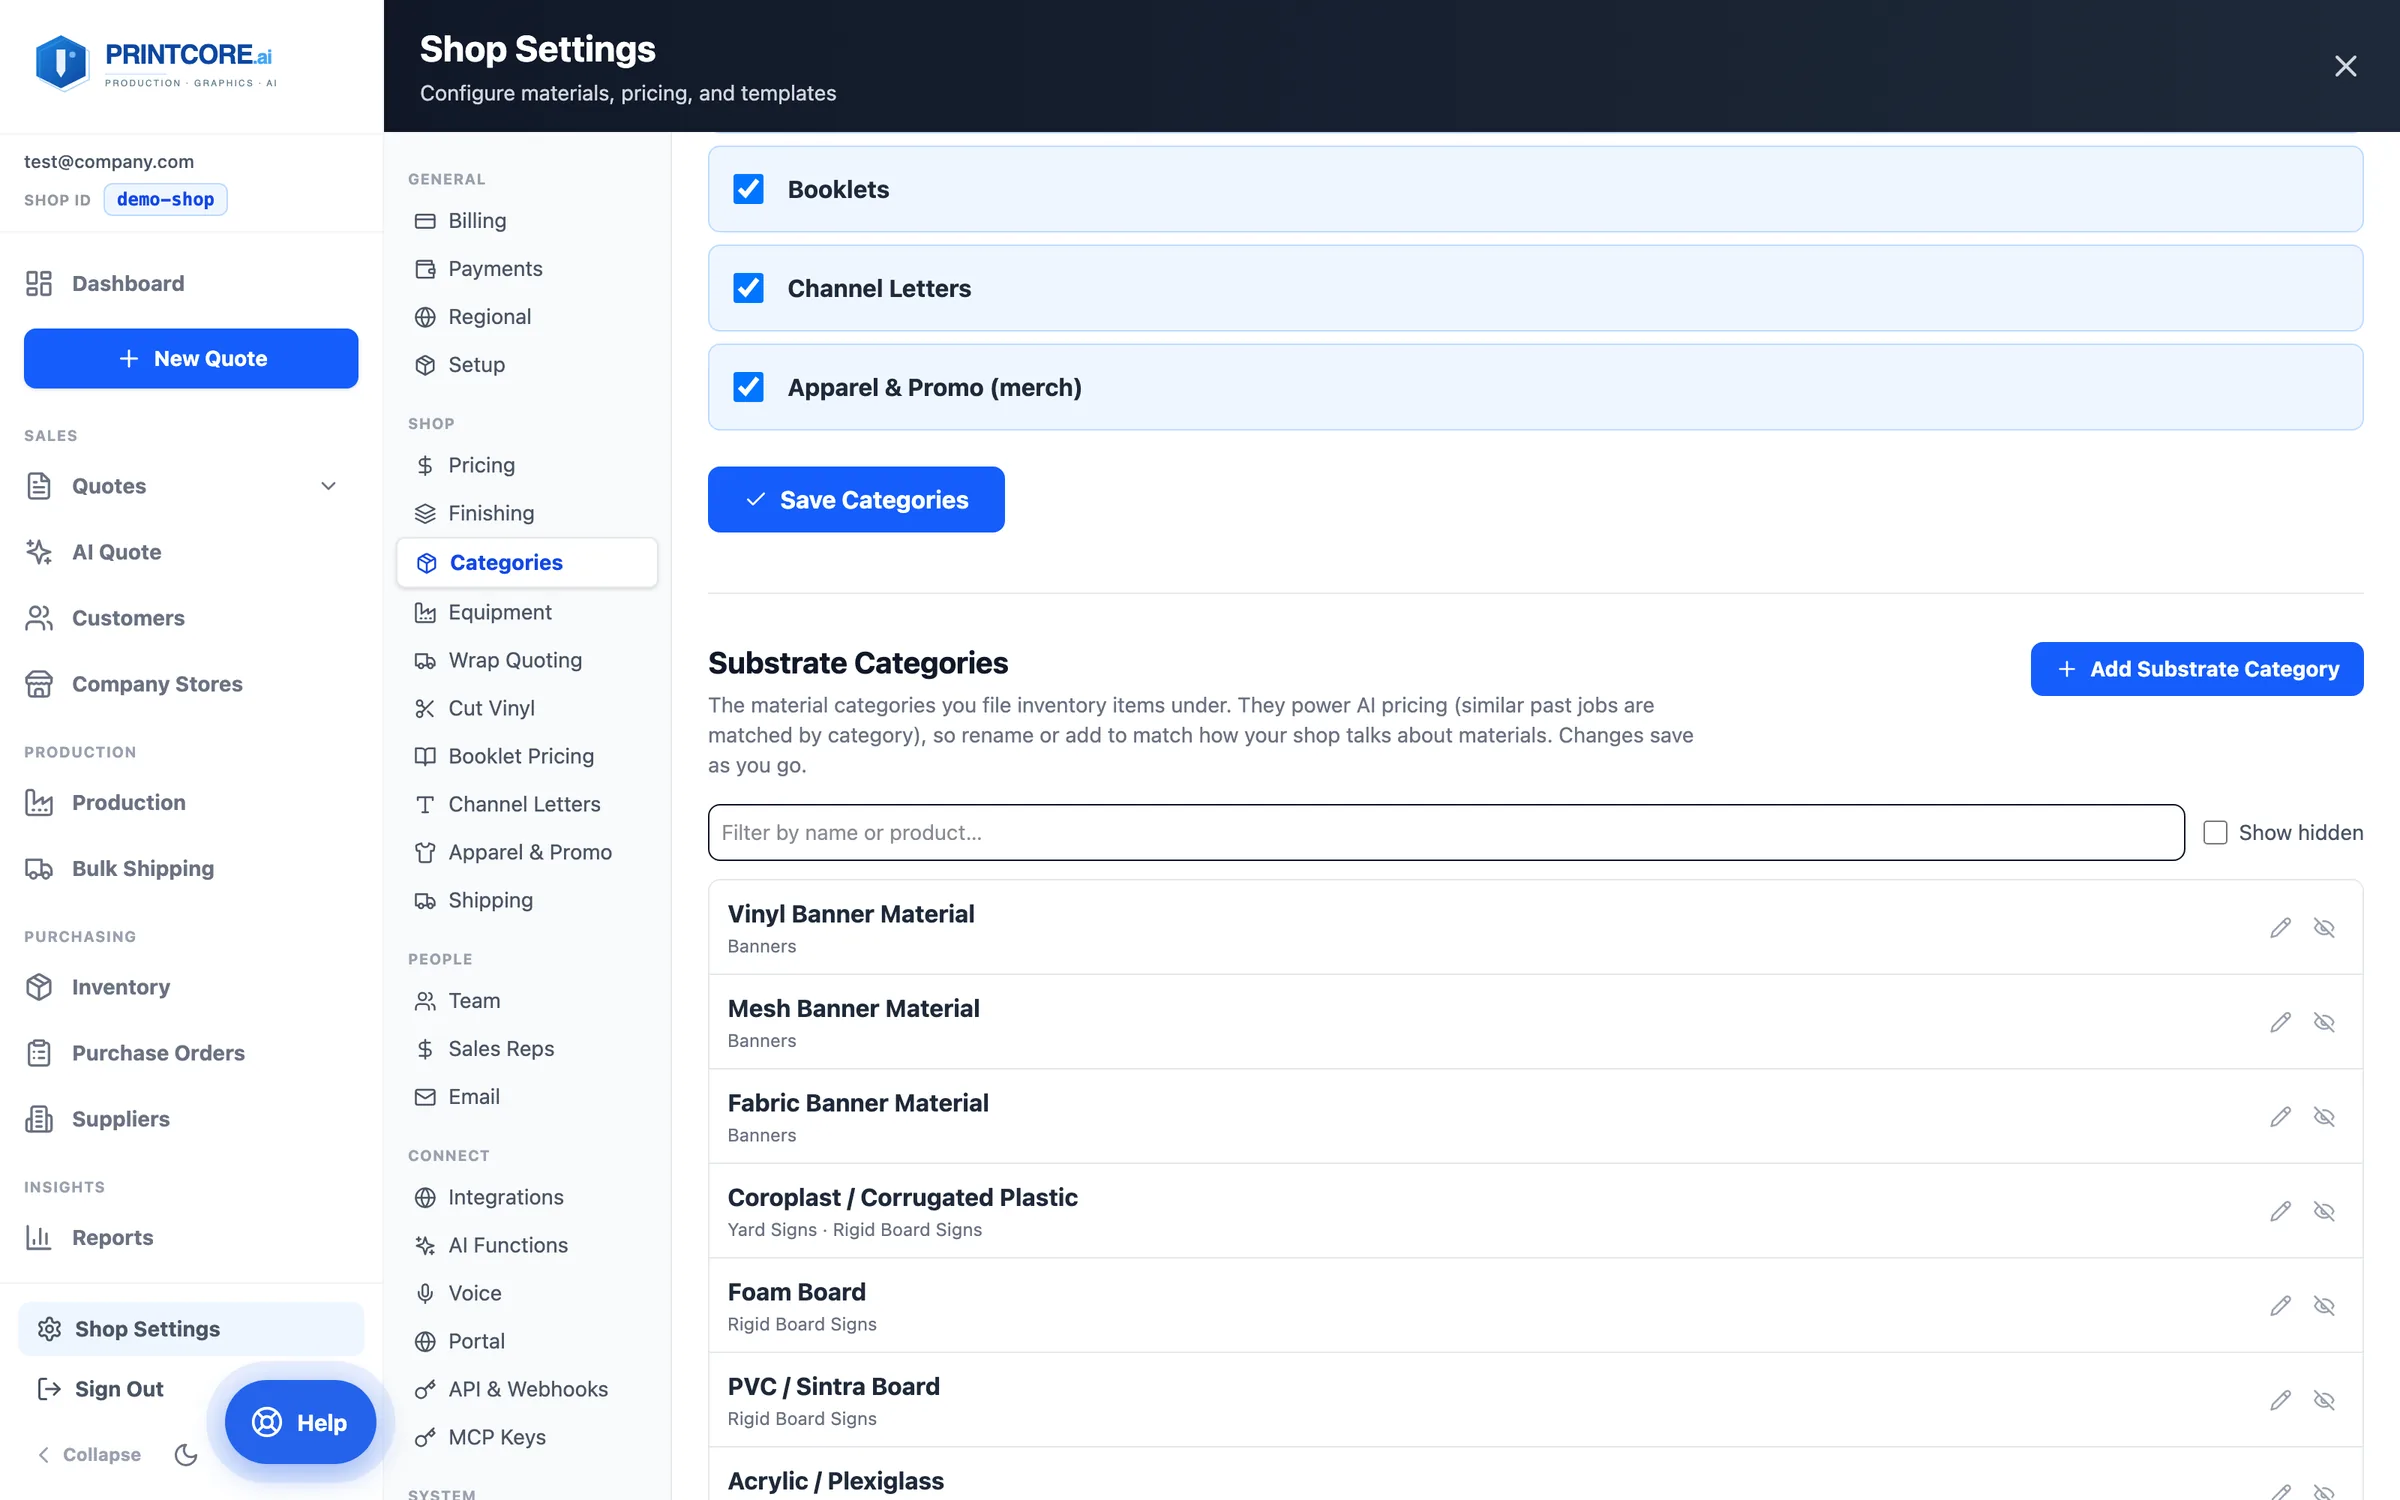
Shop → Categories has two lists. Quote Categories decides which quoters appear in New Quote — including the opt-in Apparel & Promo (merch). Substrate Categories are the material groups your inventory is filed under — Vinyl Banner, Coroplast, Foam Board — and they're now yours to edit.
app.printcore.ai/settings/categories
What to do
Click Add Substrate Category to add one, the pencil to rename it, or the eye to hide one you never use. Renames keep every existing inventory item and price history linked. You can also add a category from an inventory item's dropdown with Add new….
Why it matters
AI pricing compares jobs within a substrate category, so naming them the way your shop talks makes the suggestions sharper.
Step 6 of 10Shop Settings
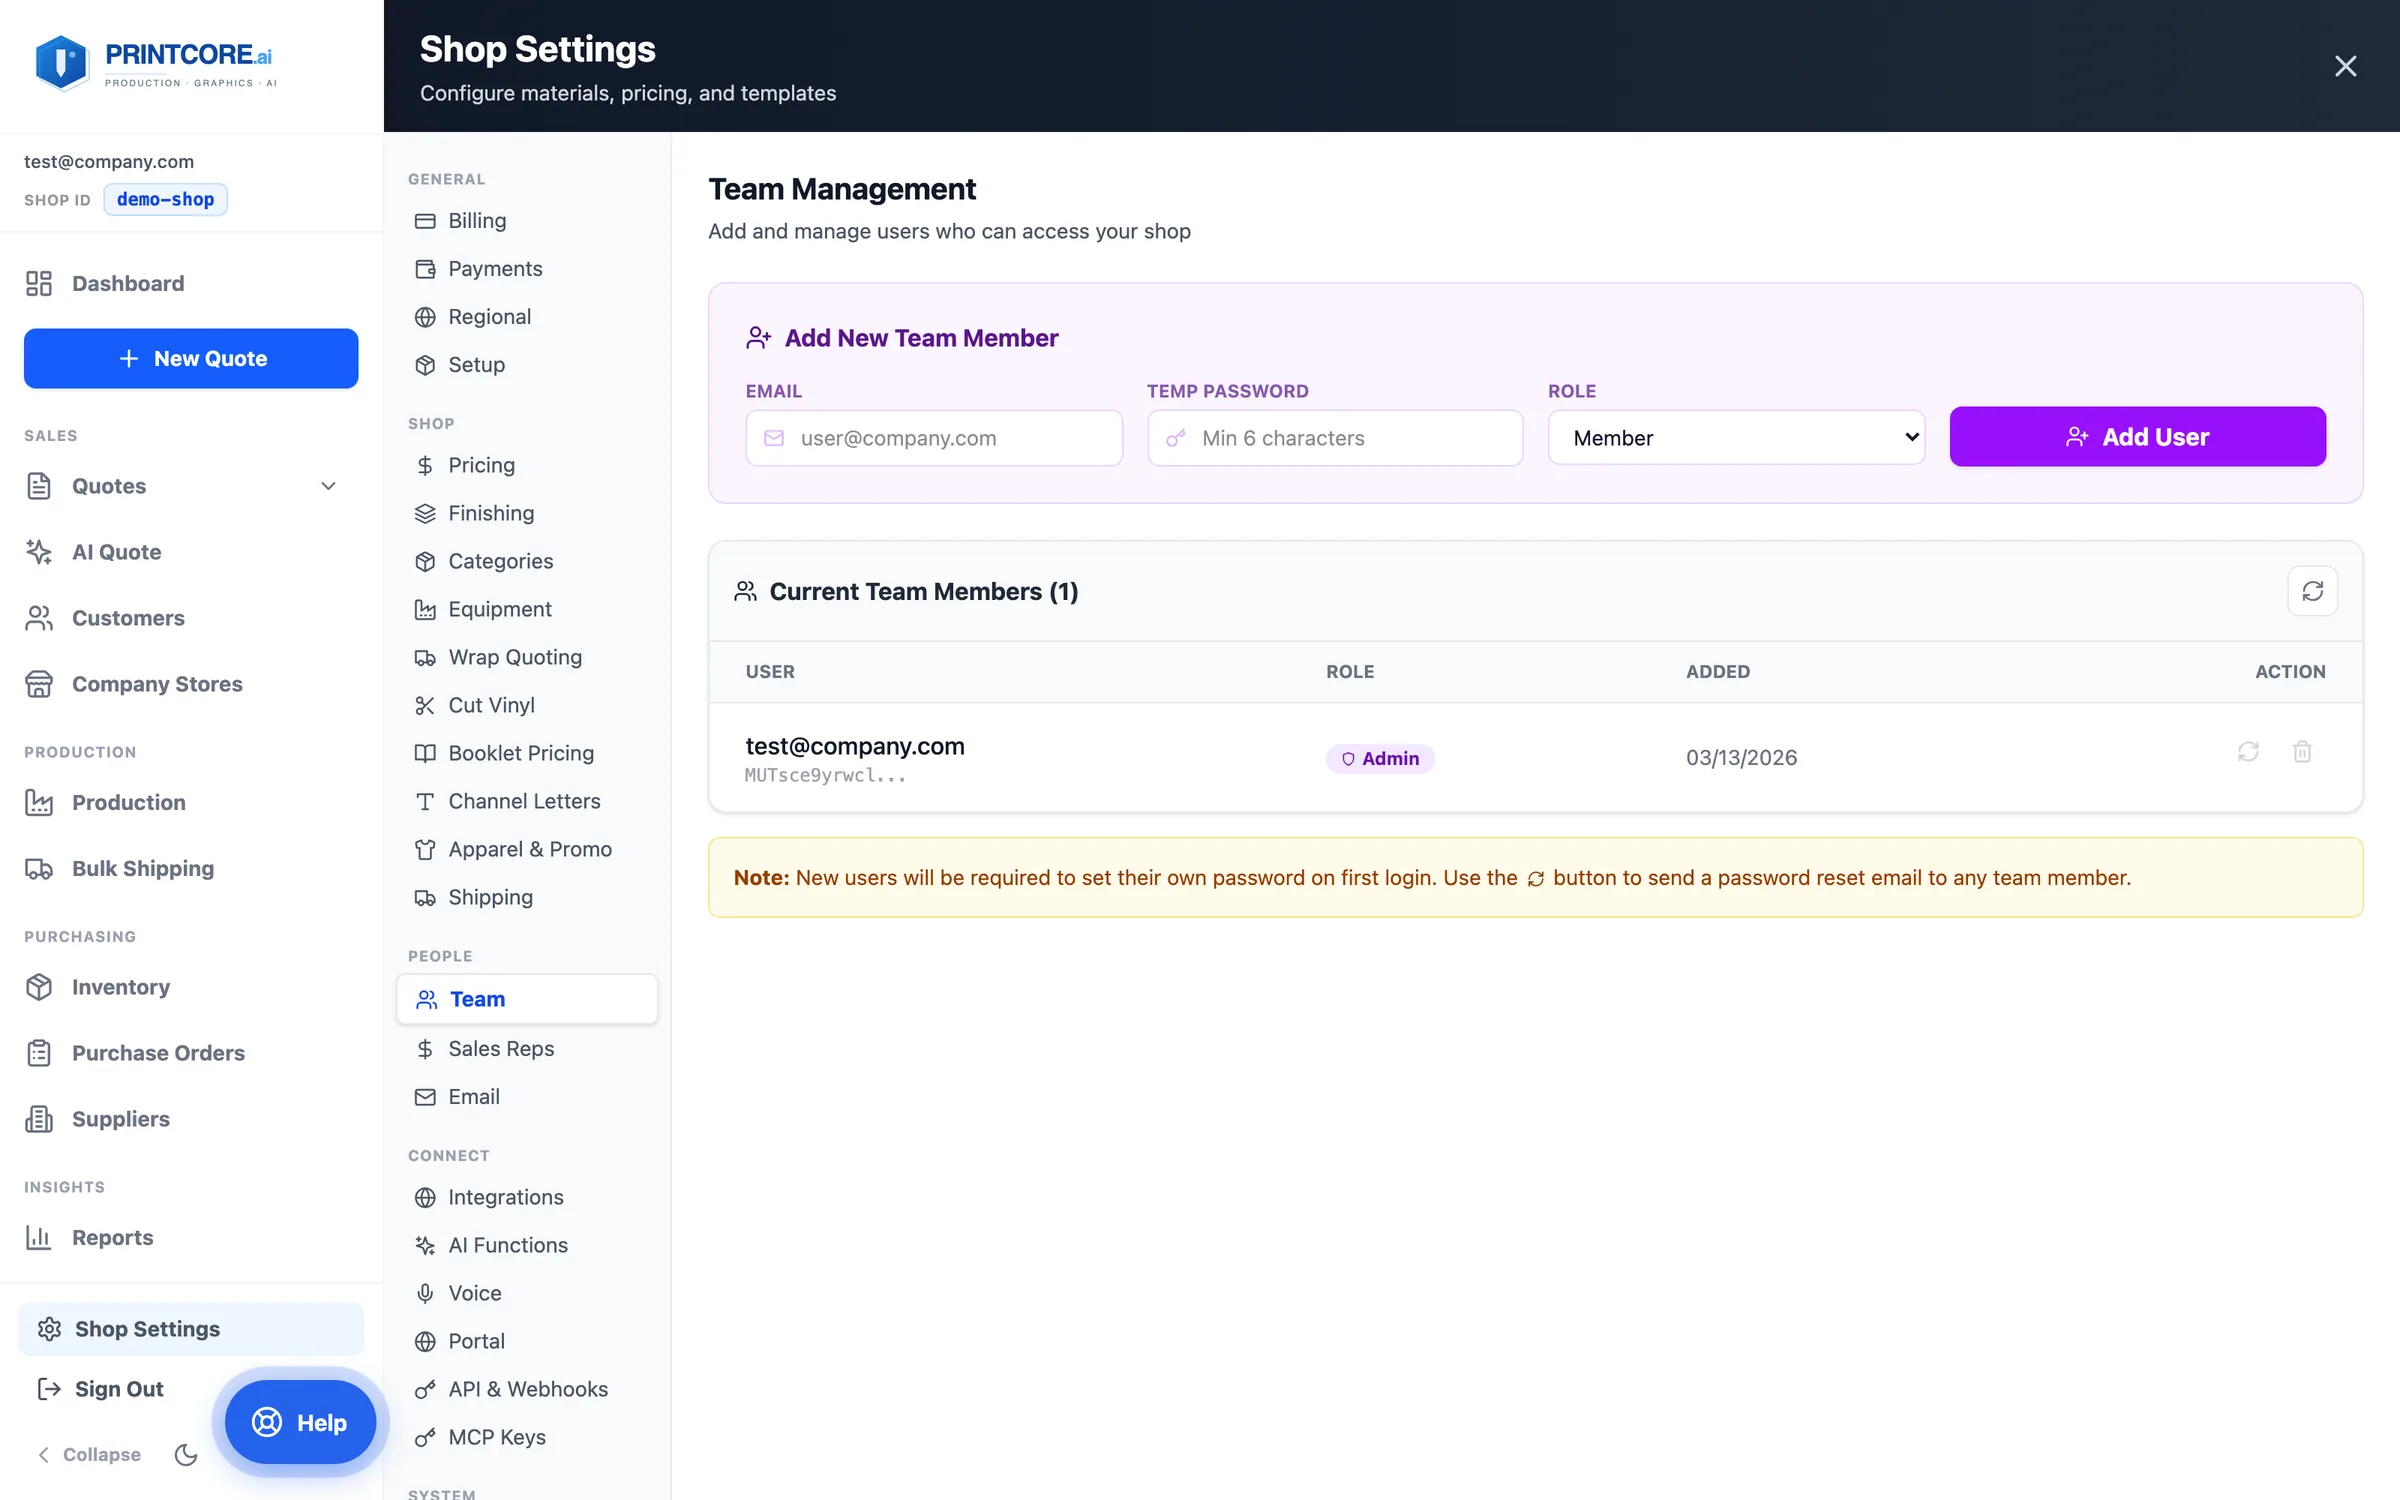
Team
Add people from your shop and set roles — Admin, Manager, Operator, or Member. Unlimited team members on every plan.
app.printcore.ai/settings/team
What to do
Under Add New Team Member, enter their email, a temporary password, and a role, then click Add User. New teammates sign in with Join my shop's team and your Shop ID.
Why it matters
Roles control what each person can do. Only admins change or remove teammates, and removing someone also removes their login.
Step 7 of 10Shop Settings
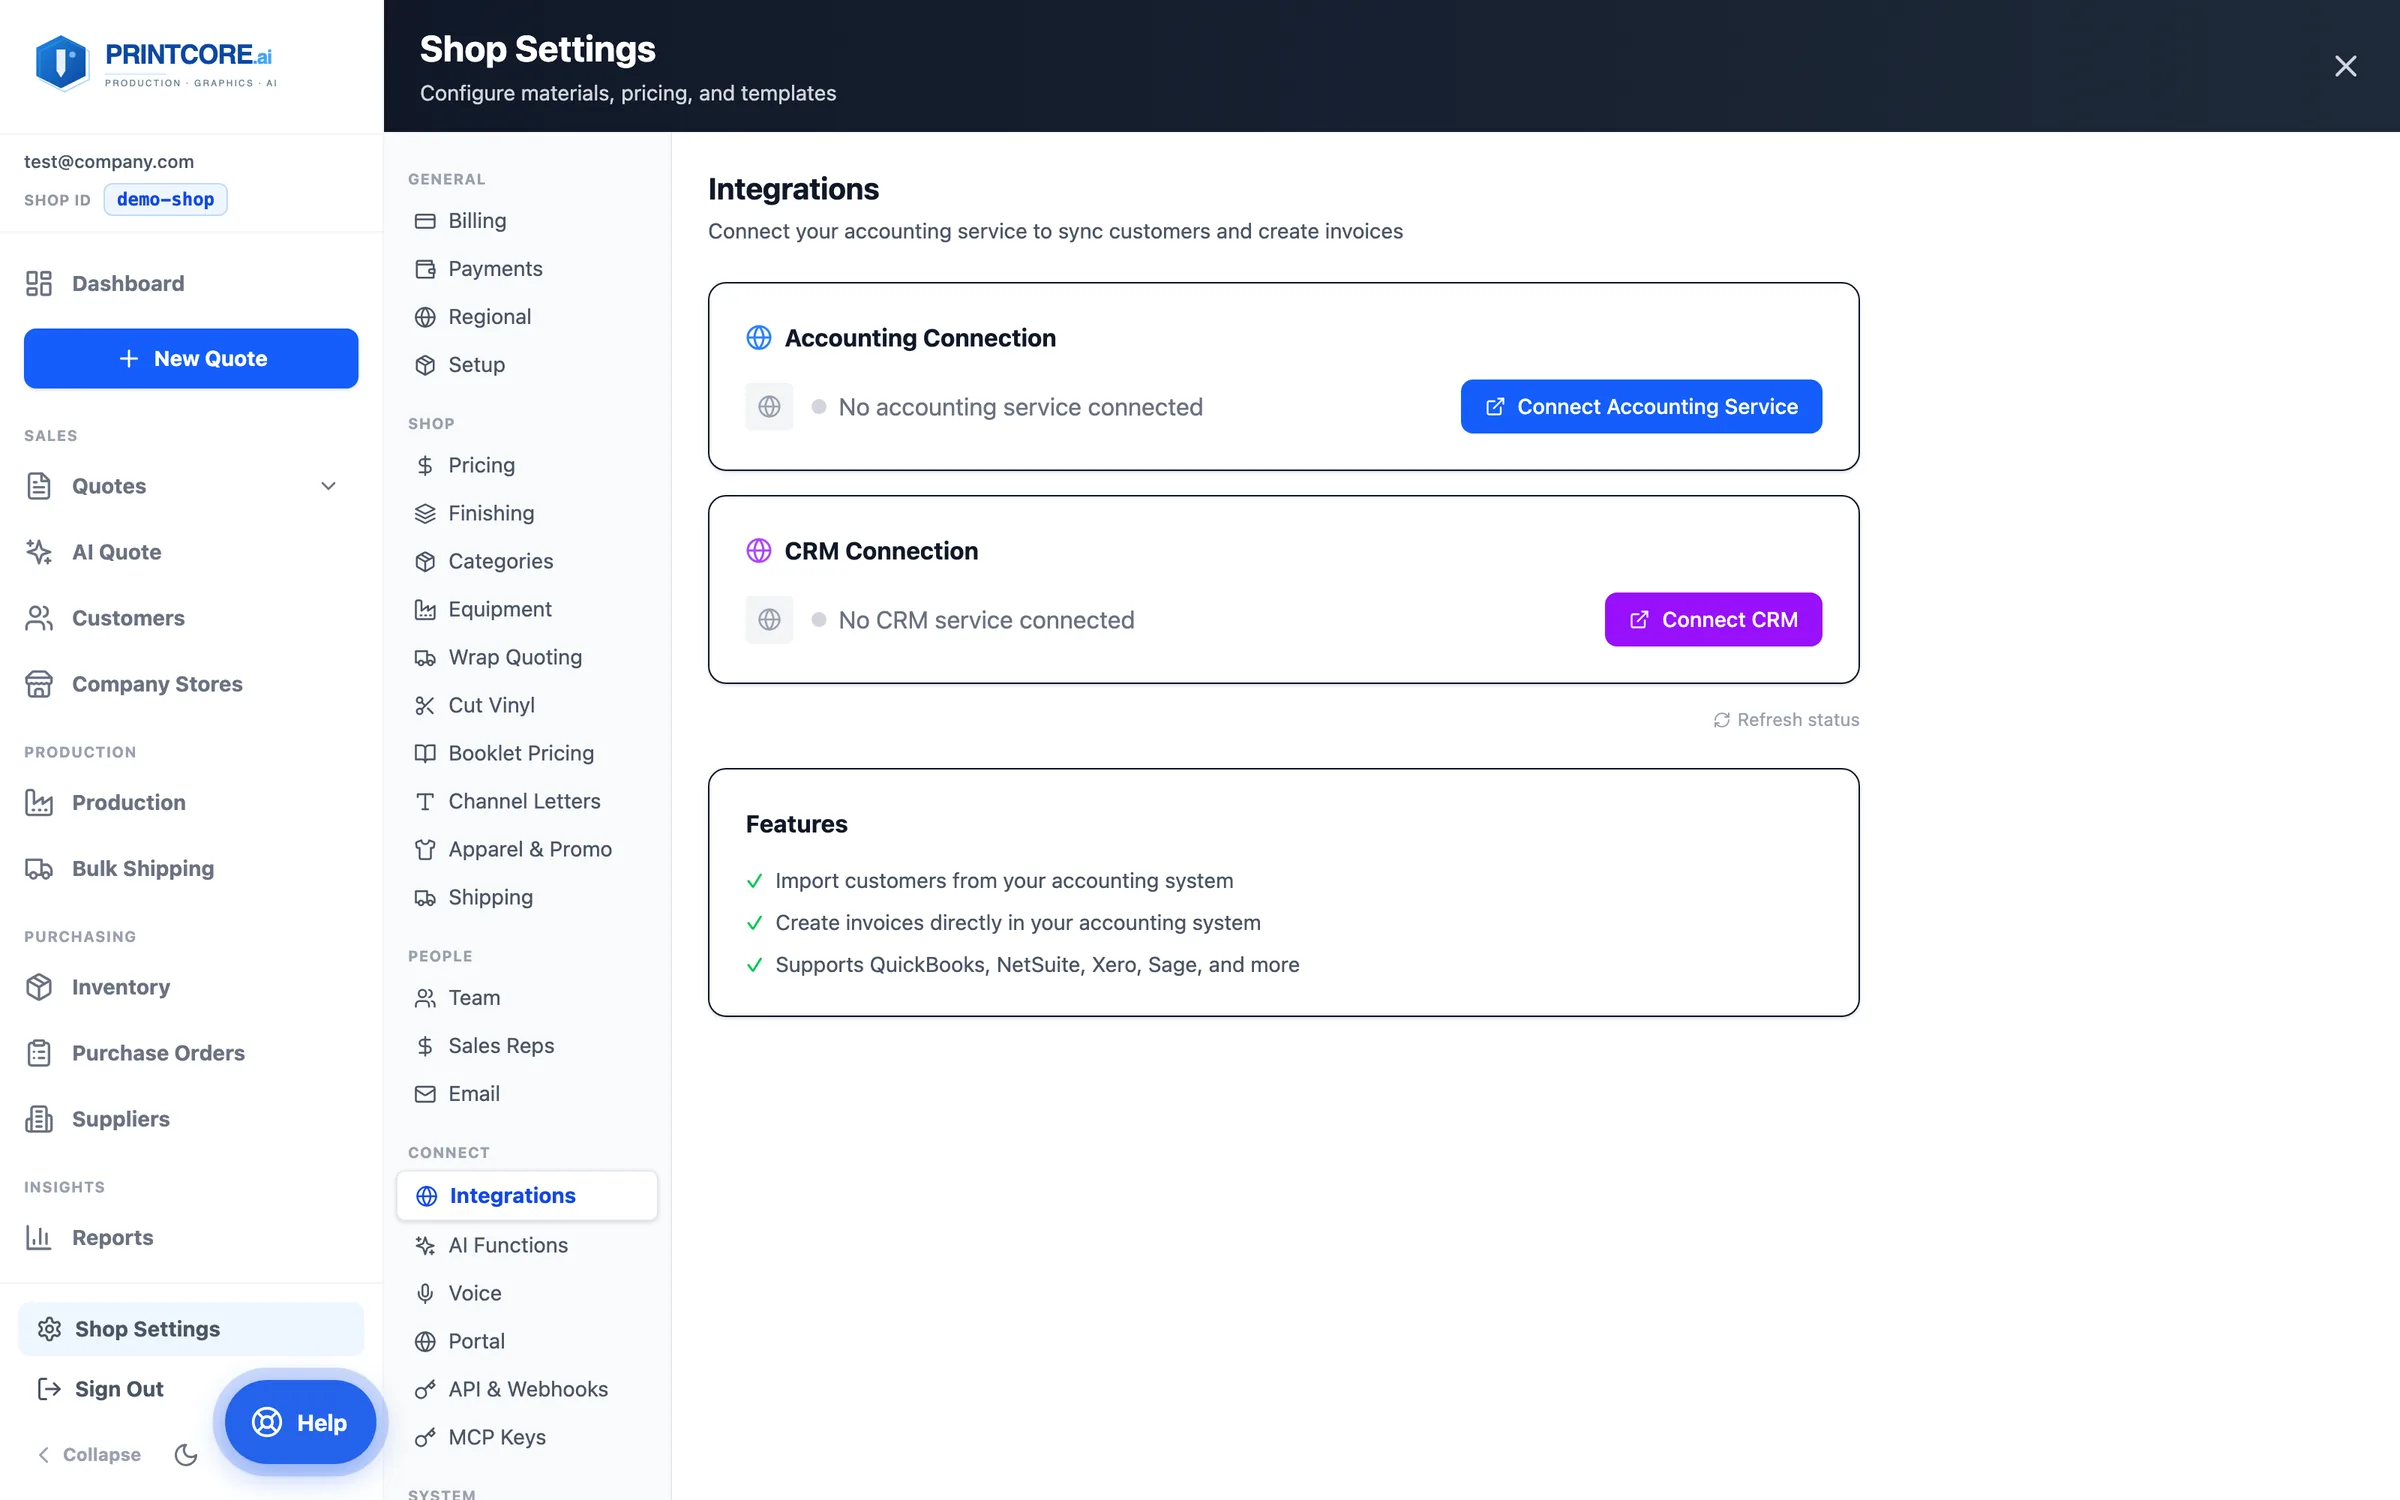
Integrations
Connect accounting and CRM through one secure connector (QuickBooks Online, Xero, Sage, NetSuite, FreshBooks, and major CRMs) and shipping carriers through Shippo.
app.printcore.ai/settings/integrations
What to do
Open Integrations. Click Connect Accounting Service (or Connect CRM) and authorize your provider. In AI Functions, Re-sync from Accounting re-imports your invoice history any time.
Why it matters
You don't wait for a custom integration to your specific tool — and the imported history is what makes AI price suggestions yours.
Step 8 of 10Shop Settings
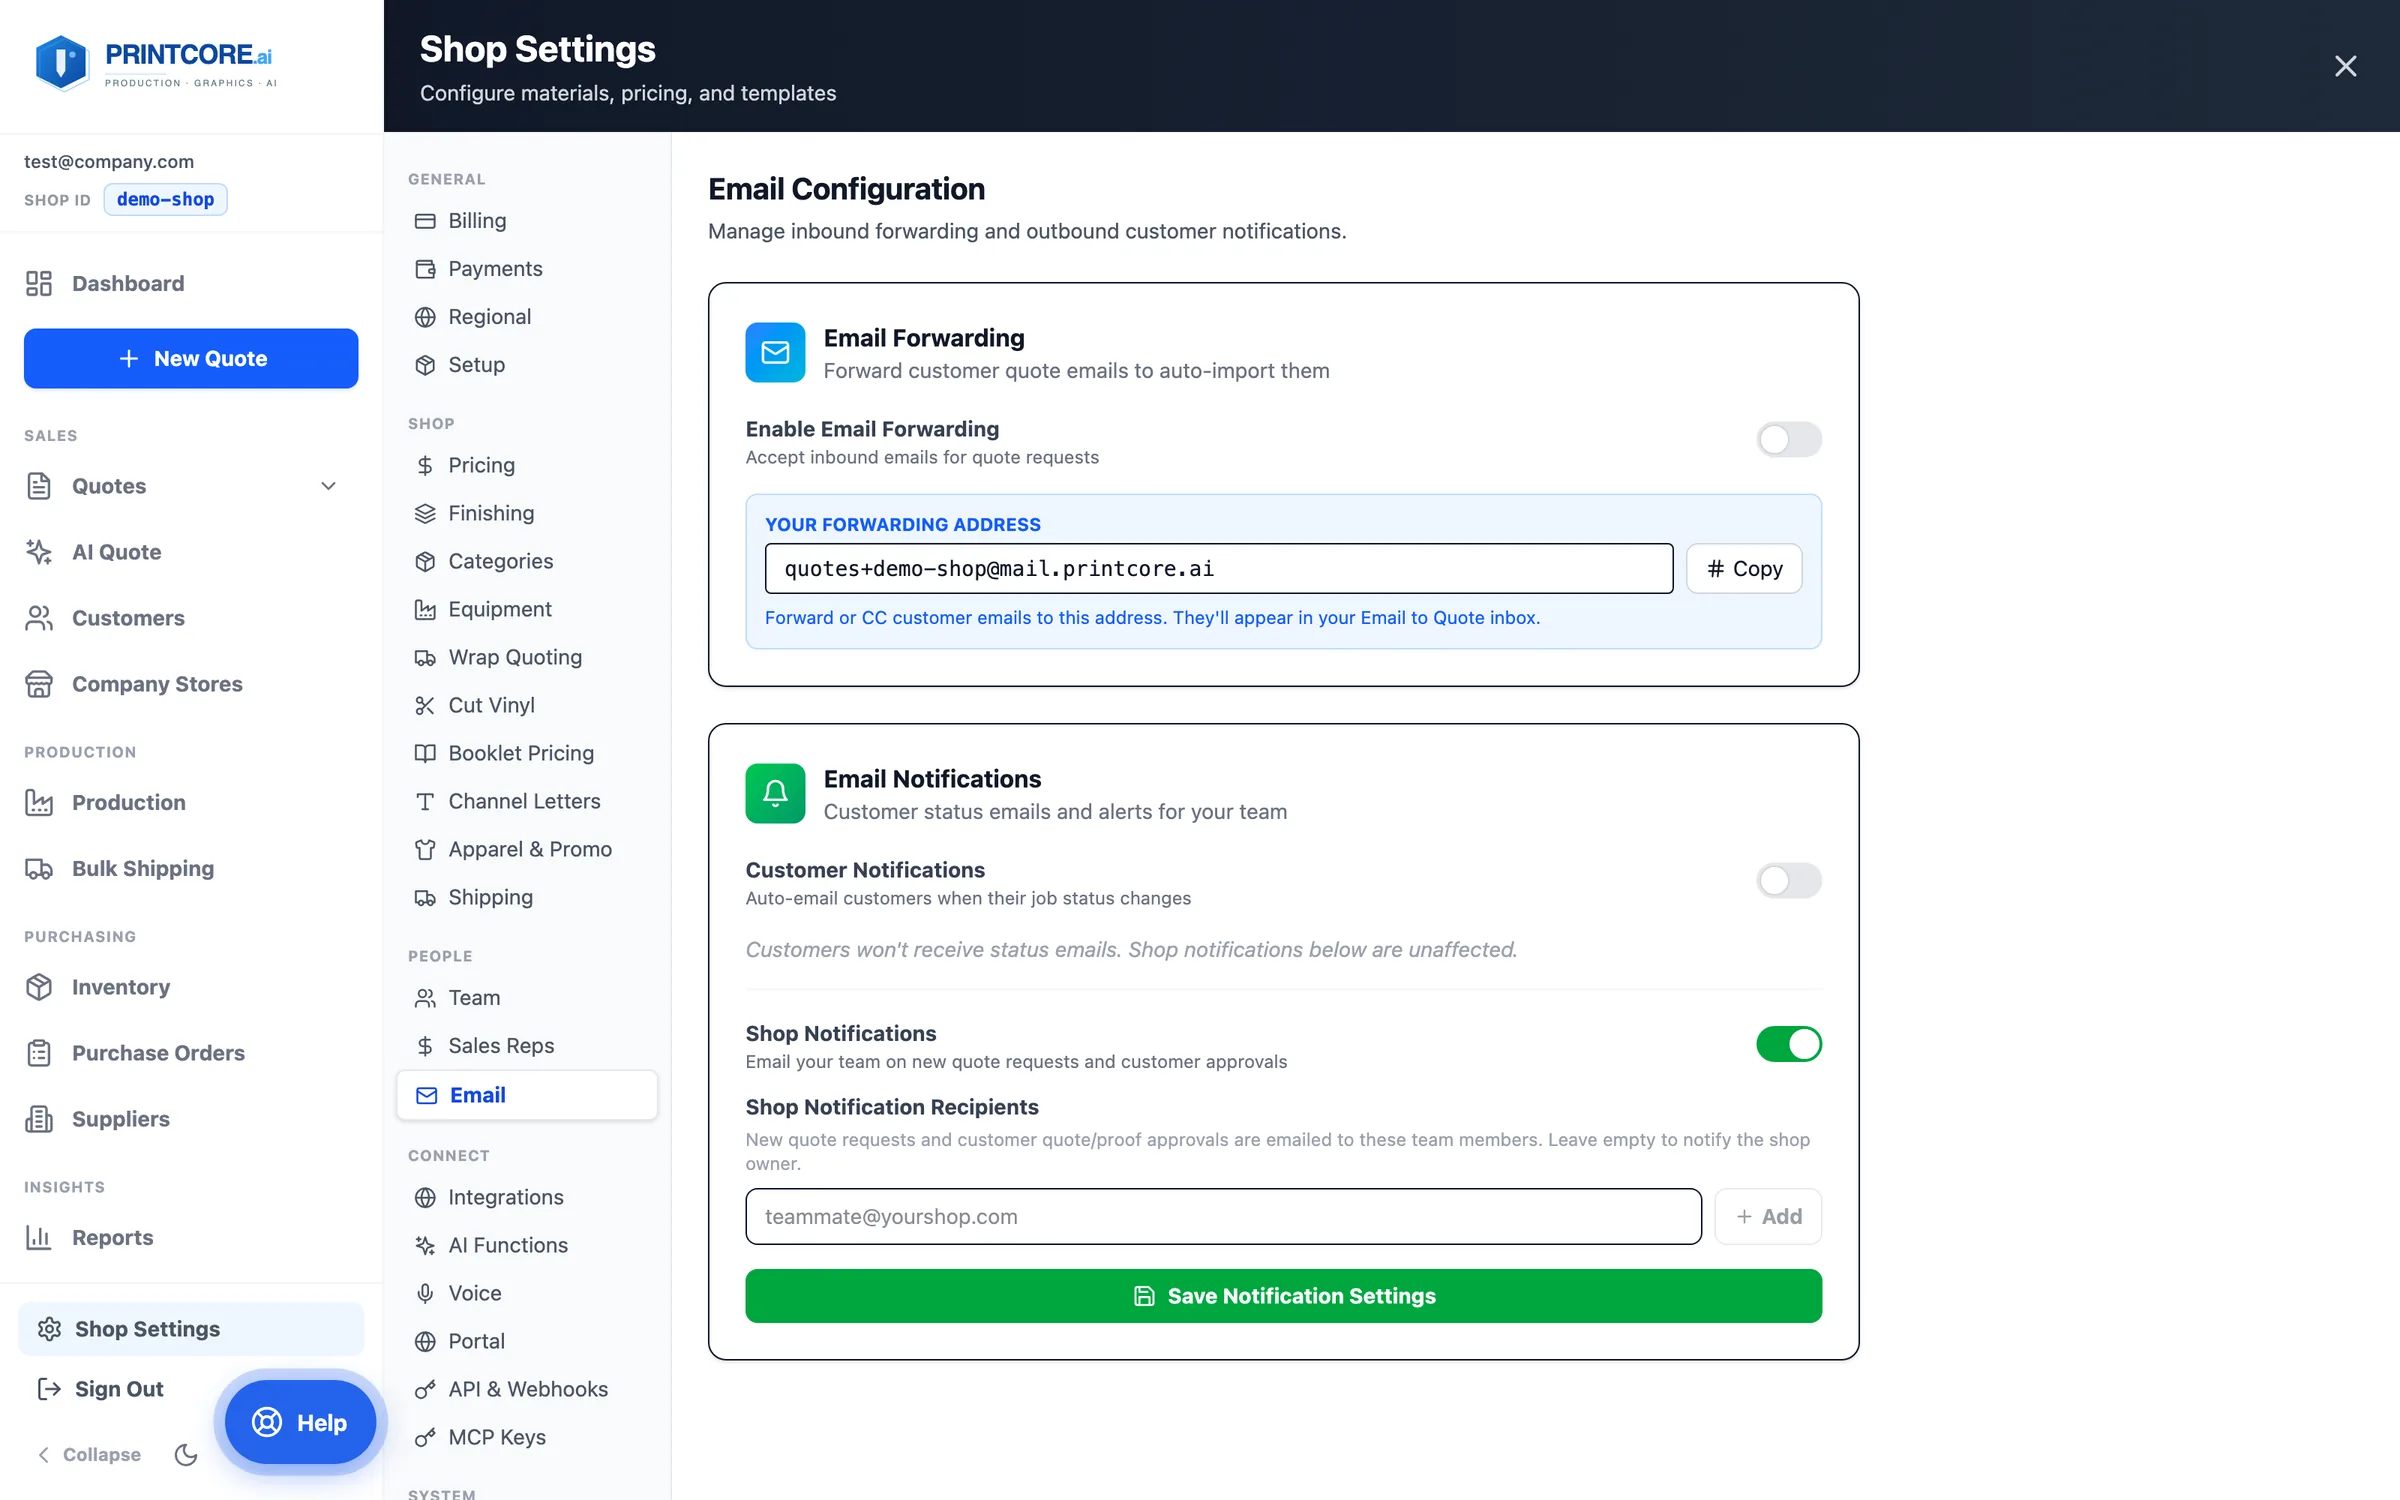
Email notifications
Two independent switches: Customer Notifications (branded status emails to customers) and Shop Notifications (quote-request and portal-approval alerts to your team's recipient list).
app.printcore.ai/settings/email
What to do
Turn on customer emails and choose which status changes trigger them. Add your team's addresses under Shop Notification Recipients. Enable Email Forwarding to get your shop's quotes@ address for AI Quote.
Why it matters
Silencing customer emails no longer silences your own alerts.
Step 9 of 10Shop Settings
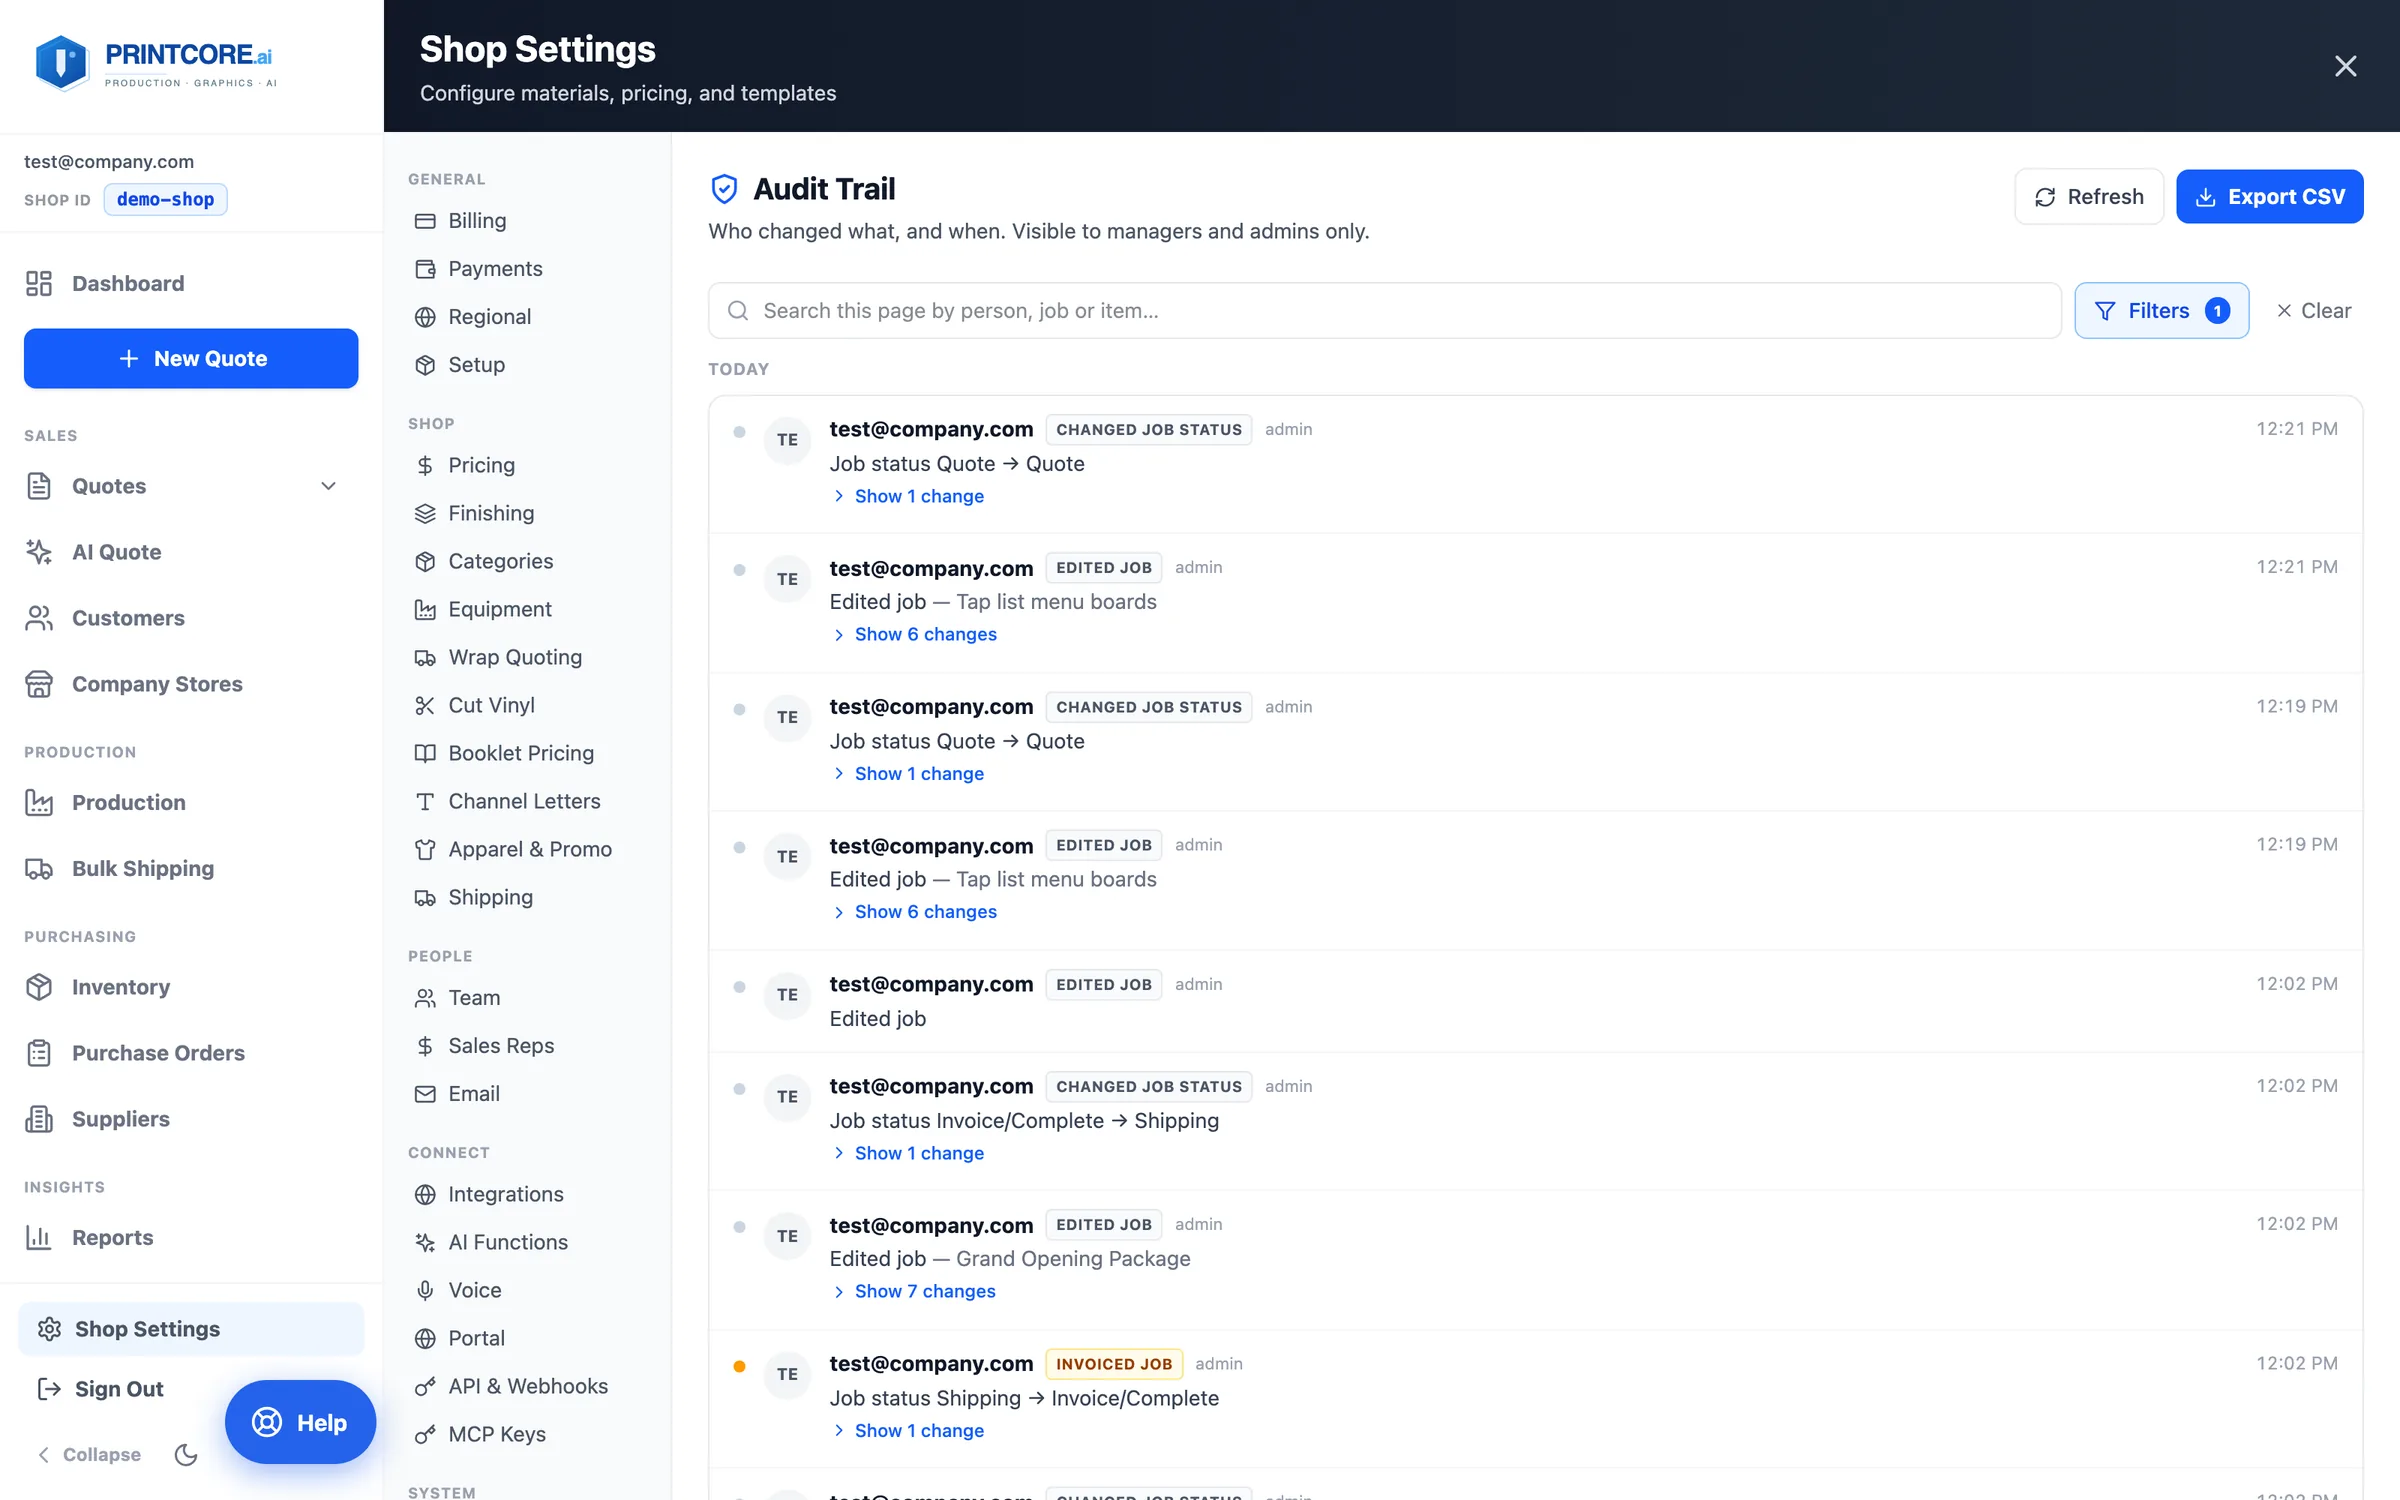
Equipment, Audit Trail, and the rest
Equipment holds your stations and their limits. Under System: the Audit Trail (managers and admins) answers who changed what and when, Housekeeping cleans up test records and duplicate inventory, and Backup gives you point-in-time recovery.
app.printcore.ai/settings/audit
What to do
Open Shop Settings → System → Audit Trail (it moved out of the sidebar; old /audit links still land here). Search, filter by person or type of change, expand Show changes, and Export CSV.
Why it matters
Entries are written server-side, so they can't be edited or attributed to someone else.
You're a Printcore power user ⚙️
Six more walkthroughs cover the newest features: the Quotes list, product presets, outsourced work, the job ticket, Ask Printcore, and Apparel & Promo.