Step 1 of 9Wide/Digital Quote Builder
Pick the customer, then the format tab
Click New Quote → Wide/Digital. Choose the customer first — the spec inputs open once one is selected, and the AI price can then use that customer's own history. Then pick a tab: Wide Format, Digital Press, Products (your priced presets), or Misc.
app.printcore.ai/quotes/wide-digital
What to do
Search for the customer in the customer bar, then click the tab that matches the job. We'll start with Wide Format.
Why it matters
Each tab uses pricing logic tuned for that product type — square footage for wide format, per finished piece for digital, setup + per-unit for presets.
Step 2 of 9Wide/Digital Quote Builder
Choose the material and size
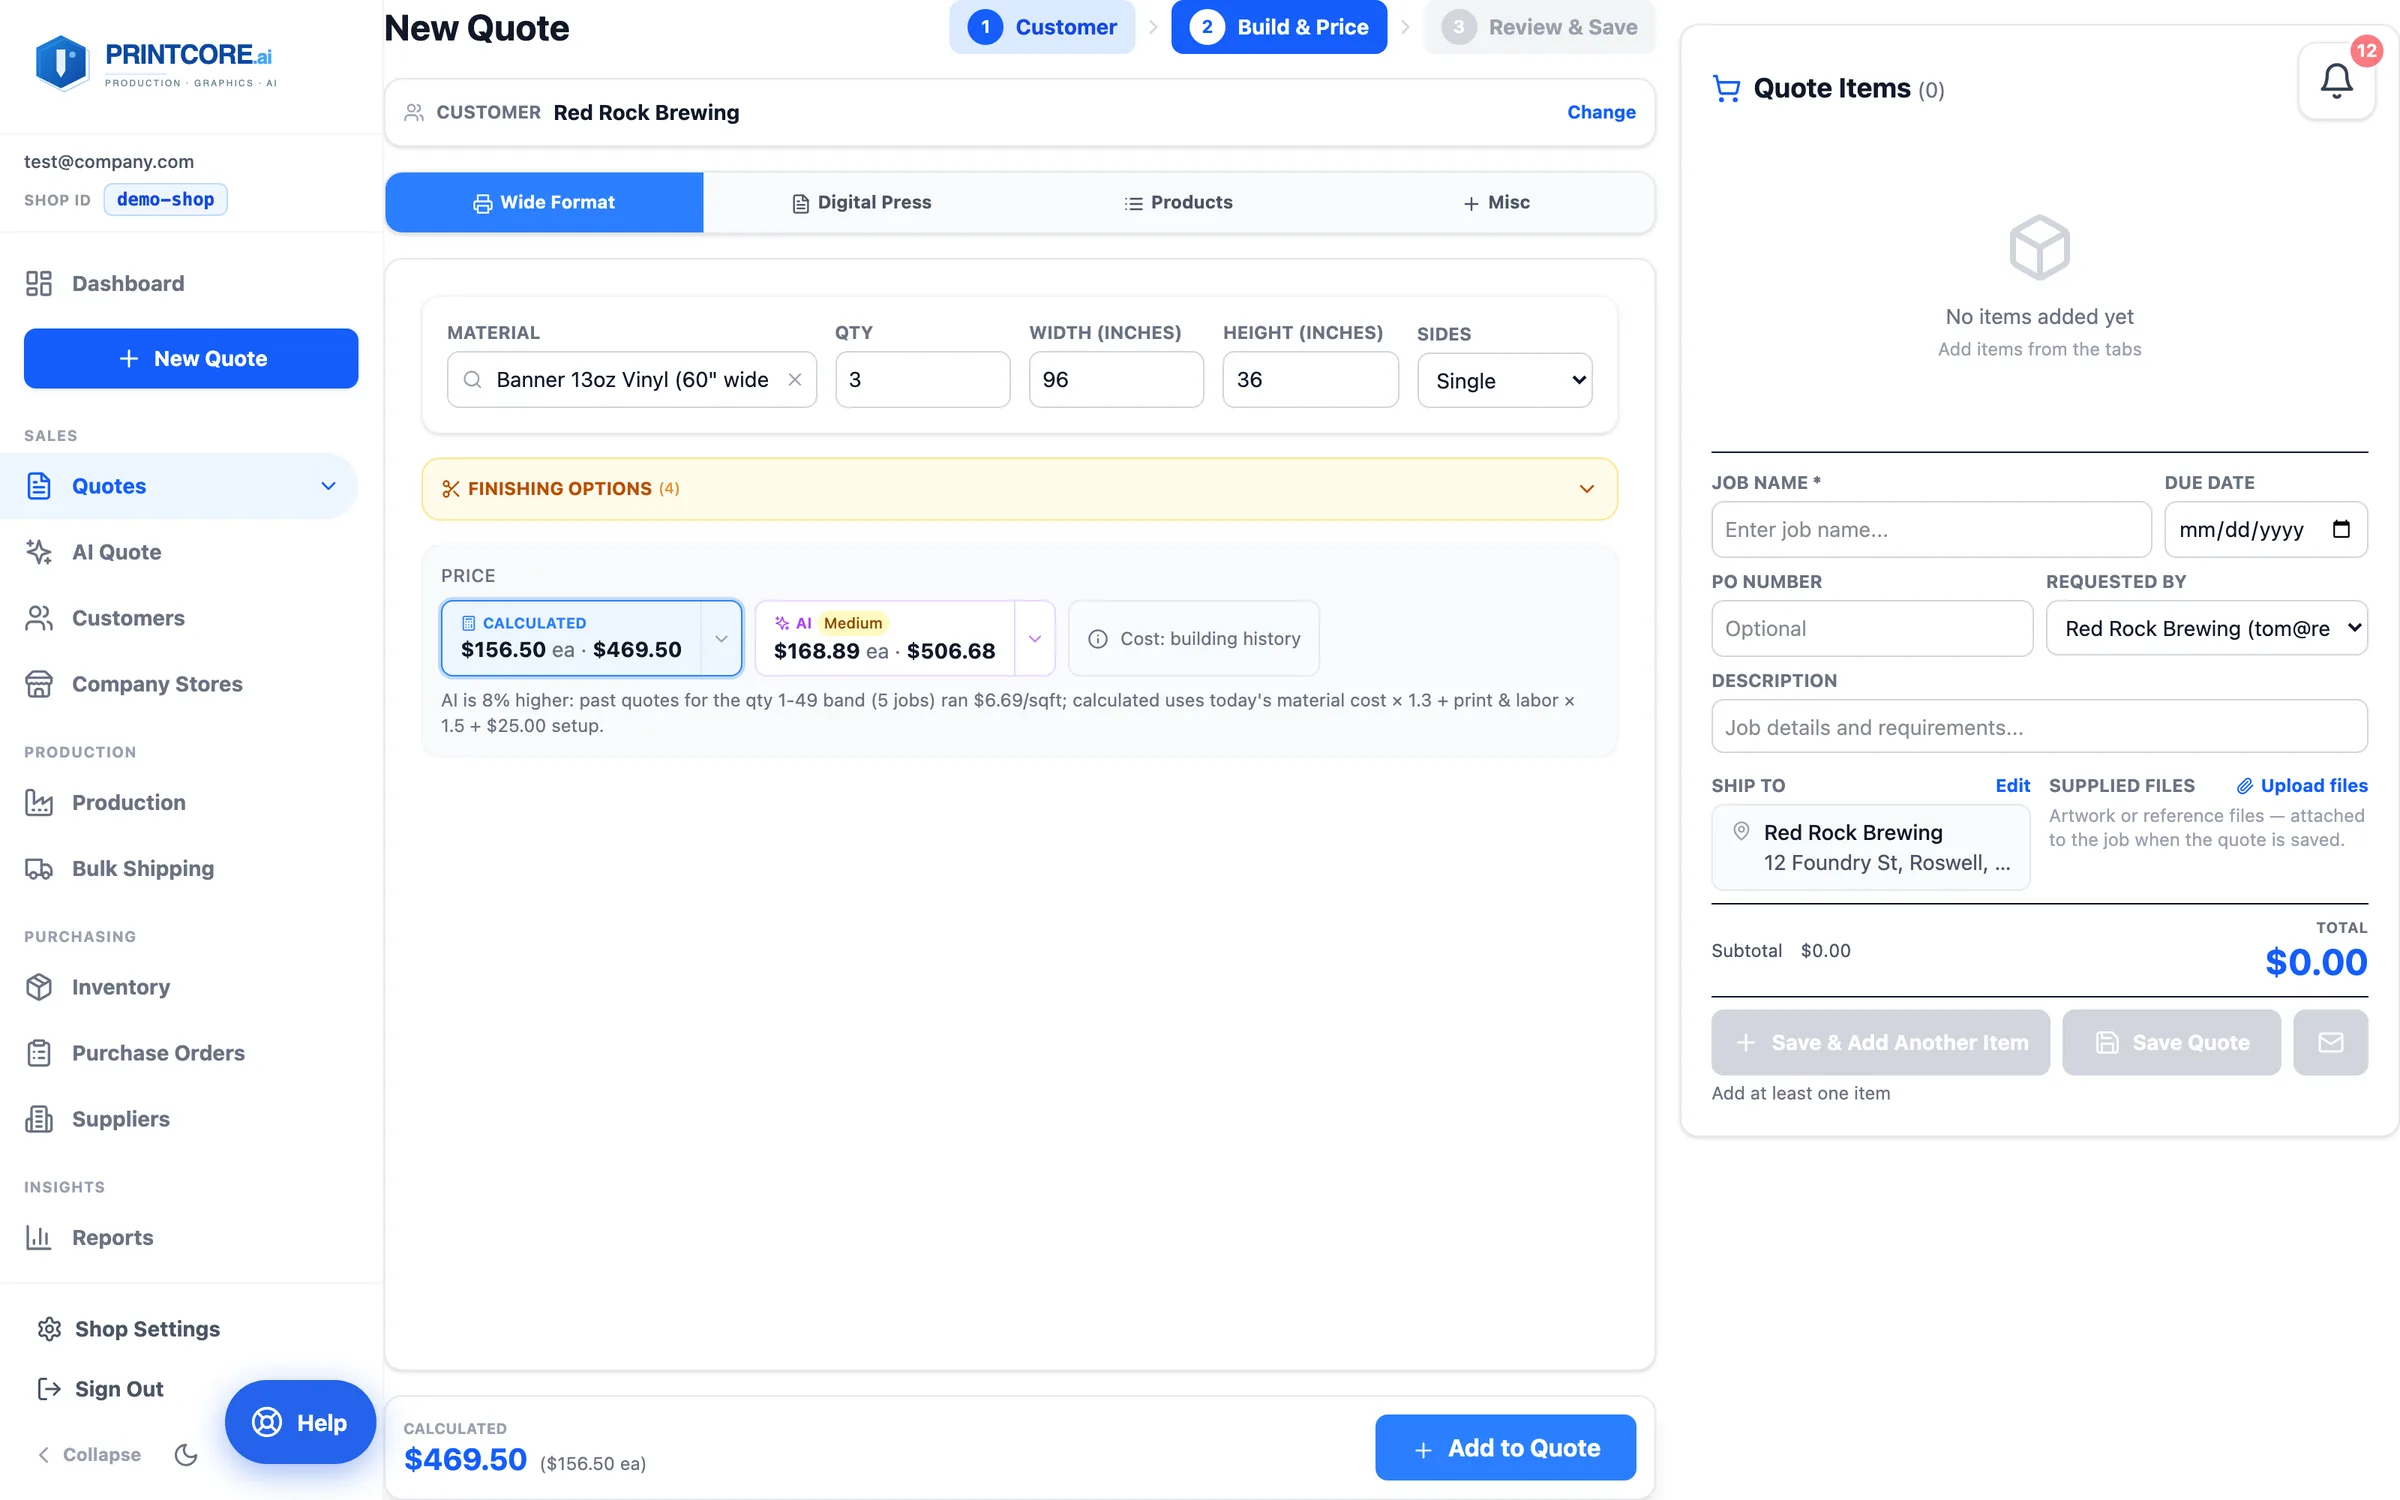
The builder starts blank — no guessed material and no default size — so nothing from the last quote carries over by accident. Pick from your stocked substrates, then enter quantity, width, height, and sides.
app.printcore.ai/quotes/wide-digital
What to do
Click Material and start typing; items show their thickness so 3mm and 6mm PVC are never confused. Fill in QTY, WIDTH, HEIGHT, and SIDES. Want a material pre-selected? Set a default in Shop Settings → Pricing.
Why it matters
Printcore knows your roll widths and stock pricing, and respects each machine's max width from Shop Settings → Equipment, so the price reflects real material usage.
Step 3 of 9Wide/Digital Quote Builder
Two prices: calculated and AI
The calculated chip is your markups, labor, and setup fee. The AI chip is what your shop has actually charged for comparable work — using this customer's own history when there is any. Each shows per-unit and total, and a line underneath explains the difference.
app.printcore.ai/quotes/wide-digital
What to do
Read the explanation under the chips. When the two are far apart the AI chip is marked Low, High, or check — look at why before you use it.
Why it matters
Pricing reflects what actually wins business with this customer — not just material × markup. And the guardrail keeps a thin-data guess from landing on a quote.
Step 4 of 9Wide/Digital Quote Builder
Check the cost and layout
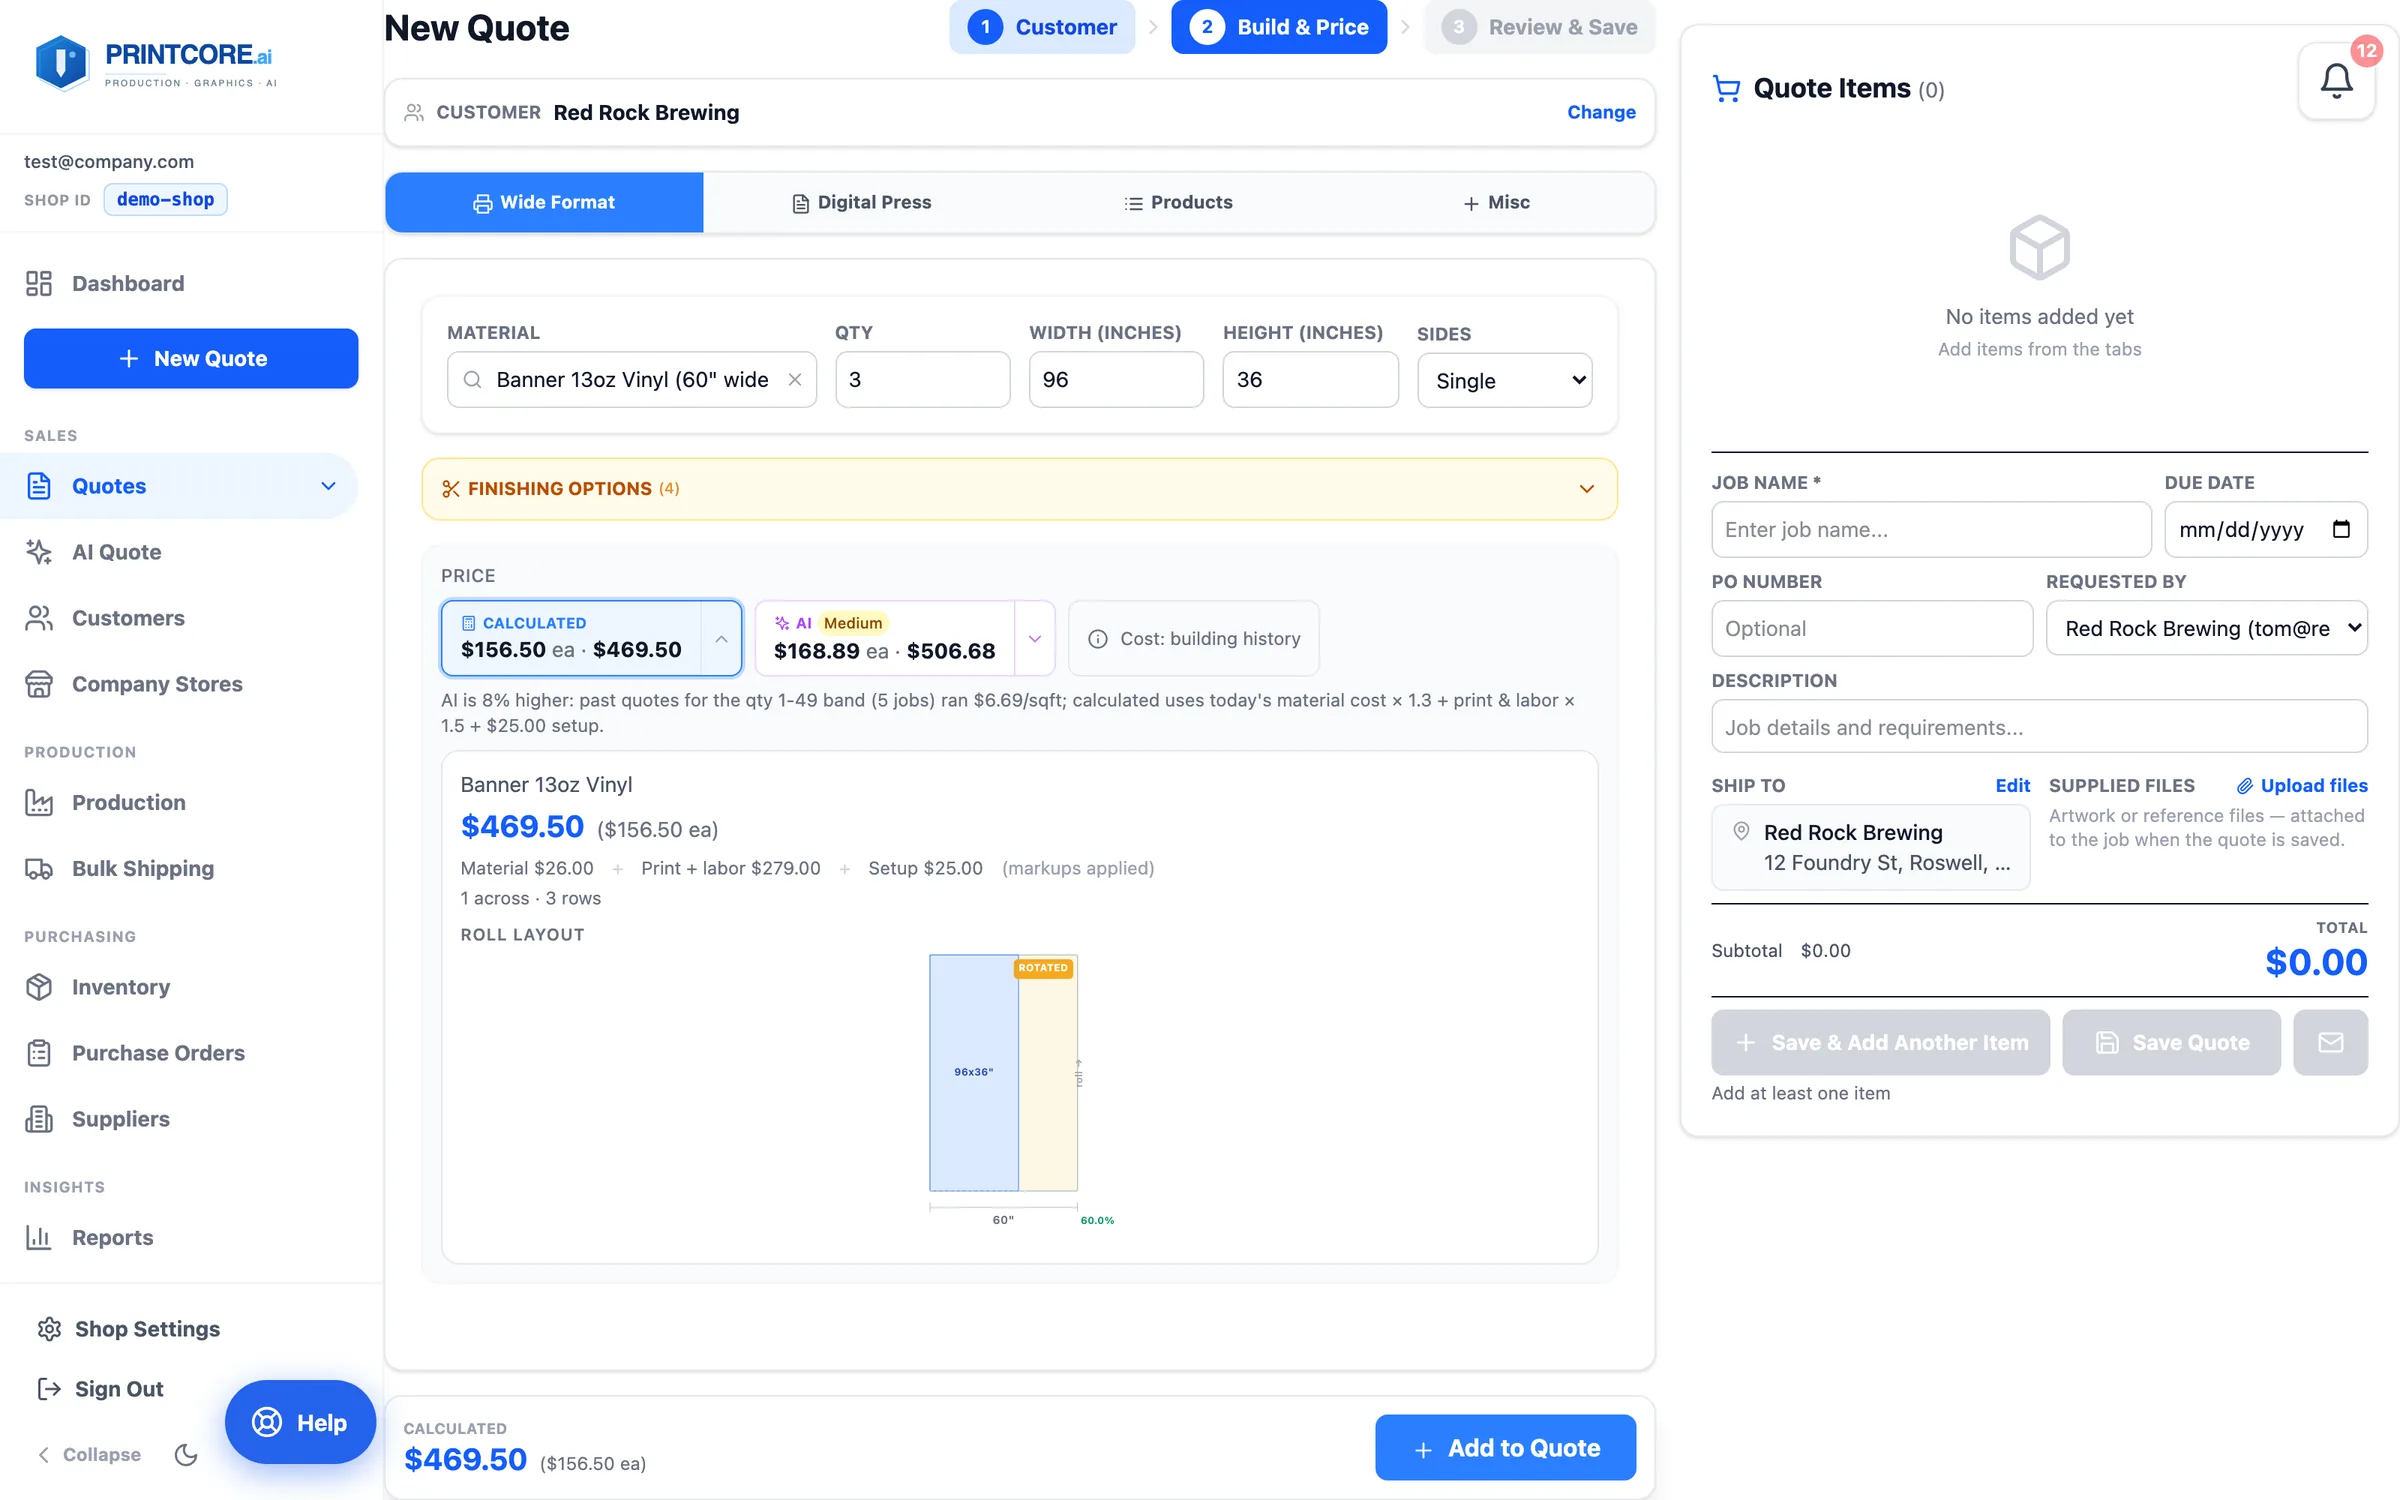
Open the calculated chip and the cost breakdown and roll or sheet layout appear: material, print + labor, setup, and how your pieces sit on the substrate, with the yield percentage.
app.printcore.ai/quotes/wide-digital
What to do
Glance at the preview. If yield looks low, try a different substrate width or rotate the piece. Open Finishing Options to add cutting, hemming, grommets, or lamination.
Why it matters
You catch waste-heavy jobs before sending the quote out. Customers don't pay for your trim scrap.
Step 5 of 9Wide/Digital Quote Builder
Oversize prints tile into panels
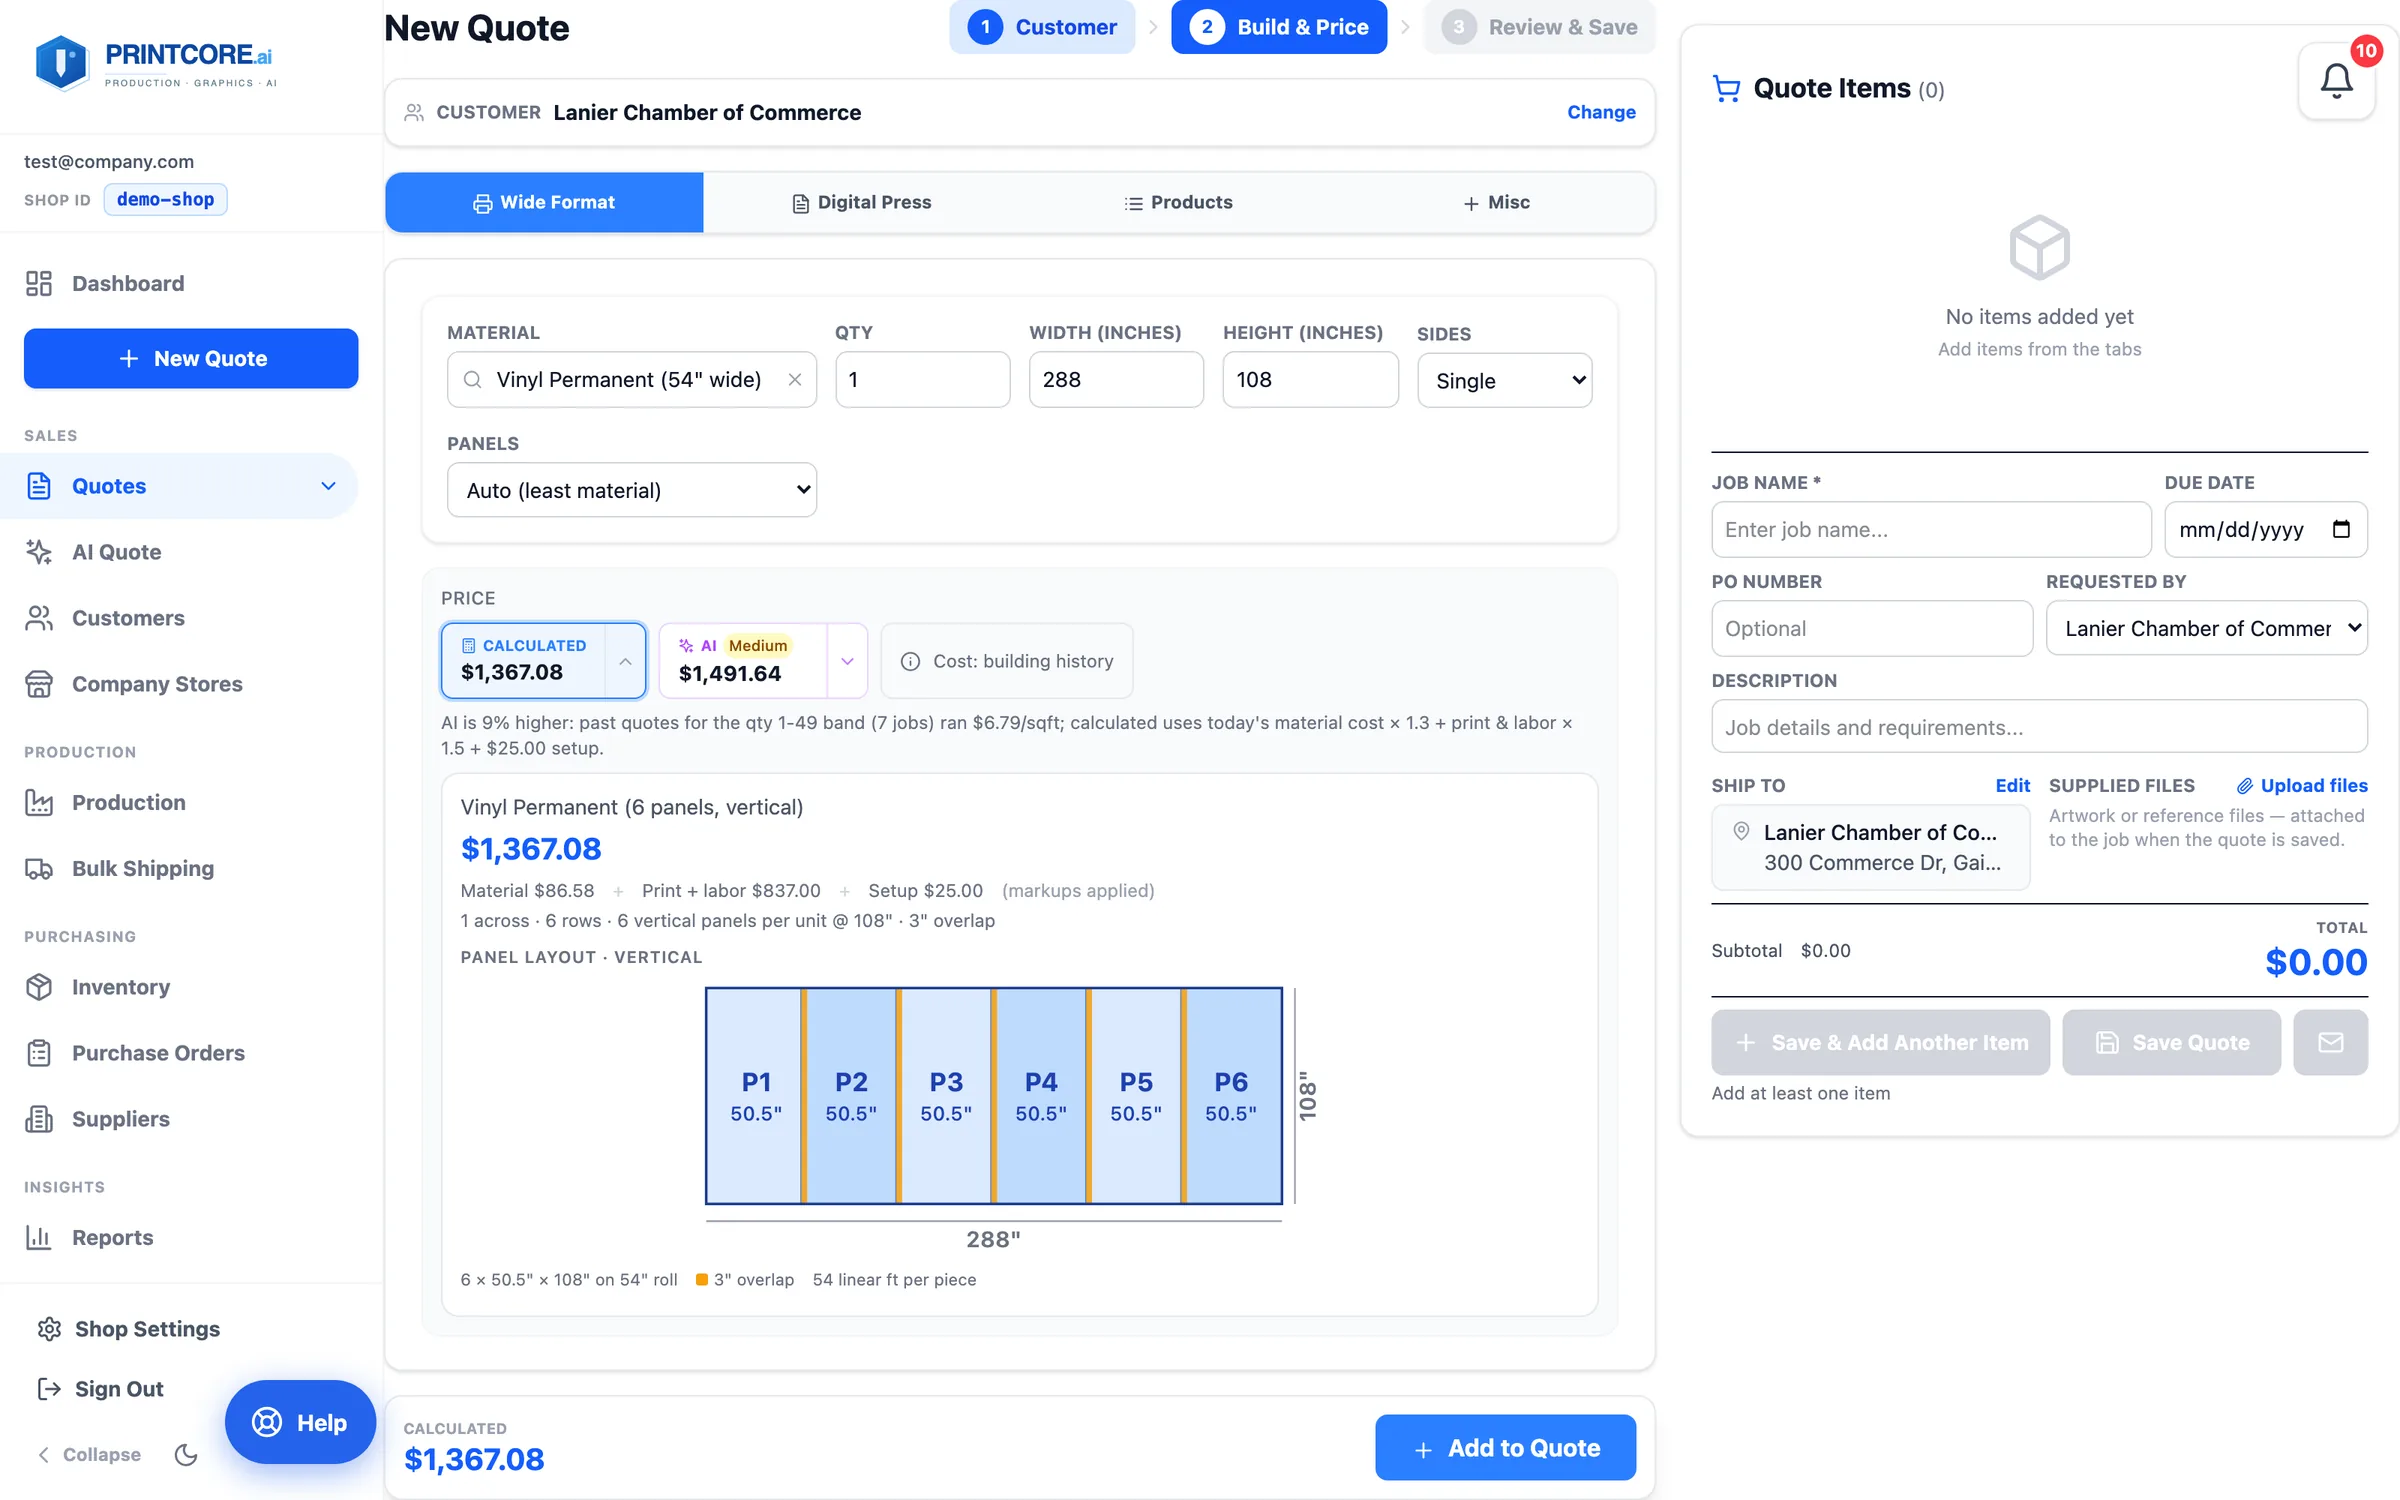
When a print is wider than your roll both ways — say a 288" × 108" lobby wall on 54" vinyl — Printcore splits it into panels. Auto picks the direction that uses the least roll, and the preview draws each panel (P1…P6) with the overlap shaded, plus the linear feet per piece.
app.printcore.ai/quotes/wide-digital
What to do
Leave Panels on Auto (least material), or switch it to Vertical or Horizontal to match how you'll produce it. The overlap comes from Shop Settings → Pricing → Roll Panel Overlap (3" if you never set it).
Why it matters
Six vertical 108" drops use far less vinyl than three 288" runs. The quote prices the roll you'll actually use, and the cost breakdown on the job shows the panel count and linear feet for the operator.
Step 6 of 9Wide/Digital Quote Builder
Add lines — each with its own AI price
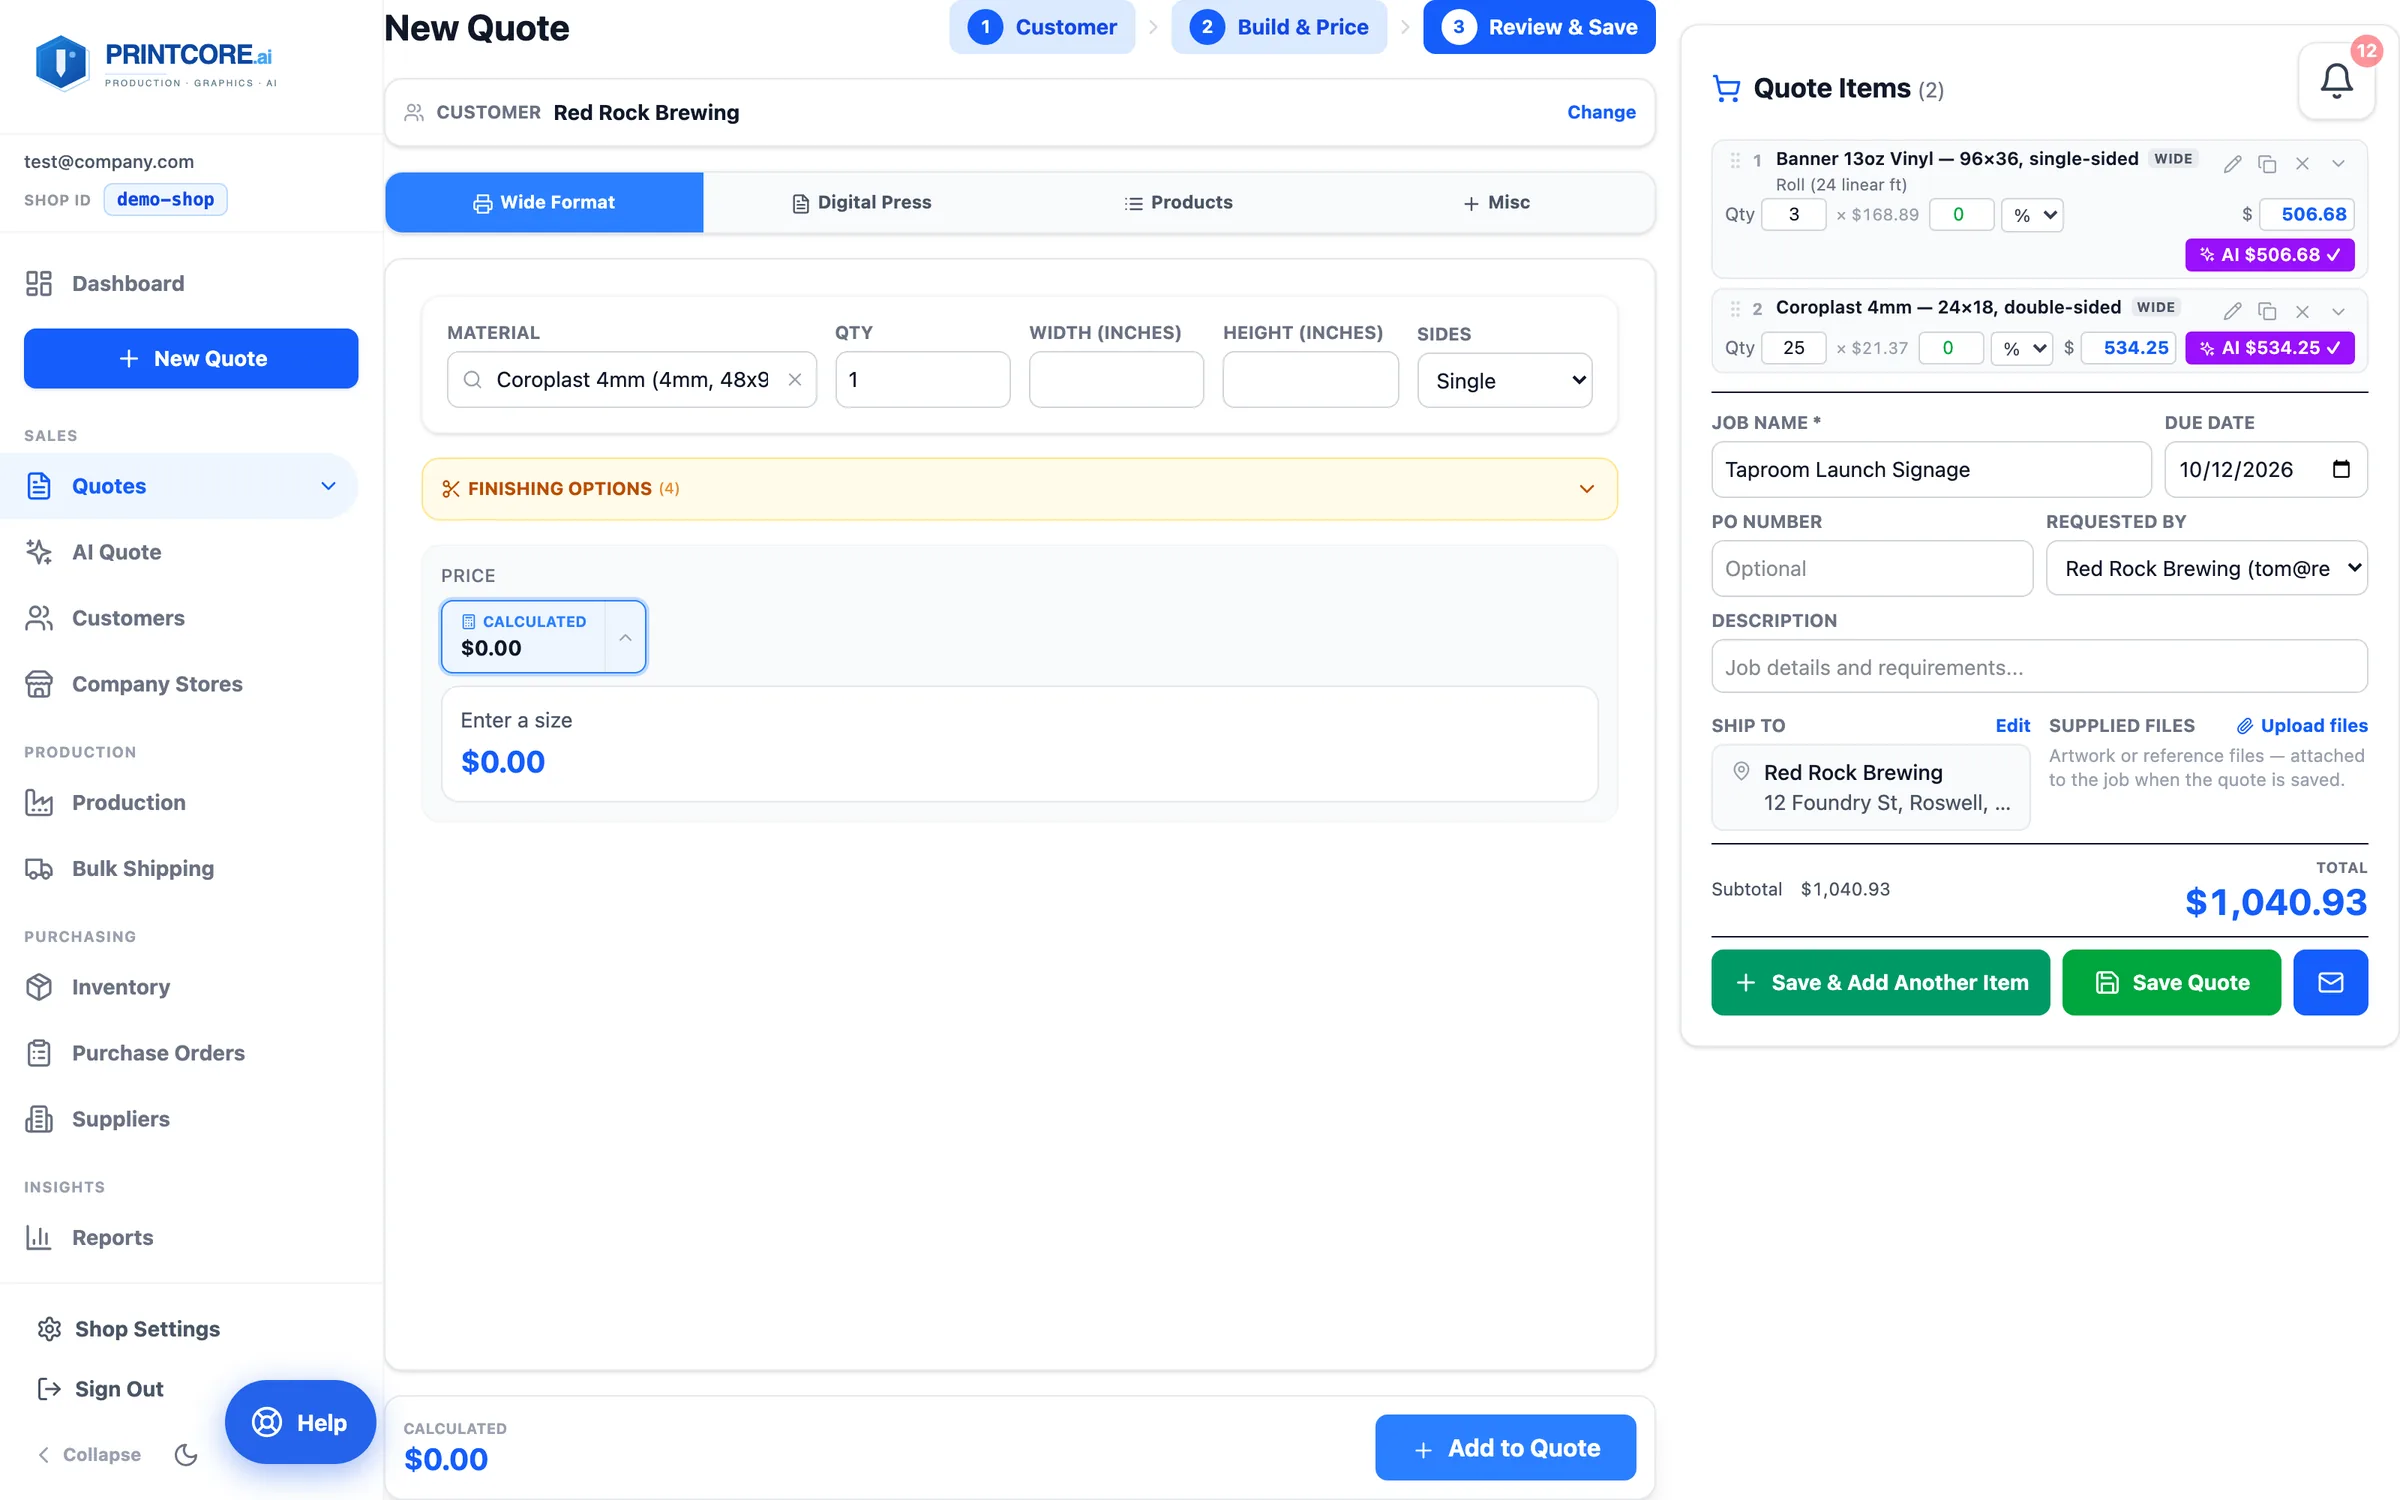
Click Add to Quote and the line lands in Quote Items on the right. Every wide and digital line carries an AI $ chip beside its price.
app.printcore.ai/quotes/wide-digital
What to do
Click a line's AI $ chip to use the AI price for that line; it turns into a check. Changed your mind? Click it again and the calculated price comes back. Add as many lines as the job needs — different sizes, materials, or quantity tiers.
Why it matters
You can mix calculated and history-based prices line by line, and undo either with one click. Lines from other calculators join the same quote too.
Step 7 of 9Wide/Digital Quote Builder
Ship To and supplied files
The panel under the line items holds the job name, due date, PO number, the Requested By contact, and a description. Ship To is filled in from the customer and can be edited; Supplied Files takes the customer's artwork.
app.printcore.ai/quotes/wide-digital
What to do
Click Edit beside Ship To to change the address for this job. Click Upload files to attach artwork — the files are saved onto the job when you save the quote.
Why it matters
The ship-to address becomes the first shipment's destination, and the artwork is already on the job when prepress opens it.
Step 8 of 9Wide/Digital Quote Builder
Save, or preview and send
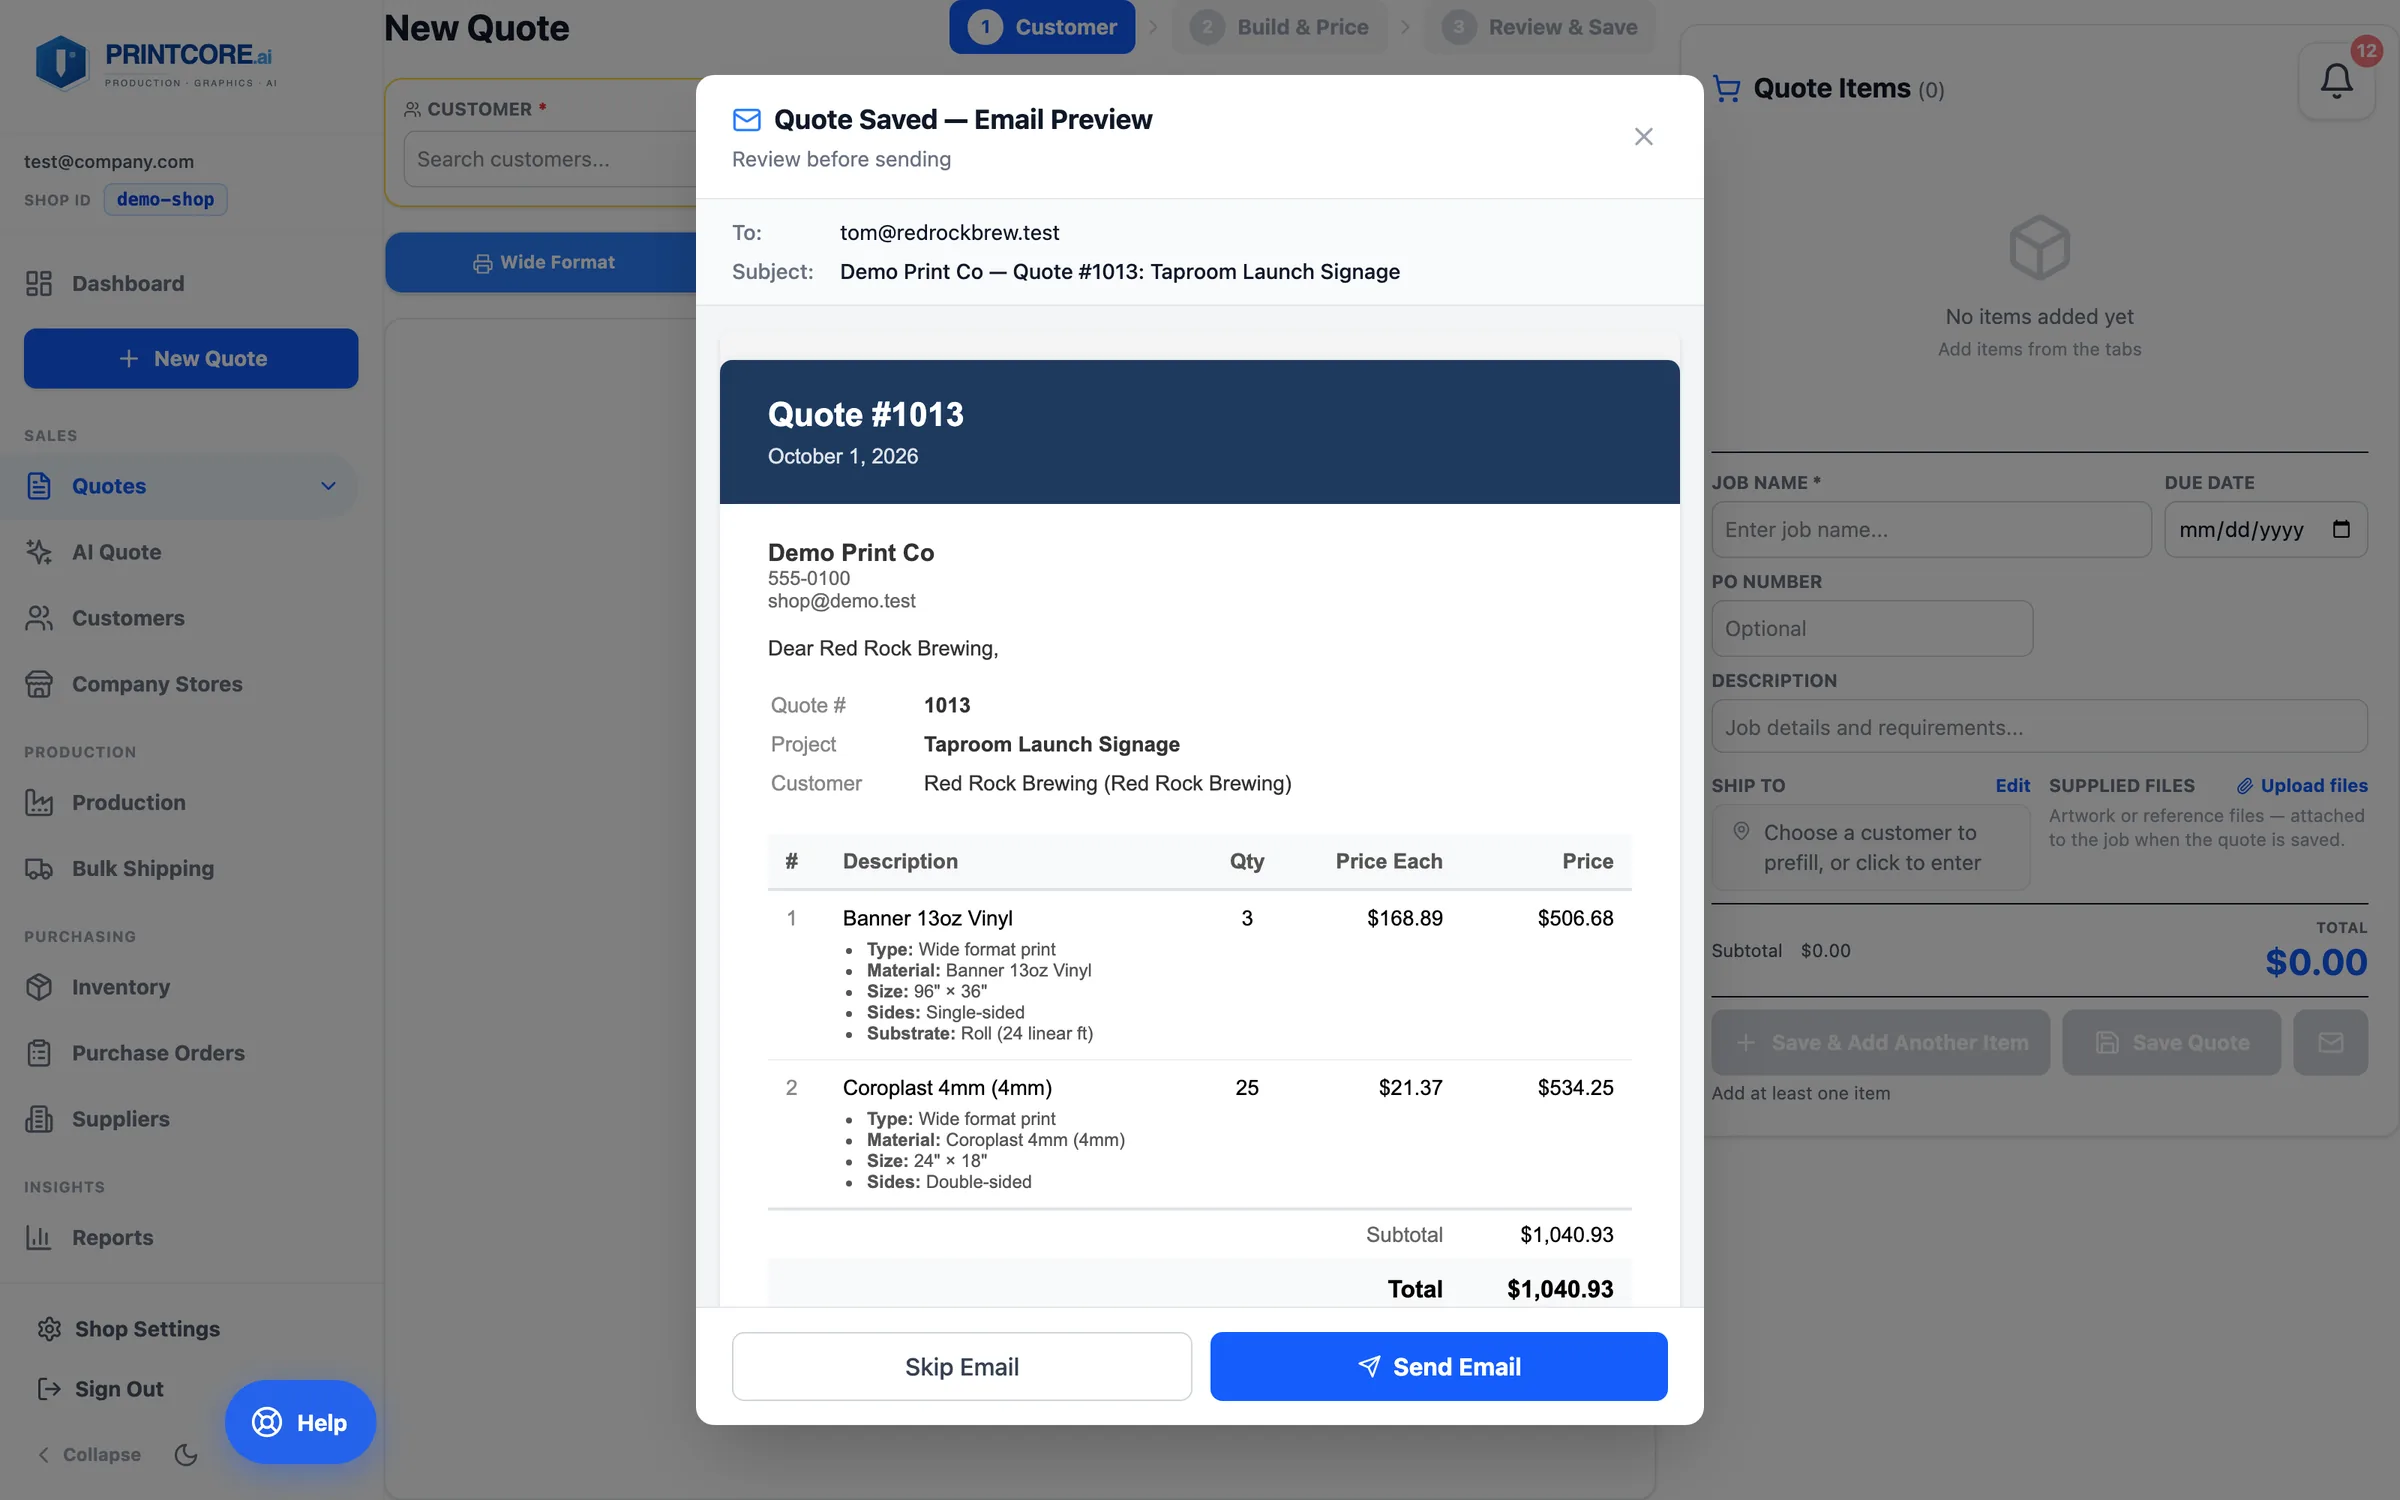
Save Quote files the quote and opens the email preview — who it goes to and the subject line — so you can send it now or skip for later.
app.printcore.ai/quotes/wide-digital
What to do
Click Send Email to send the branded quote, or Skip Email to keep working. The quote appears in the Quote column and in the Quotes list — as Sent once it's gone out.
Why it matters
The email carries a one-click link — the customer opens the quote in your portal and approves it there with no login to set up.
Your first quote is done ✅
You've got the Quote Builder down. Want to try a specialty quoter? Wraps, Cut Vinyl, Booklets, and Channel Letters each have their own dedicated walkthrough.