Step 1 of 12Getting Started
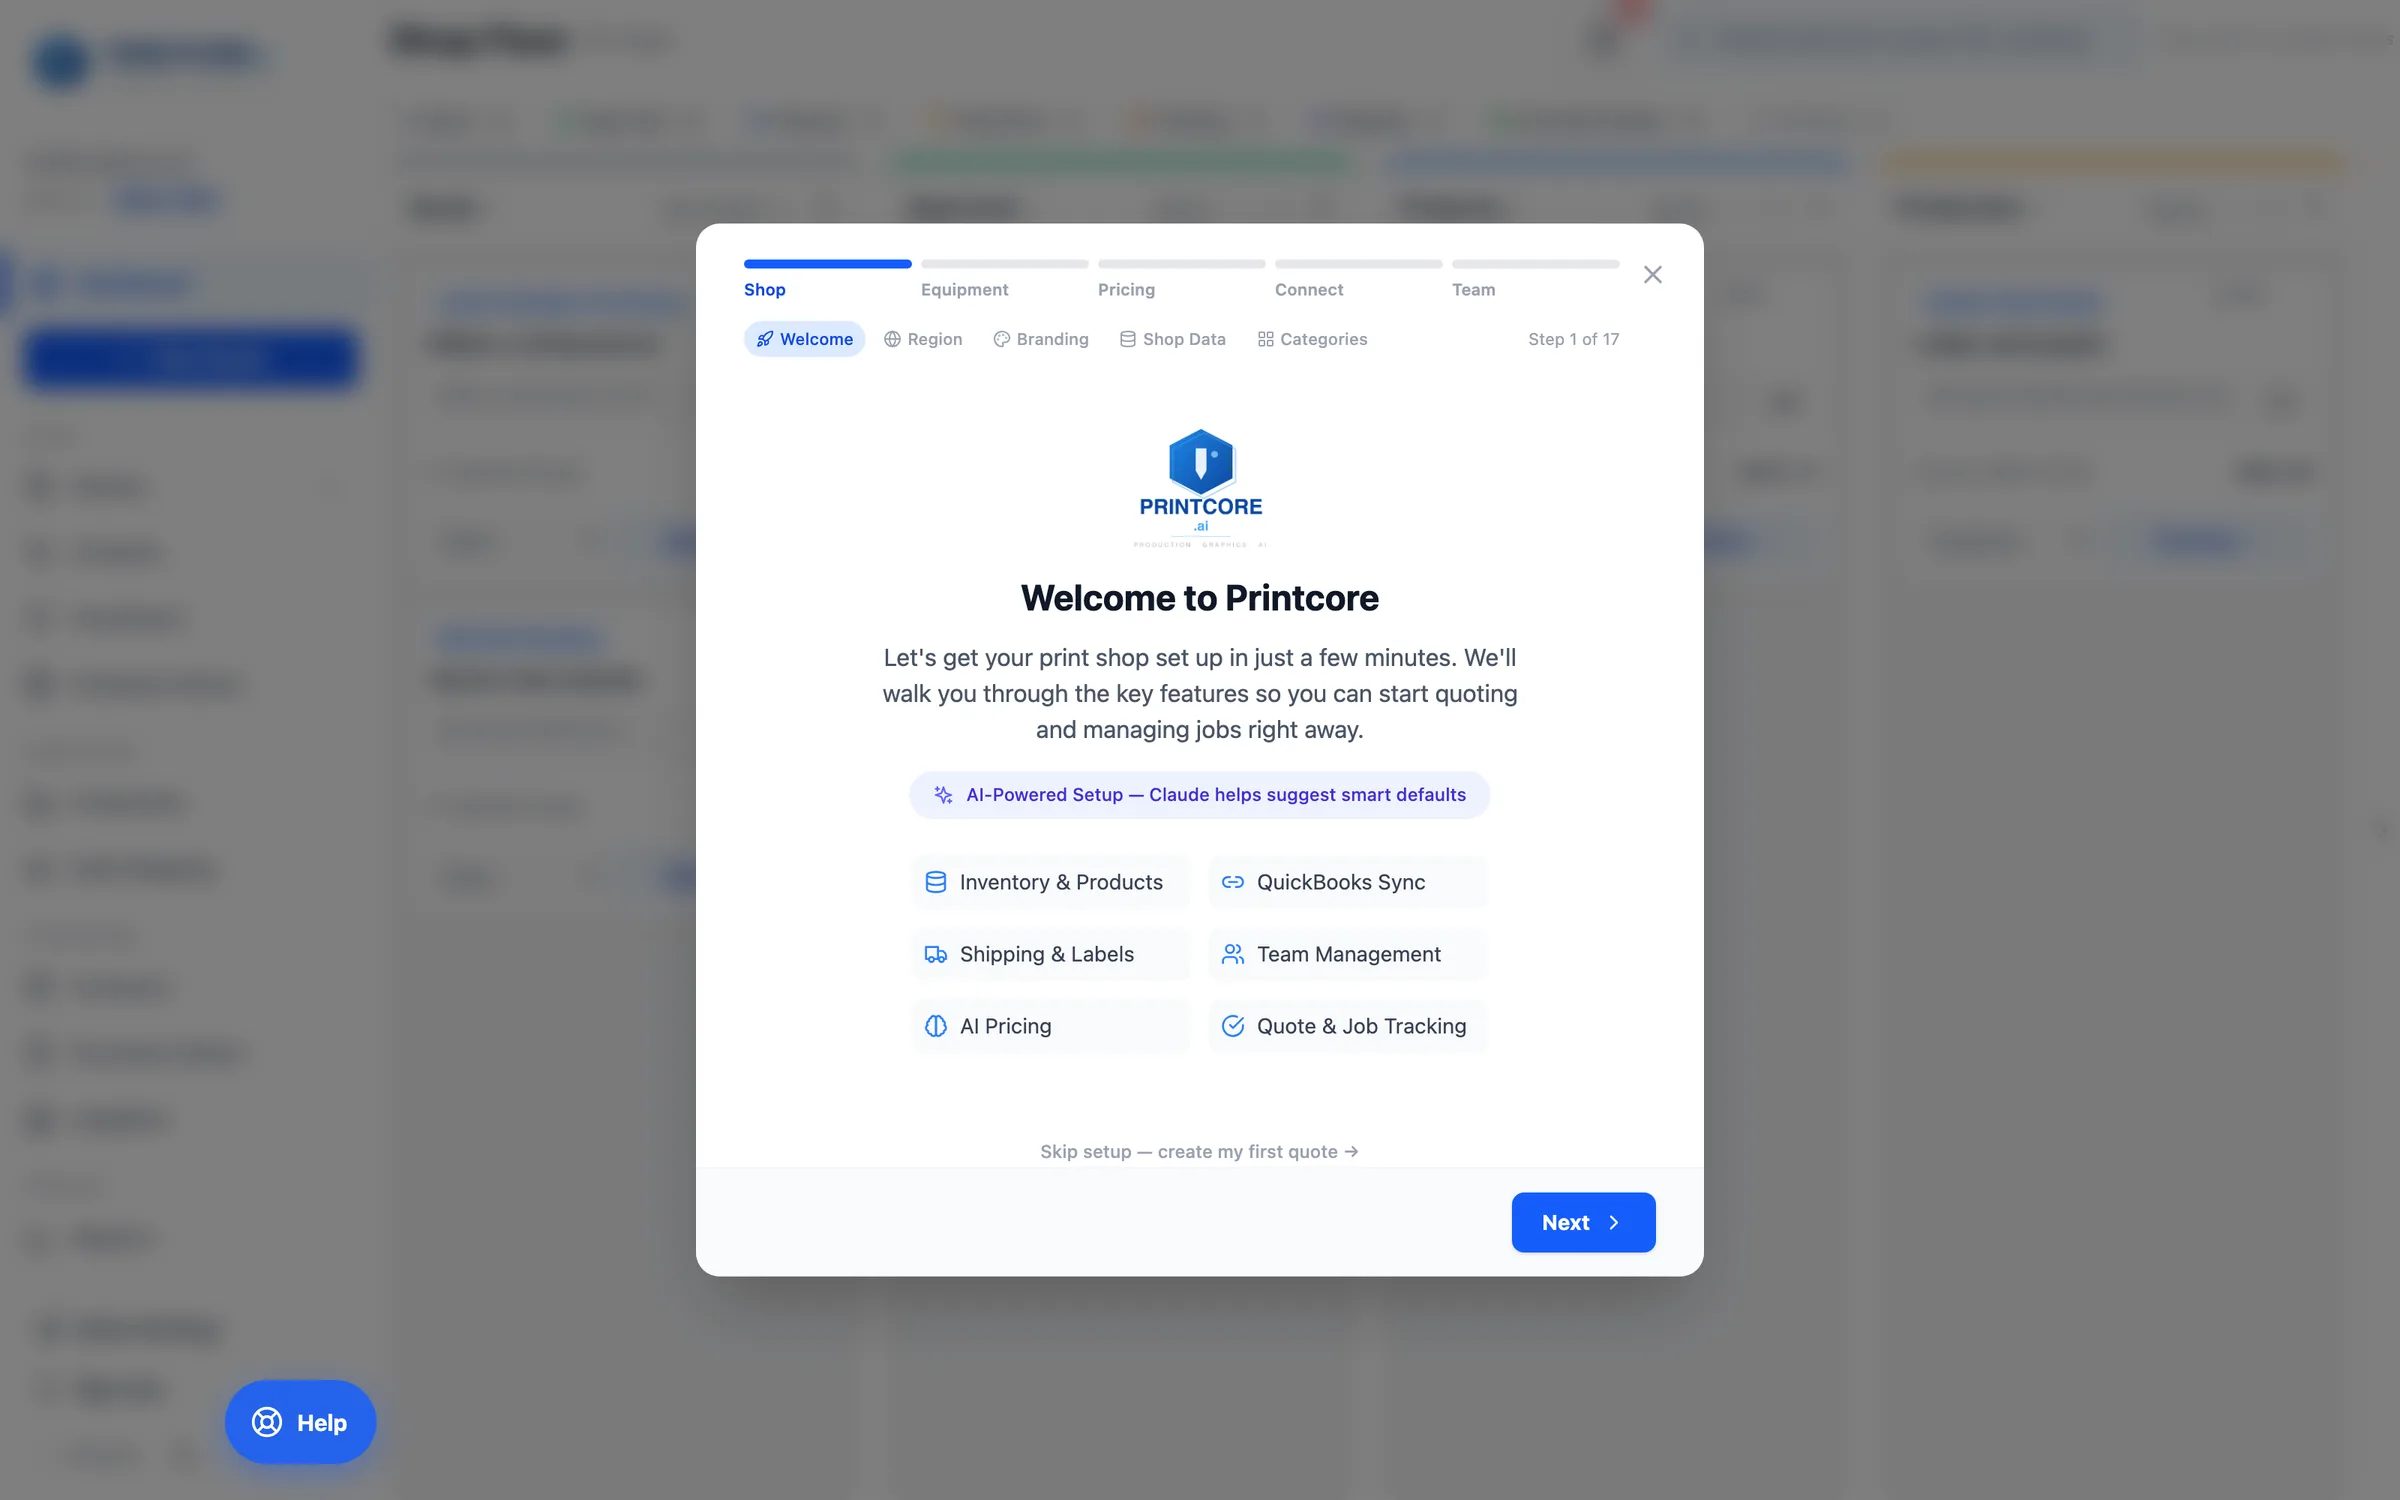
Welcome to Printcore
The first time you sign in, a setup wizard walks you through five phases — Shop → Equipment → Pricing → Connect → Team — in 17 short steps. The bar across the top shows the phase, the row beneath it shows the step, and most steps come with AI-suggested defaults.
What to do
Read what the wizard plans to set up, then click Next. Skip setup — create my first quote sits on every step. You can close the wizard and reopen it later from Shop Settings → Setup → Reopen Setup Guide.
Why it matters
Smart defaults are pre-filled from your shop type and region, so you rarely type from a blank page.
Step 2 of 12Getting Started
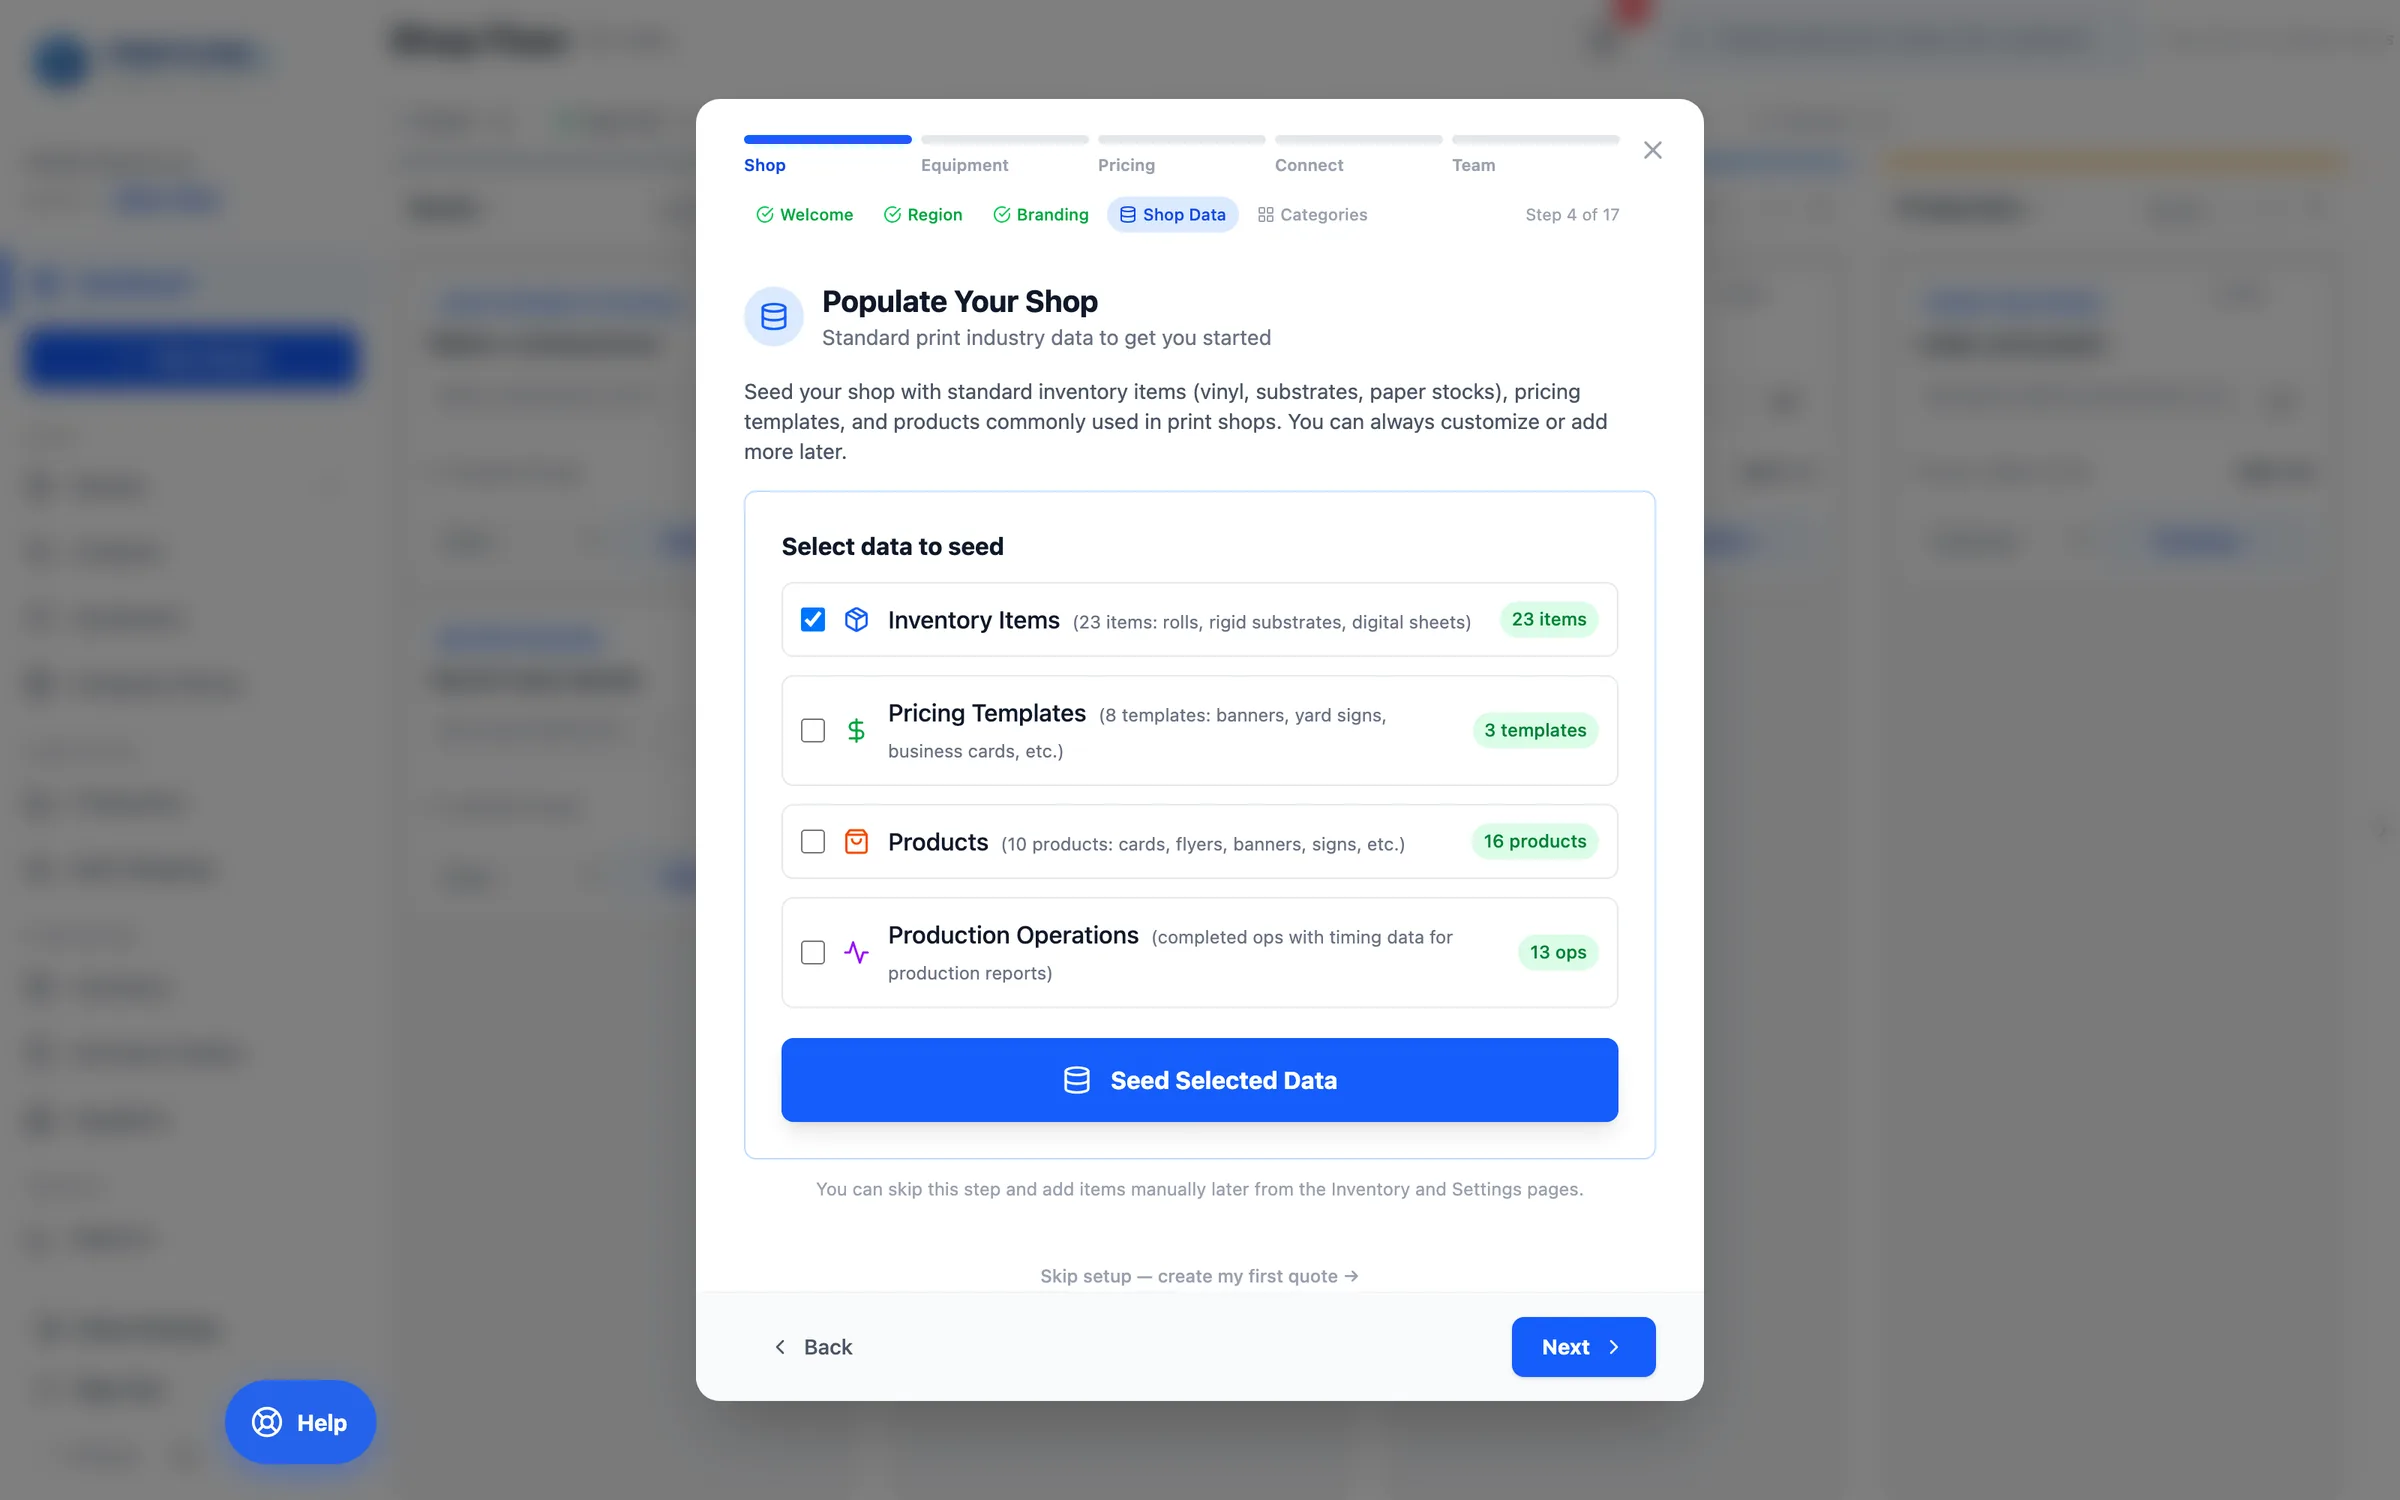
Populate your shop with industry data
Pre-load standard inventory items, pricing templates, products, and production operations commonly used in print shops. You'll customize from there.
app.printcore.ai/setup/shop-data
What to do
On Populate Your Shop, tick the data sets that apply — Inventory Items, Pricing Templates, Products, Production Operations — and click Seed Selected Data. Nothing is ever duplicated; only missing items are added.
Why it matters
Starting with realistic data means you can quote a real job on day one. Skip the empty-spreadsheet syndrome that kills most setups.
Step 3 of 12Getting Started
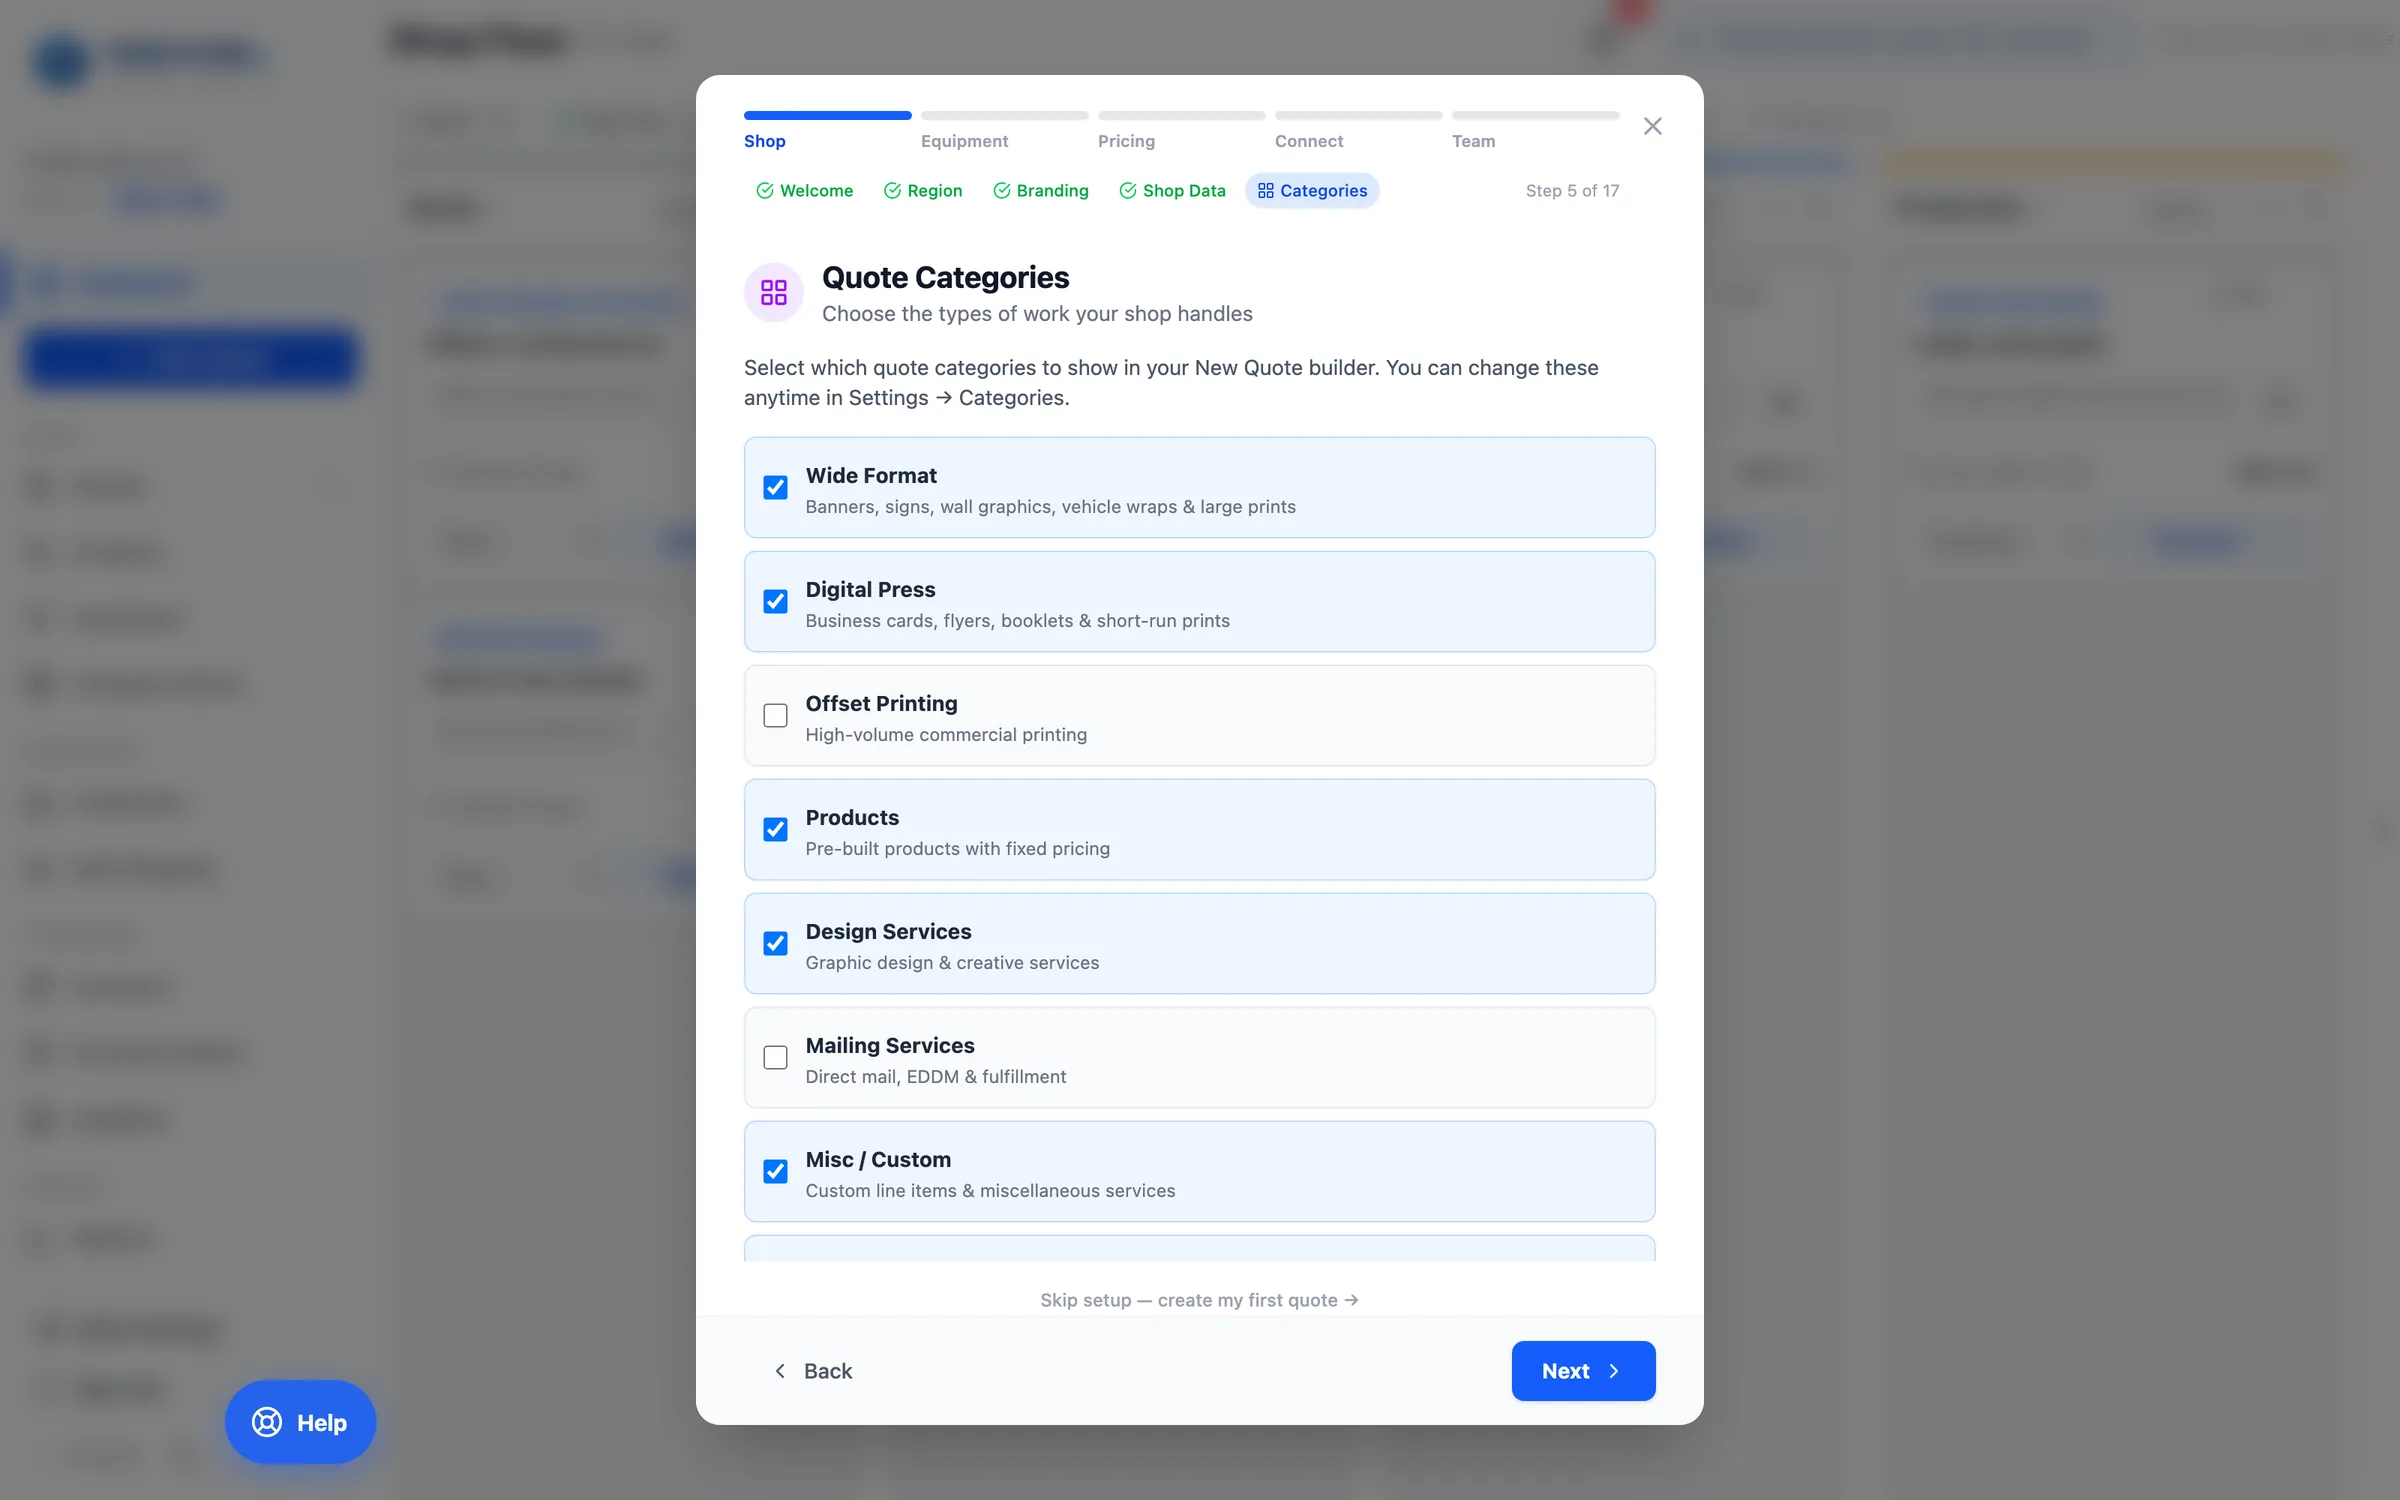
Choose the kinds of work you quote
Quote Categories decides which quoters appear in New Quote: Wide Format, Digital Press, Offset, Products, Design, Mailing, Misc, Vehicle Wraps, Cut Vinyl, Booklets, Channel Letters — and Apparel & Promo, which is off until you switch it on.
app.printcore.ai/setup/categories
What to do
Tick what your shop does and untick what it doesn't. You can change it any time in Shop Settings → Categories.
Why it matters
A shop that never quotes channel letters shouldn't have to scroll past them. A trimmed picker is a faster picker.
Step 4 of 12Getting Started
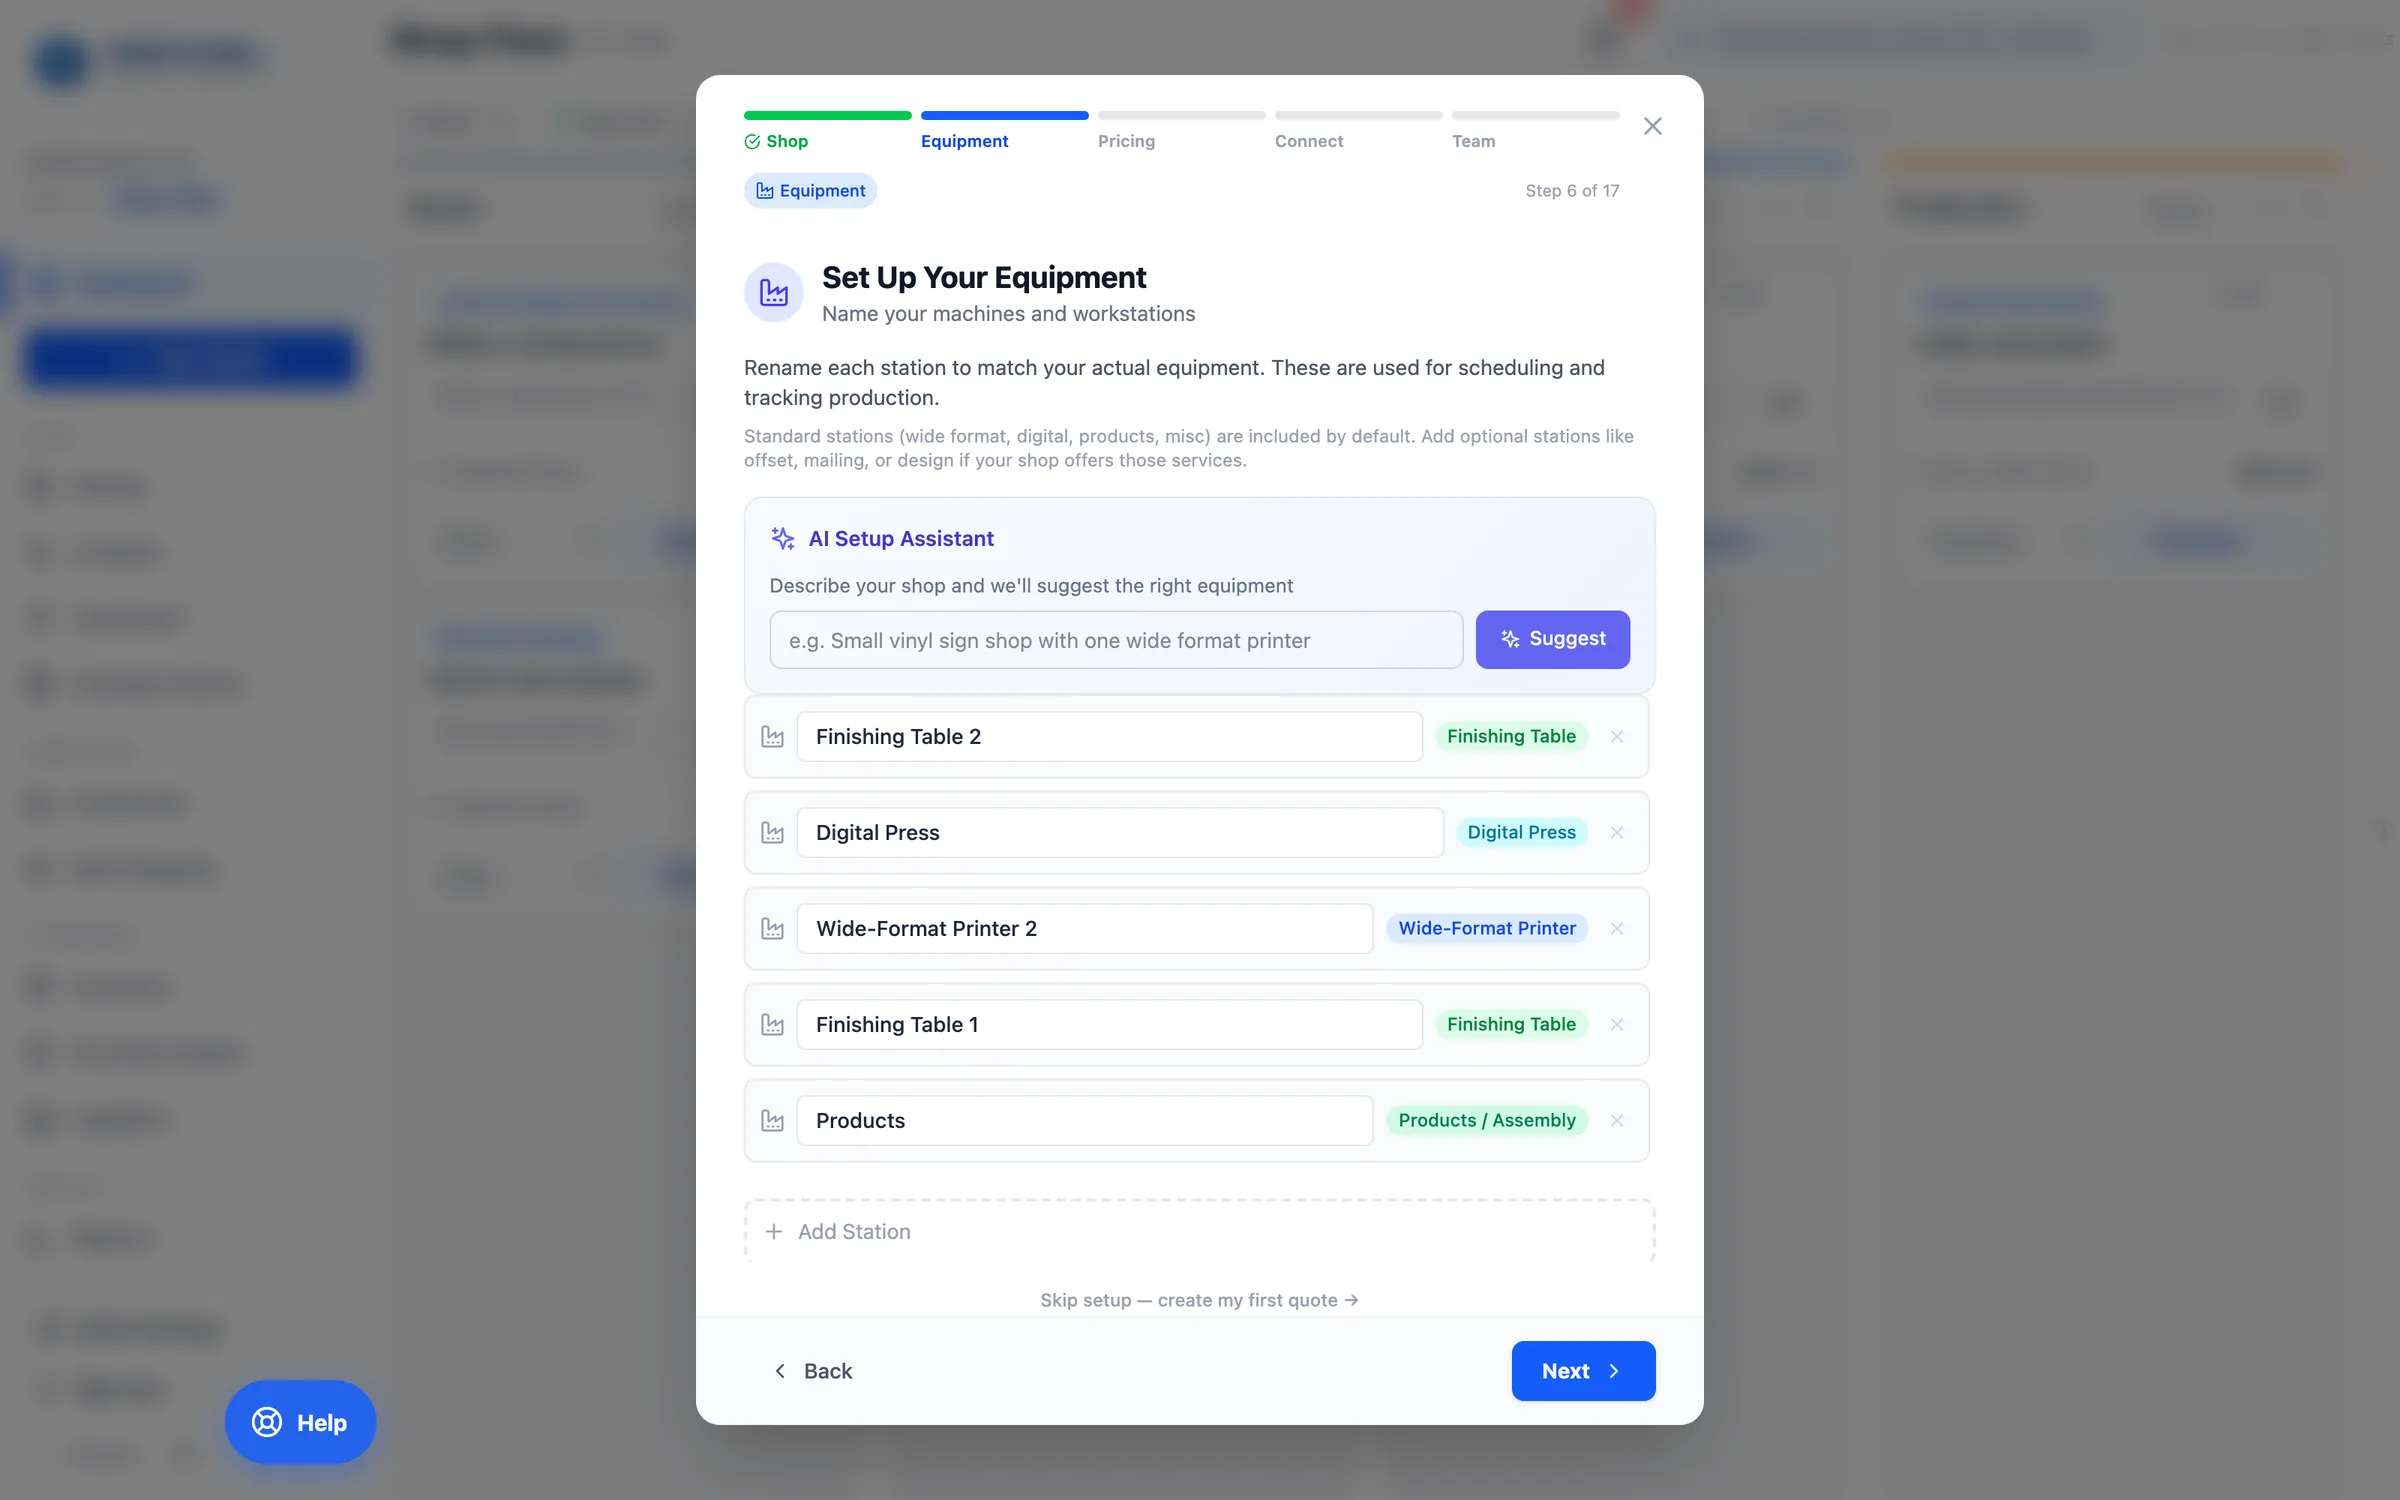
Set up your equipment
Name each press, cutter, and finishing station. Use the AI Setup Assistant — describe your shop in one sentence and it suggests the right equipment. You can add each machine's limits (max width, max length, max thickness) now or later in Shop Settings → Equipment.
app.printcore.ai/setup/equipment
What to do
Type a quick description in the AI Setup Assistant (e.g. "Small vinyl sign shop with one 54-inch latex printer and a flatbed cutter") and click Suggest. Rename or remove items so the list matches your actual gear.
Why it matters
Equipment drives scheduling and routing — and once a machine's limits are entered, Printcore will never price a 60-inch banner as a single panel on a 54-inch printer.
Step 5 of 12Getting Started
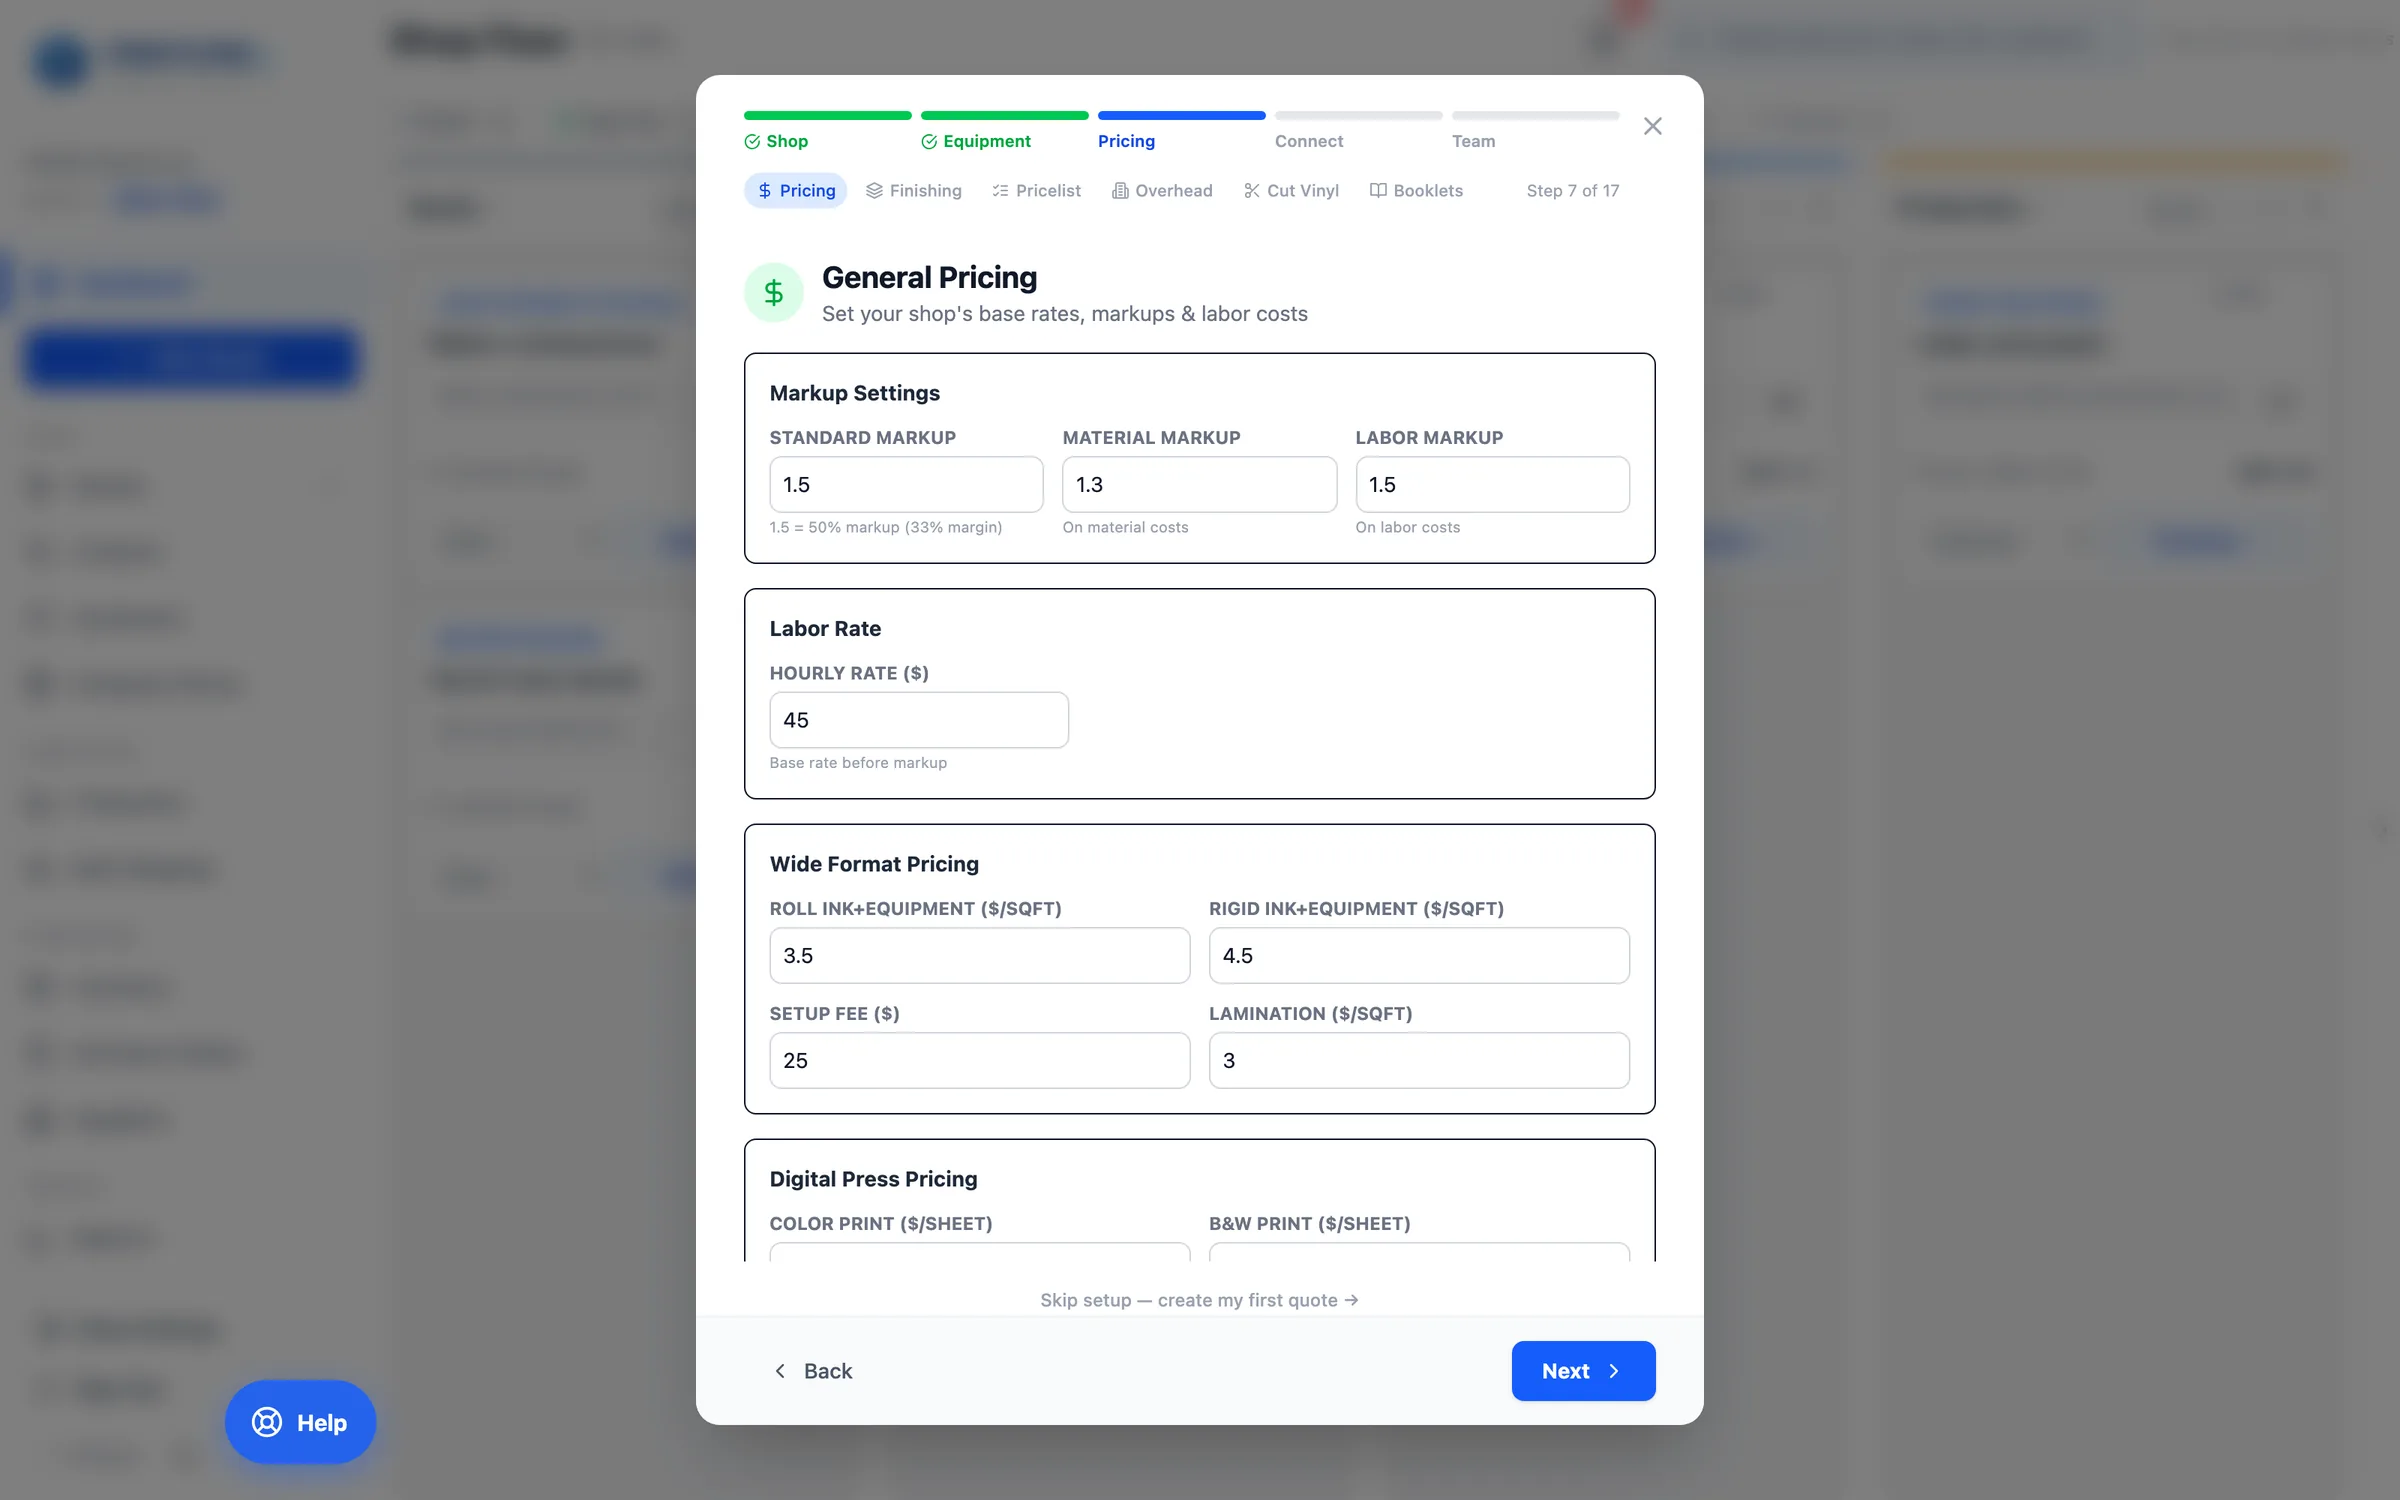
Configure pricing
Set your markups (standard, material, labor), labor rate, setup fee, and base wide-format and digital pricing. These flow into every quote you produce.
app.printcore.ai/setup/pricing
What to do
Adjust Markup Settings, set your Hourly Rate, and tune Wide Format Pricing (per sq ft, setup fee, lamination). Defaults are based on industry benchmarks.
Why it matters
Centralizing pricing here means every new quote uses the latest rules — no more outdated numbers in a back-office spreadsheet.
Step 6 of 12Getting Started
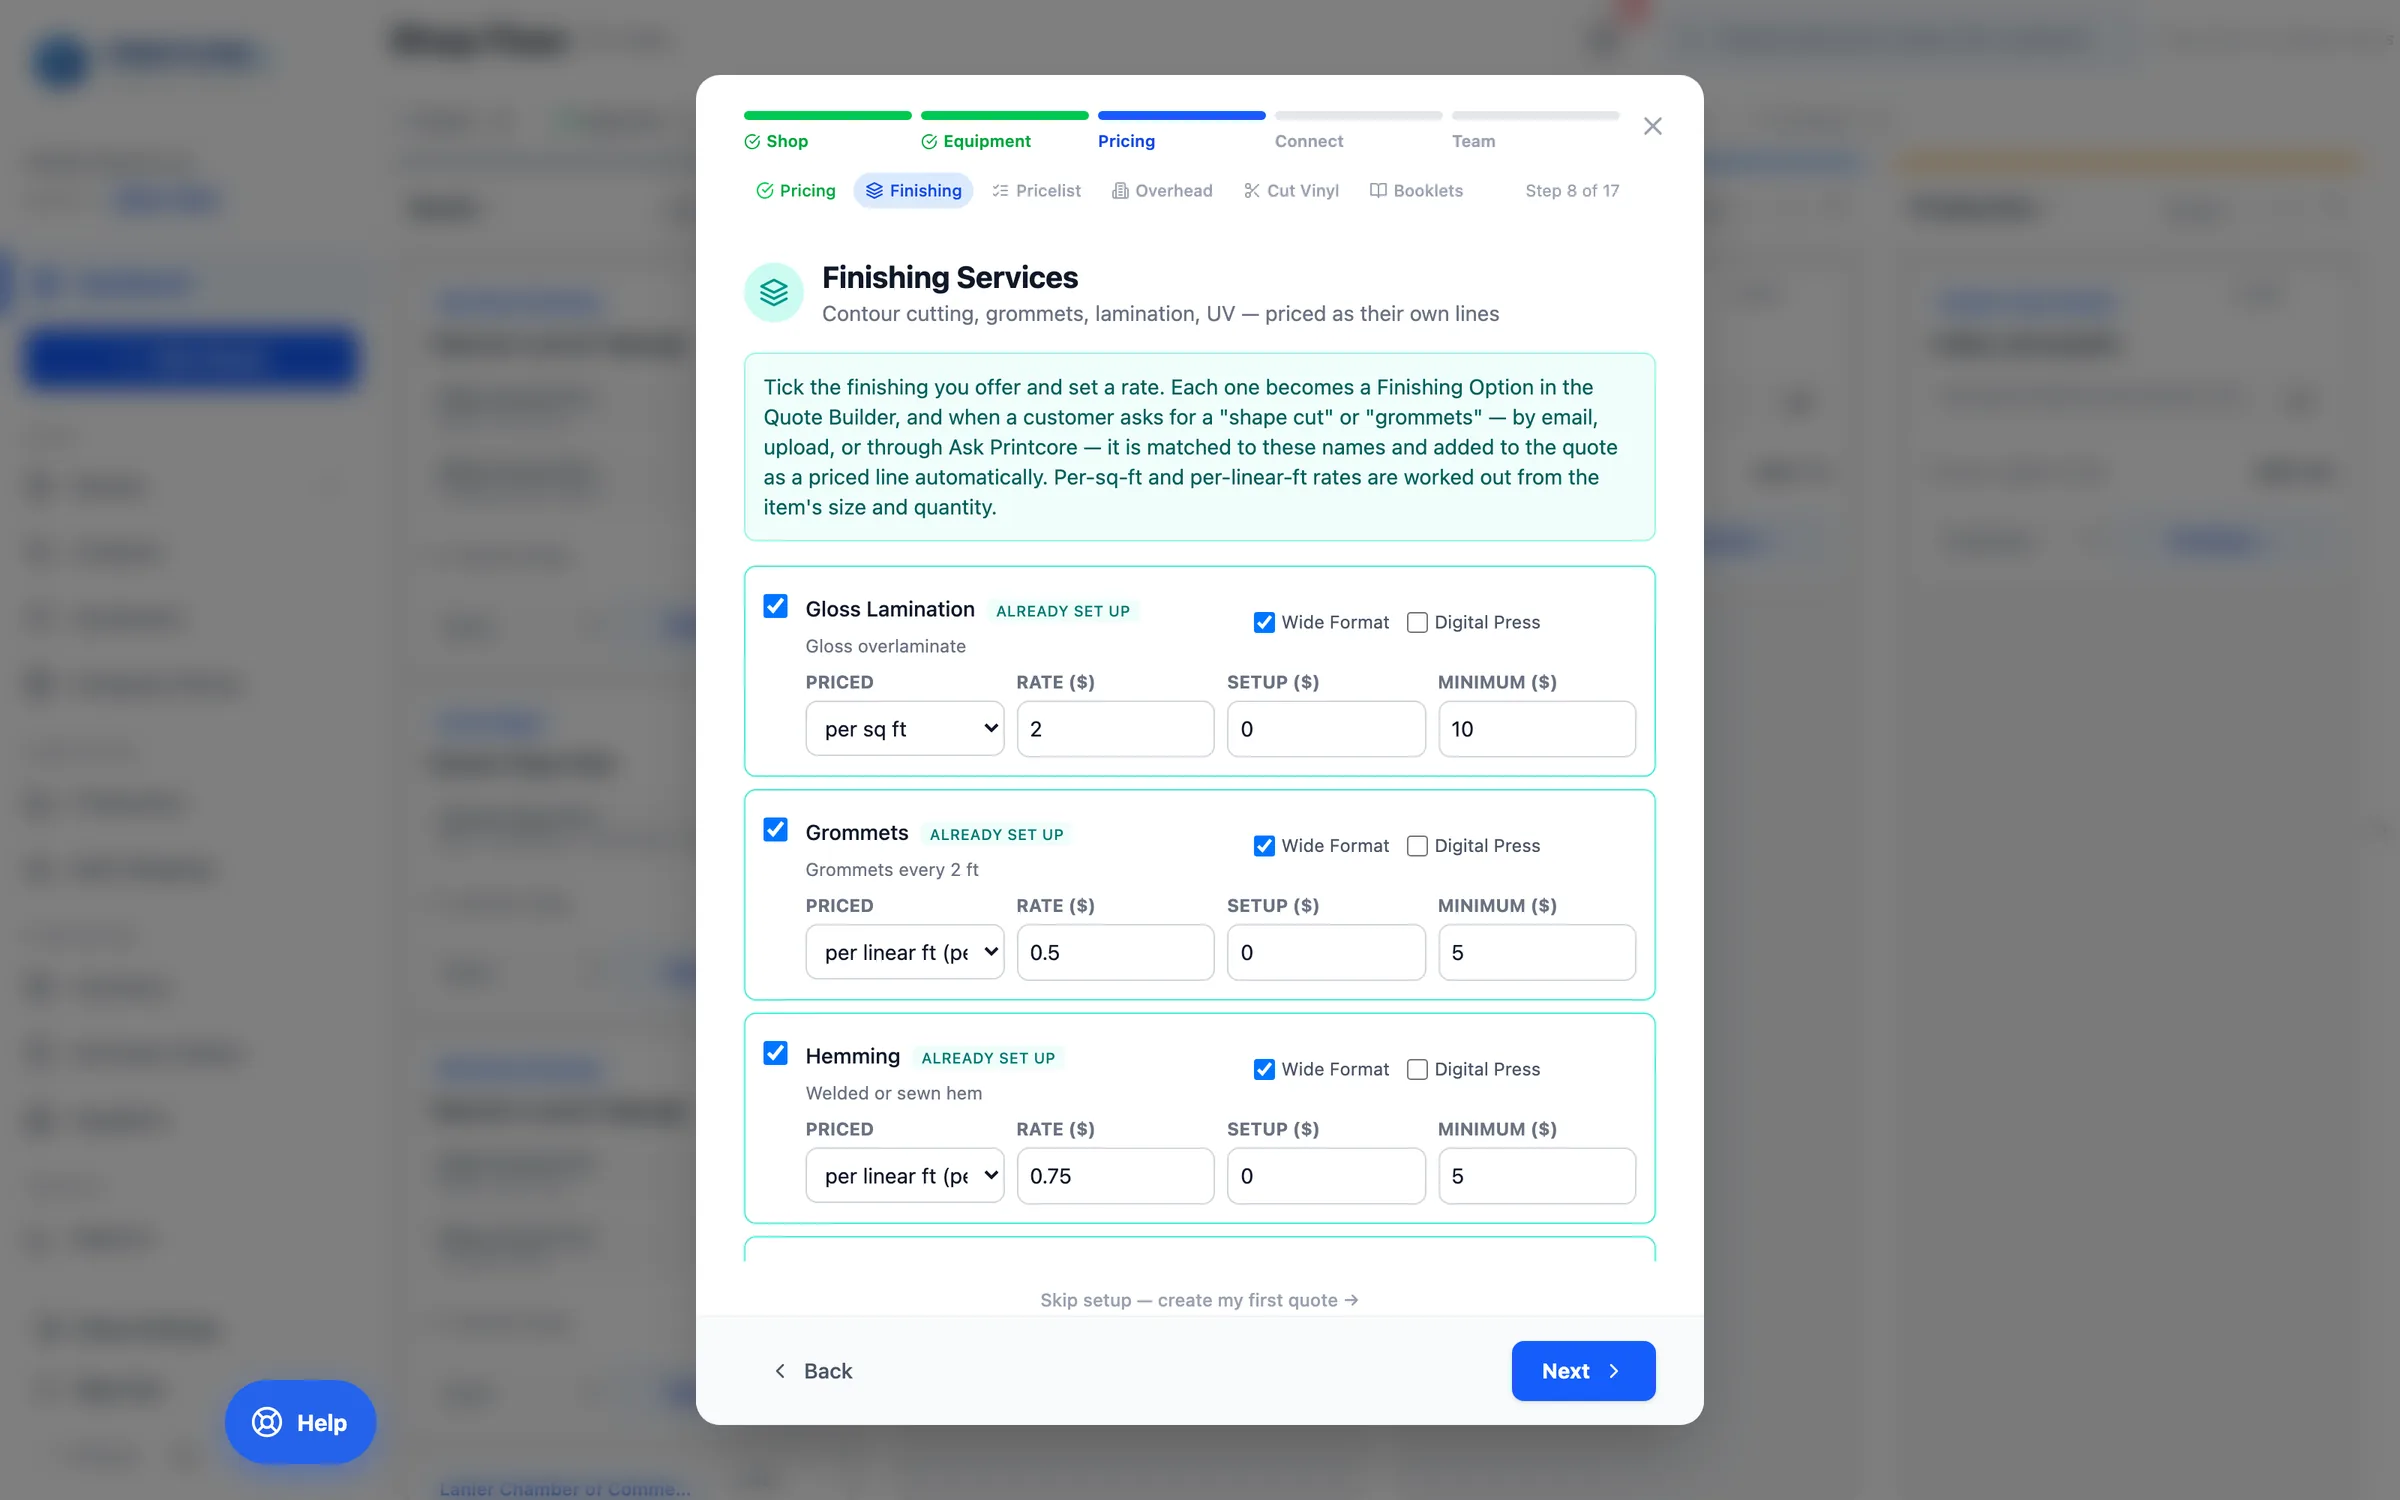
Price your finishing services
Finishing Services — contour cutting, grommets, hems, pole pockets, lamination, UV, mounting and more — each become their own priced line. Tick the ones you offer, choose whether each is priced per piece, per square foot, or per linear foot of perimeter, and set a rate, setup, and minimum.
app.printcore.ai/setup/finishing
What to do
Tick the finishing you offer and set the rate. When a customer asks for "shape cut" or "grommets" — by email, upload, or through Ask Printcore — Printcore matches it to these names and adds the priced line automatically.
Why it matters
Finishing is where margin leaks. Once it's priced here, it's never forgotten on a quote. You can change it later in Shop Settings → Finishing.
Step 7 of 12Getting Started
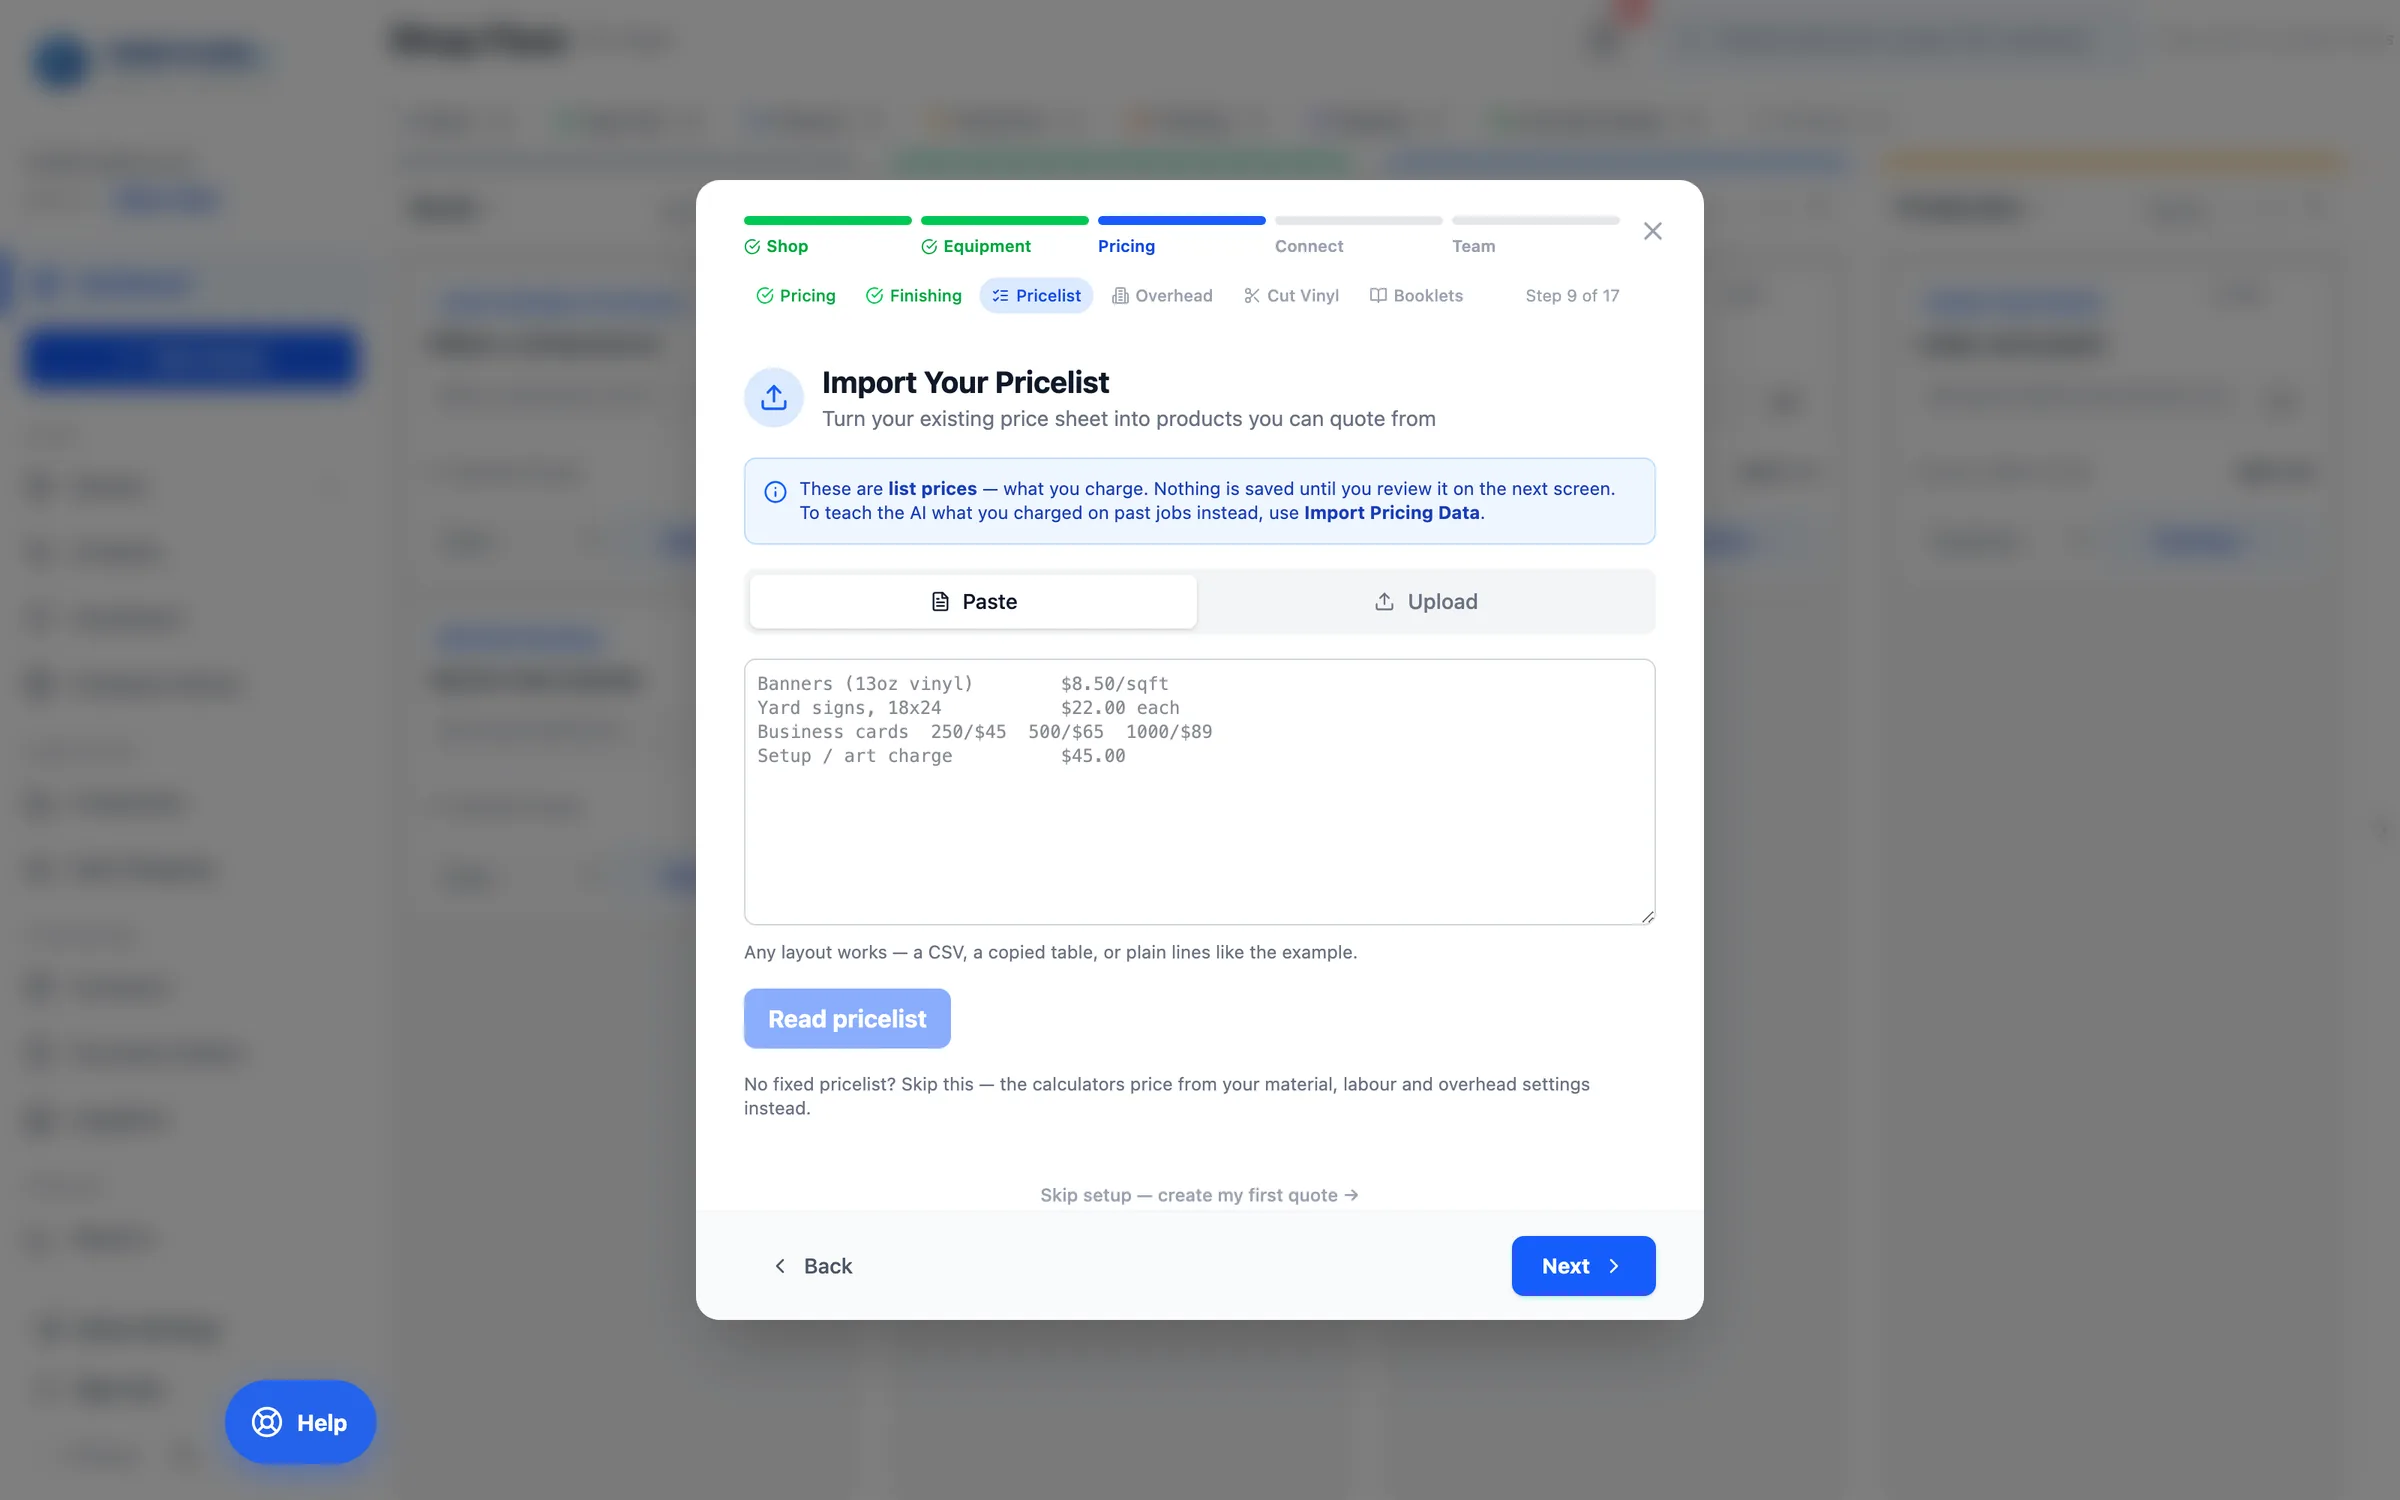
Bring your price list in
Import Your Pricelist comes next. Paste or upload the price sheet you already quote from and Printcore turns it into products and pricing templates — flat prices become products, anything with quantity breaks becomes one template with its tiers intact. Skip it freely: a shop that prices everything from material and square footage has no fixed list to import.
app.printcore.ai/setup/pricelist
What to do
Paste the list, or upload a CSV or a PDF rate card, and click Read pricelist. Review every row before pressing Import — nothing is saved until you do.
Why it matters
This is the difference between quoting your top twenty items on day one and rebuilding each of them from material and dimensions.
Walkthrough 17 covers the importer in full.
Step 8 of 12Getting Started
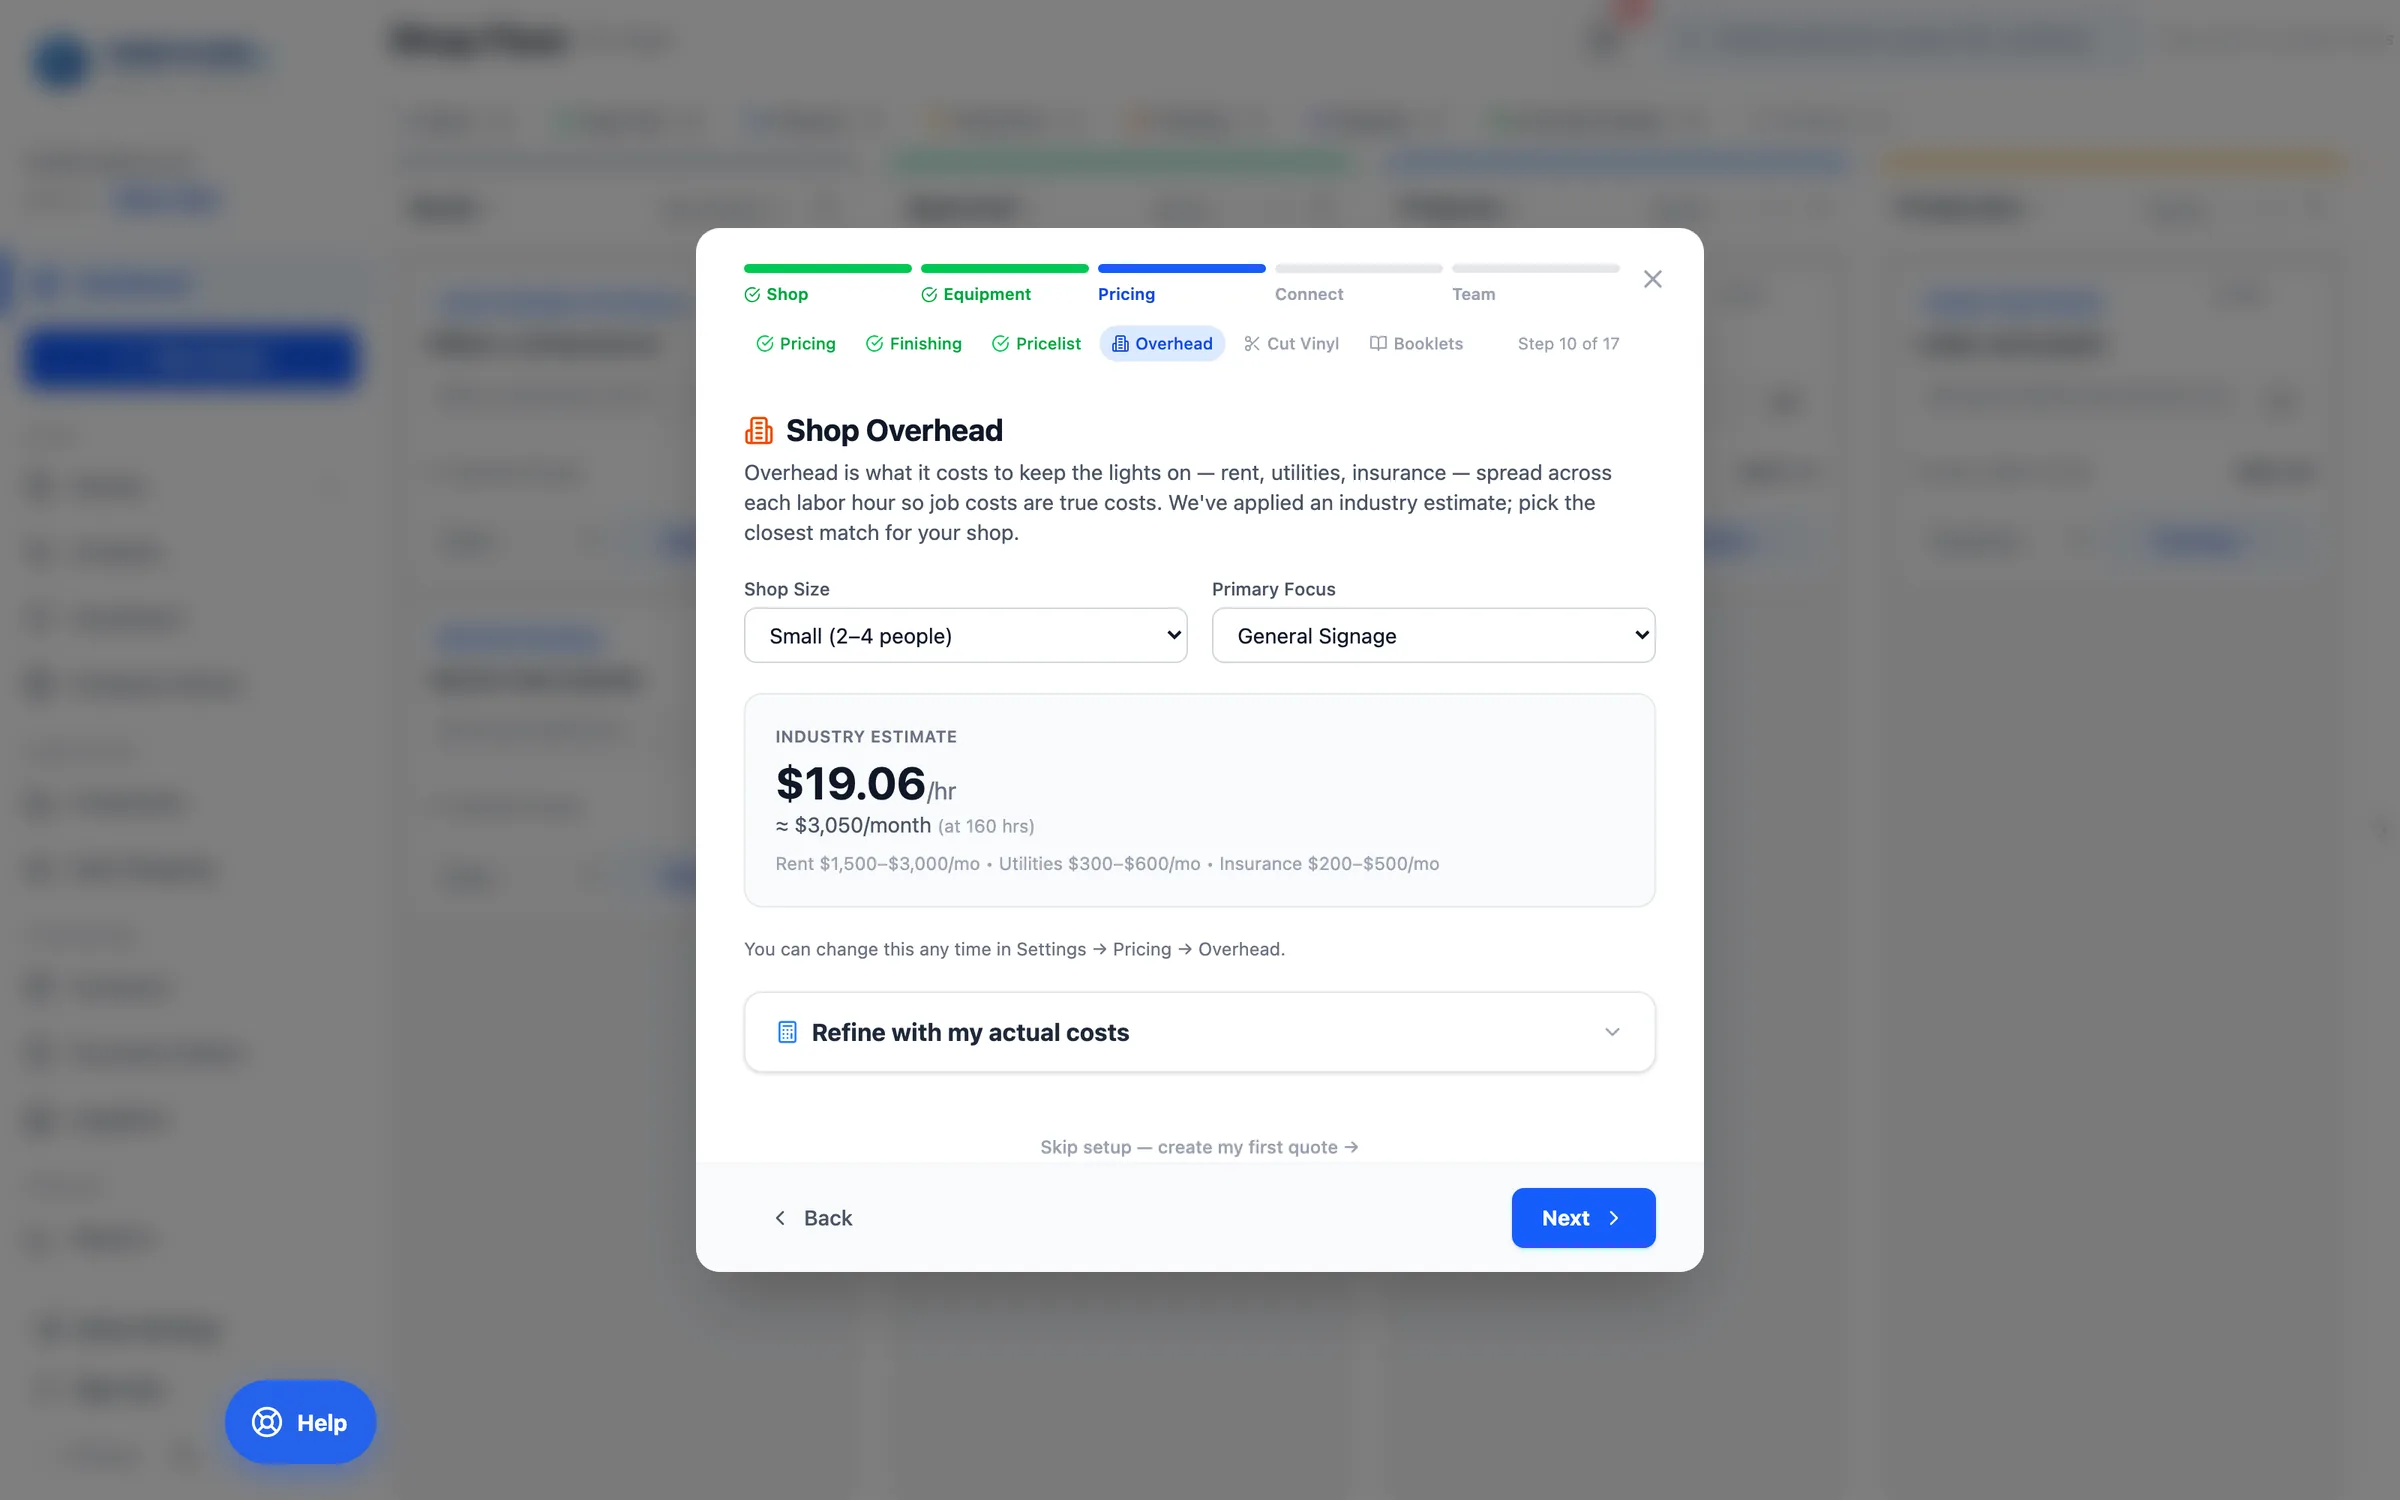
Set your overhead
Tell Printcore your monthly overhead — rent, utilities, insurance — so it can roll real overhead cost into per-job profitability. The wizard starts you with an industry estimate for your shop size and focus.
app.printcore.ai/setup/overhead
What to do
Pick your Shop Size and Primary Focus and accept the estimate, or click Refine with my actual costs to enter your real monthly numbers. You can change it any time in Settings → Pricing → Overhead.
Why it matters
Without overhead, jobs look more profitable than they really are. This step is what makes the Profitability report trustworthy.
Step 9 of 12Getting Started
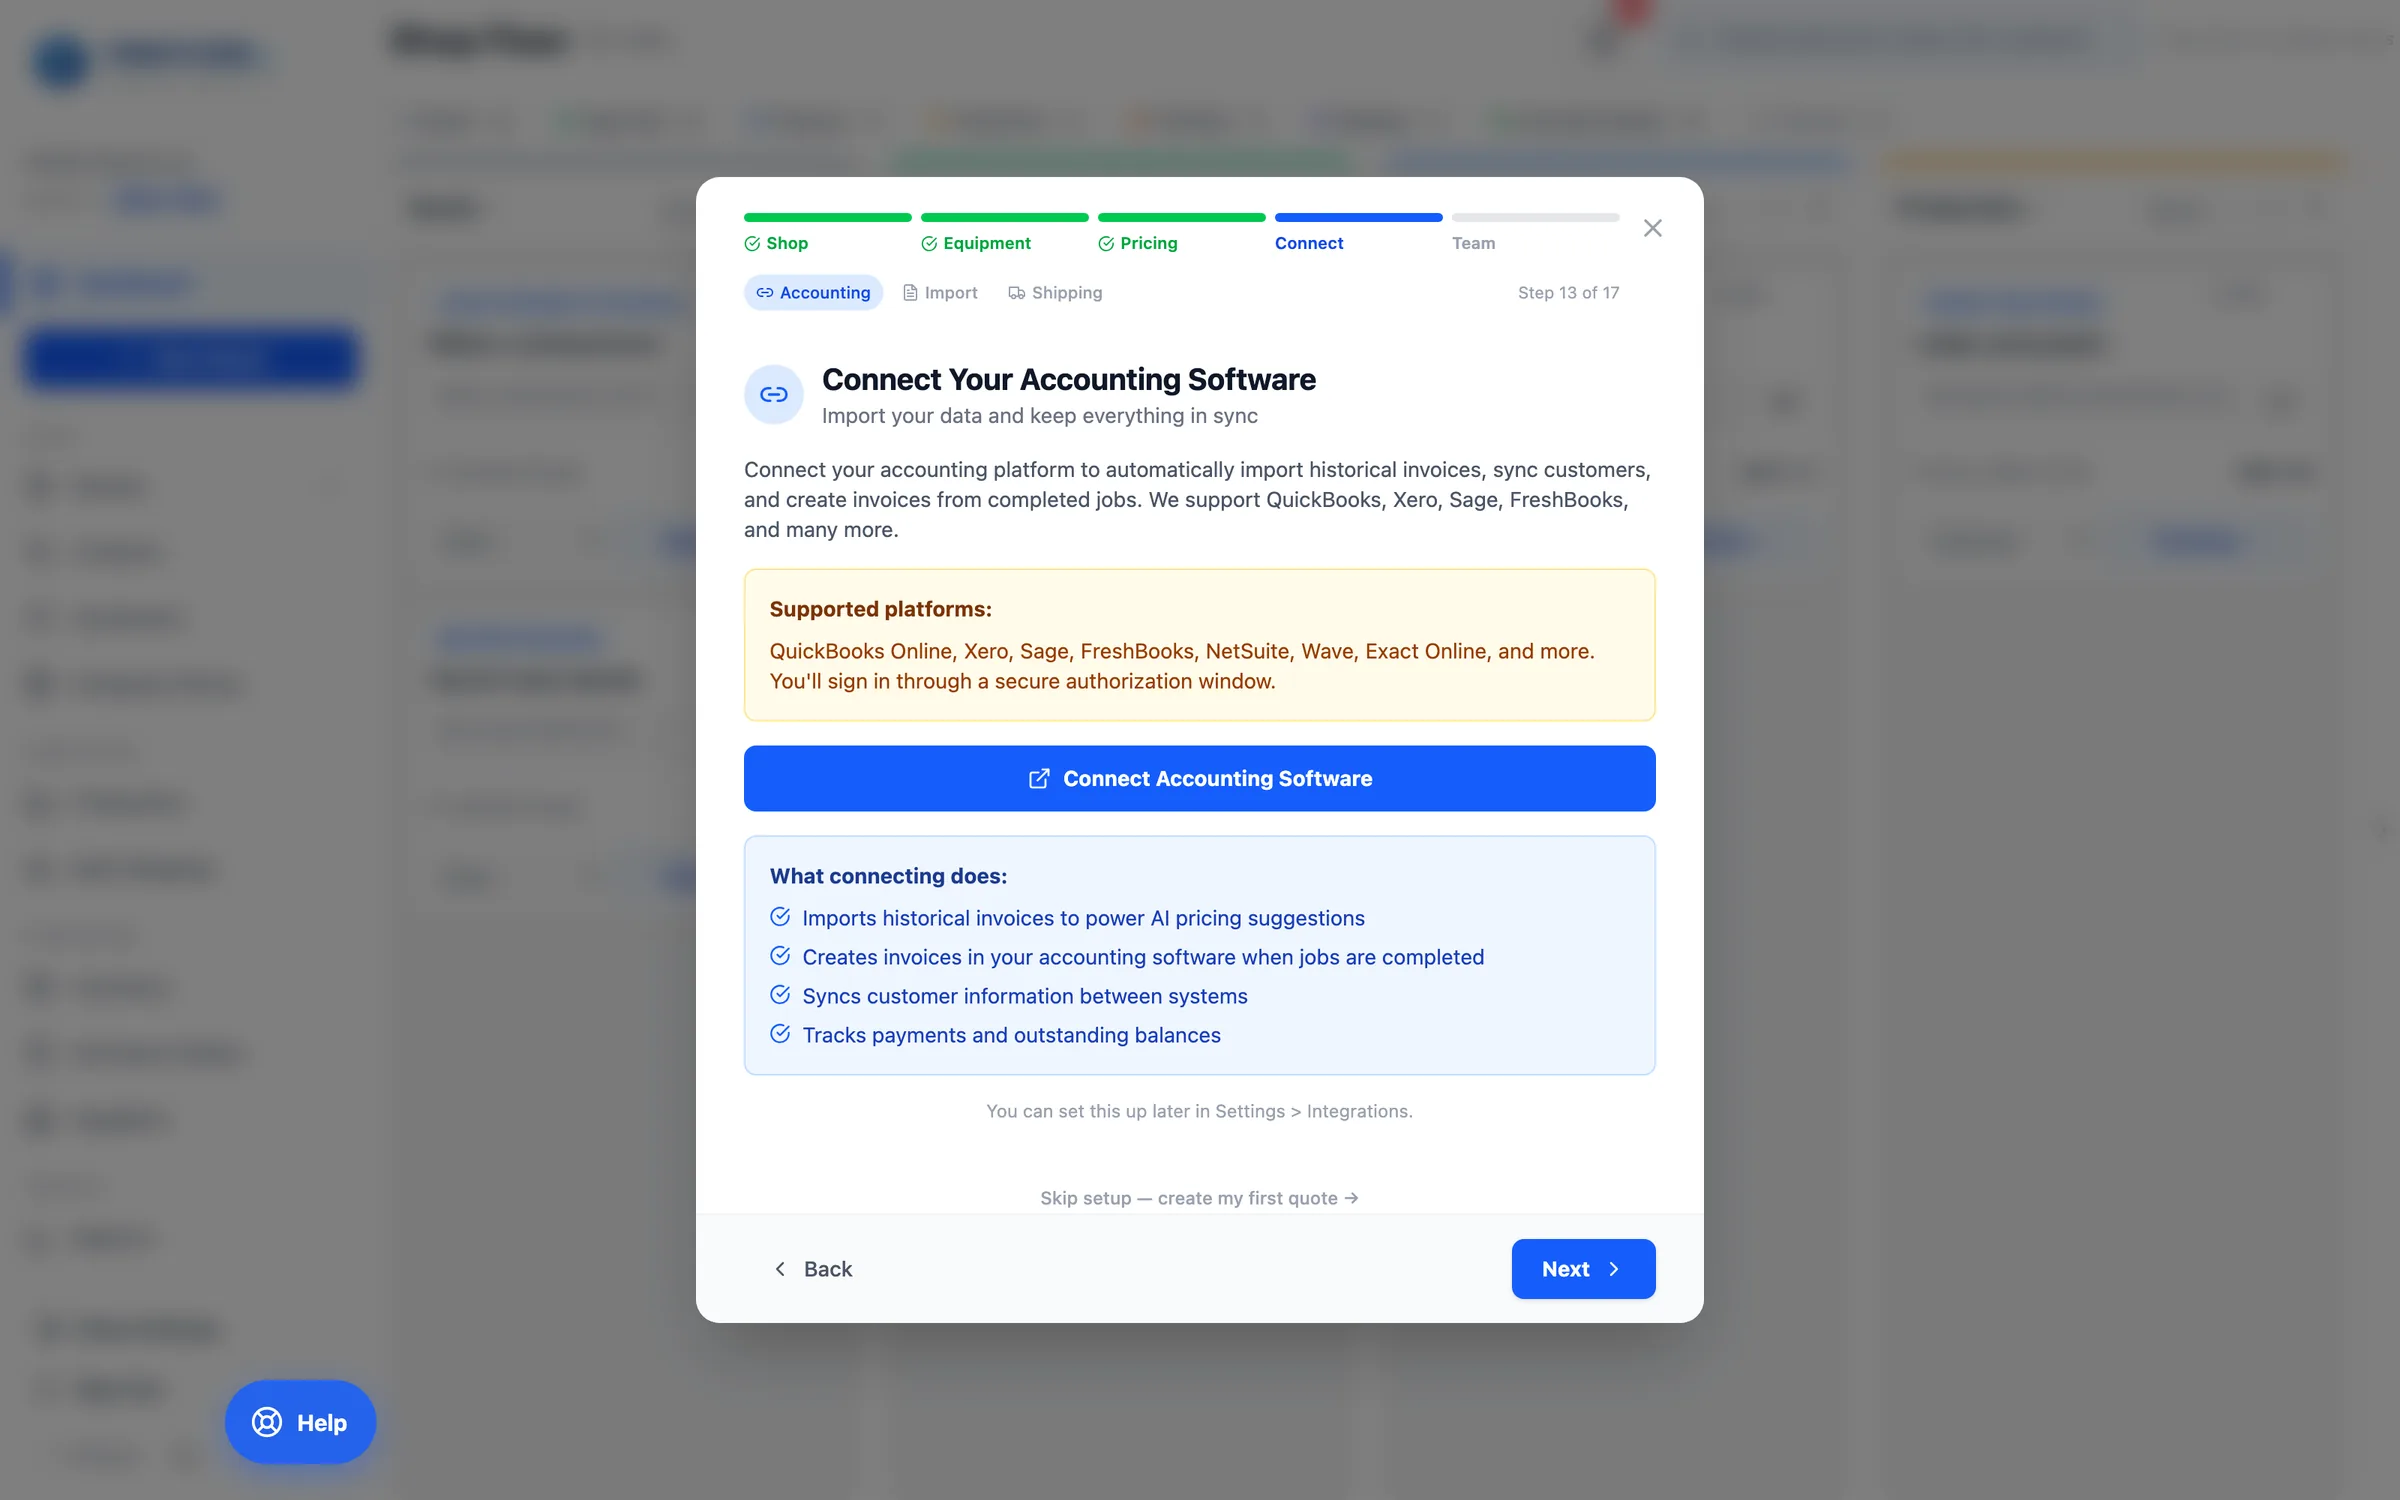
Connect your accounting software
Link QuickBooks Online, Xero, Sage, NetSuite, FreshBooks and more. Customers and invoices sync — and Printcore imports your invoice history so its AI price suggestions start from what your shop has actually charged. The Connect phase also covers importing pricing data and setting up shipping.
app.printcore.ai/setup/accounting
What to do
Click Connect Accounting Software and sign in. Once linked, Printcore imports historical invoices (attributed to each customer), syncs customers, and pushes invoices back.
Why it matters
Connecting unlocks AI-powered pricing grounded in your own history. Skip it now if you like — it's in Settings → Integrations later.
Step 10 of 12Getting Started
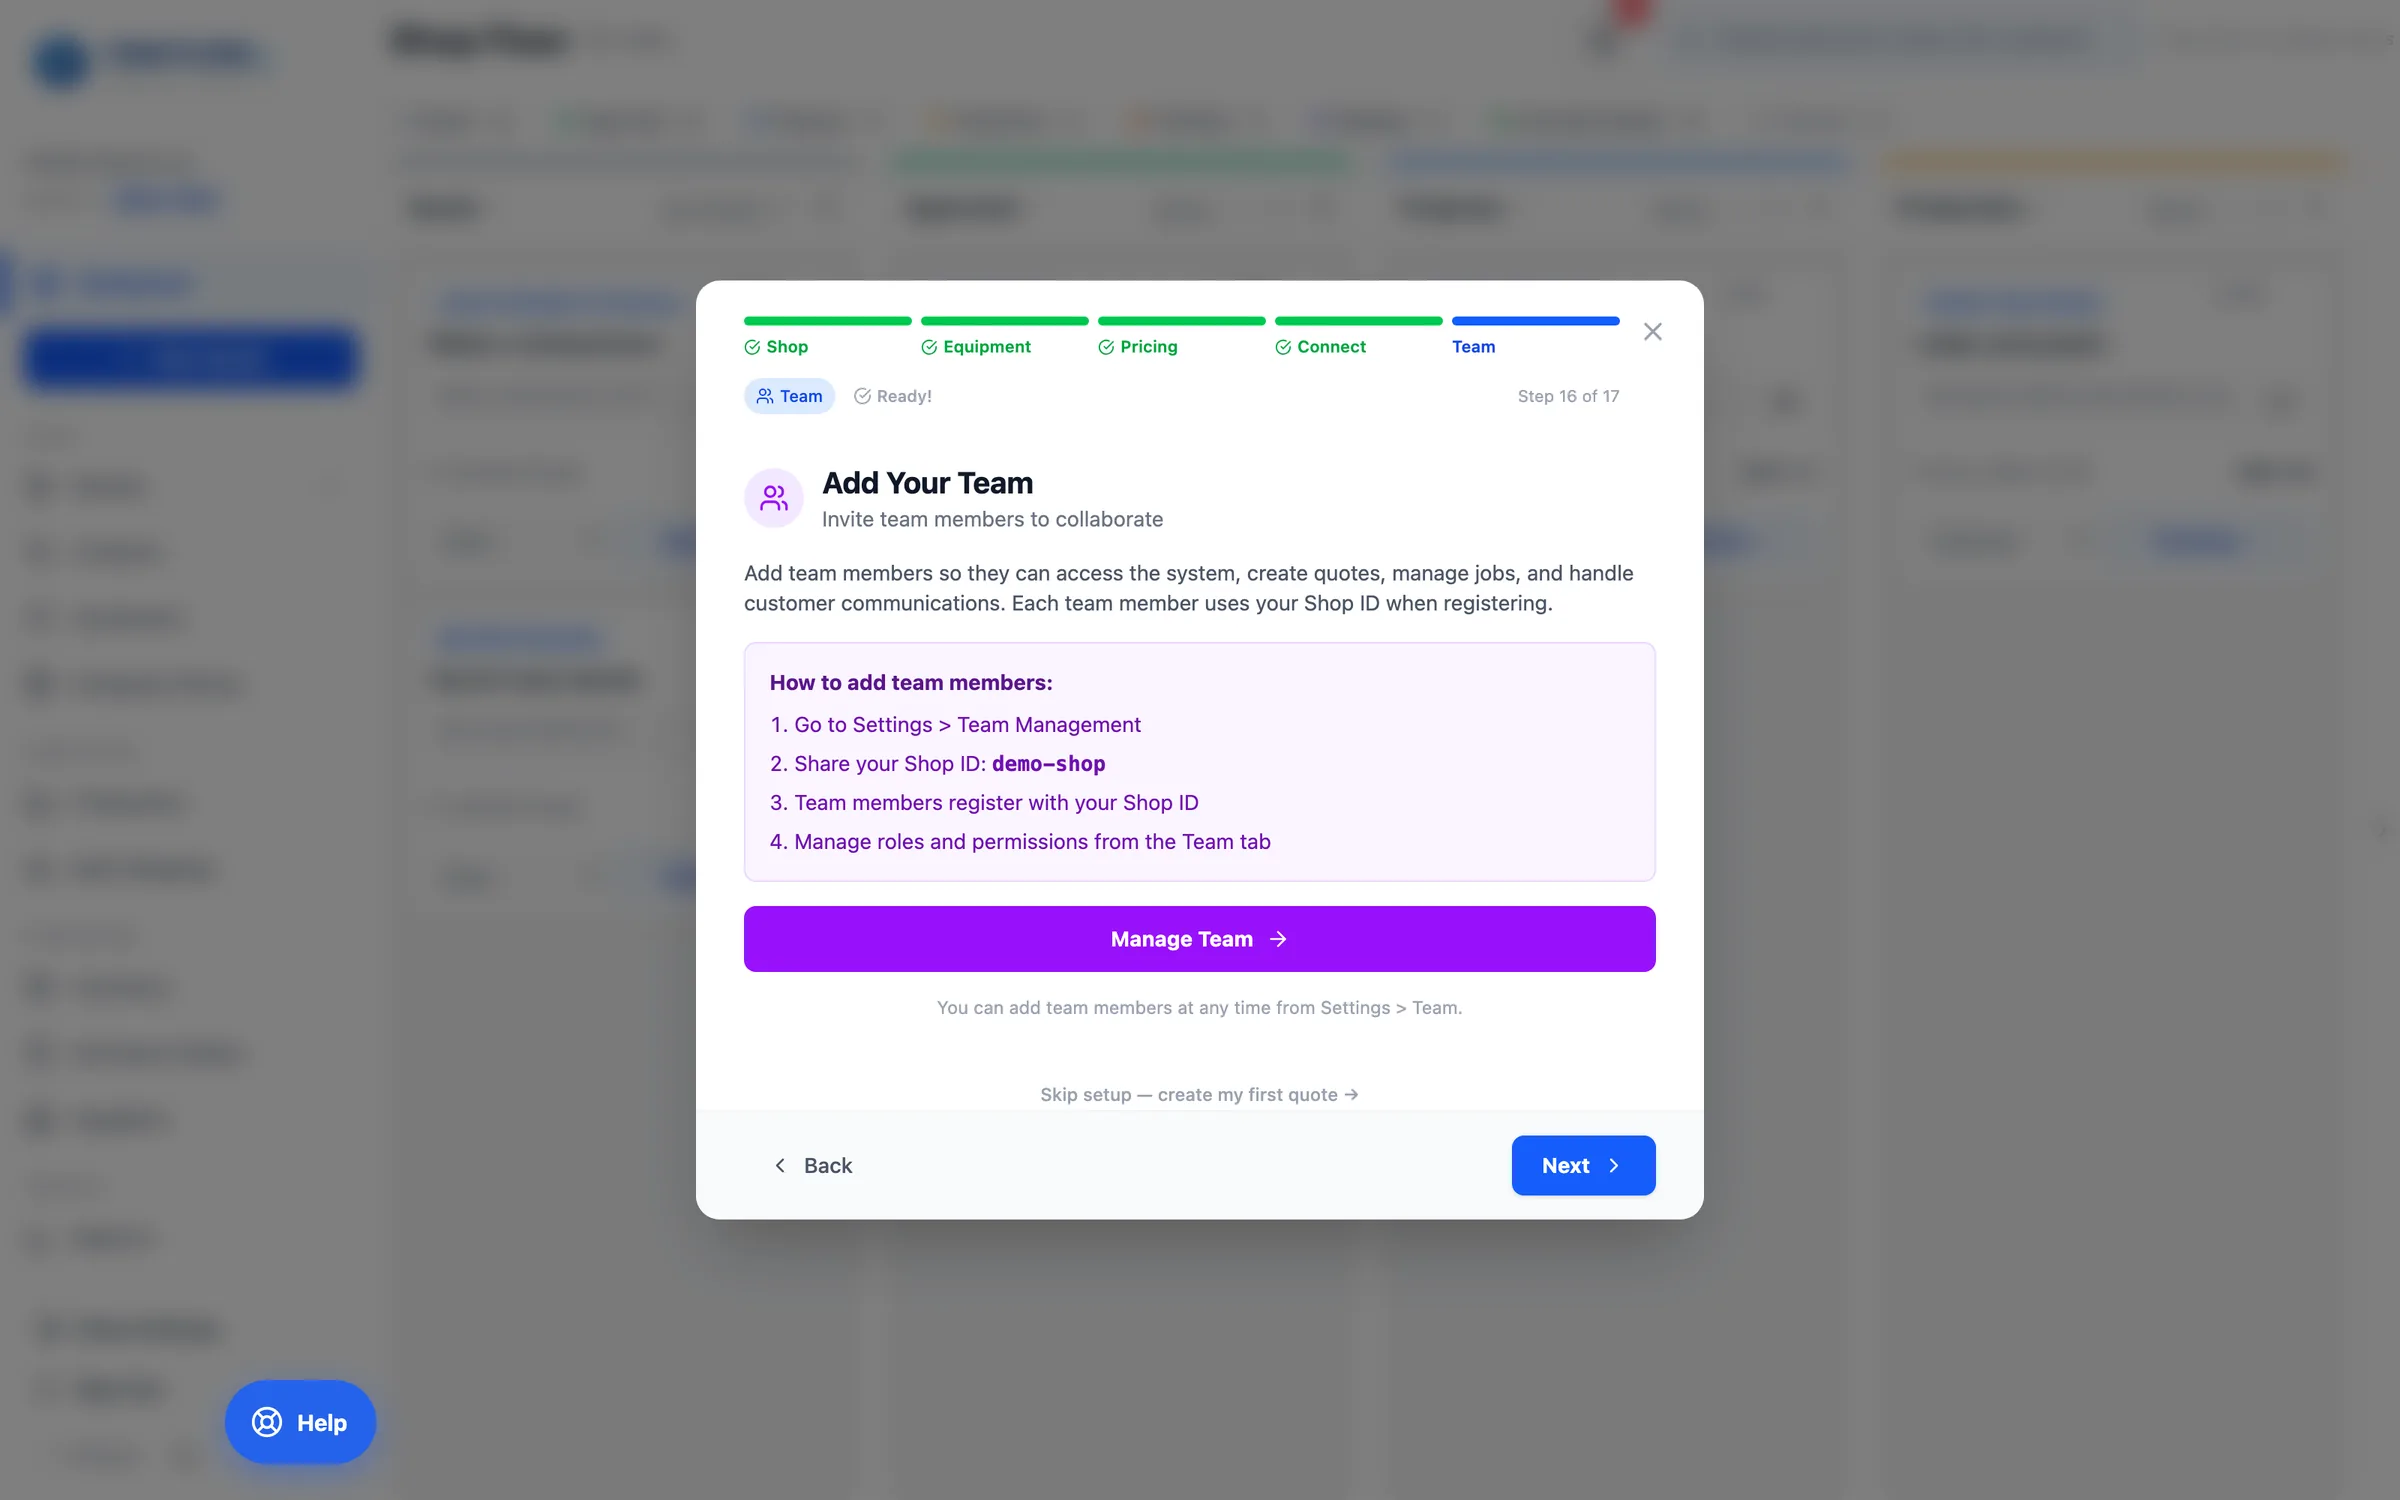
Add your team
Invite the people who'll use Printcore with you — sales, prepress, operators. Every plan includes unlimited team members.
app.printcore.ai/setup/team
What to do
Click Manage Team. Share your Shop ID with each team member; they sign in at app.printcore.ai and choose Join my shop's team. In Settings → Team you set their role — Admin, Manager, Operator, or Member.
Why it matters
Roles control what each person can do. Operators work the production queue; managers can plan production and read the Audit Trail; admins manage settings and the team.
Step 11 of 12Getting Started
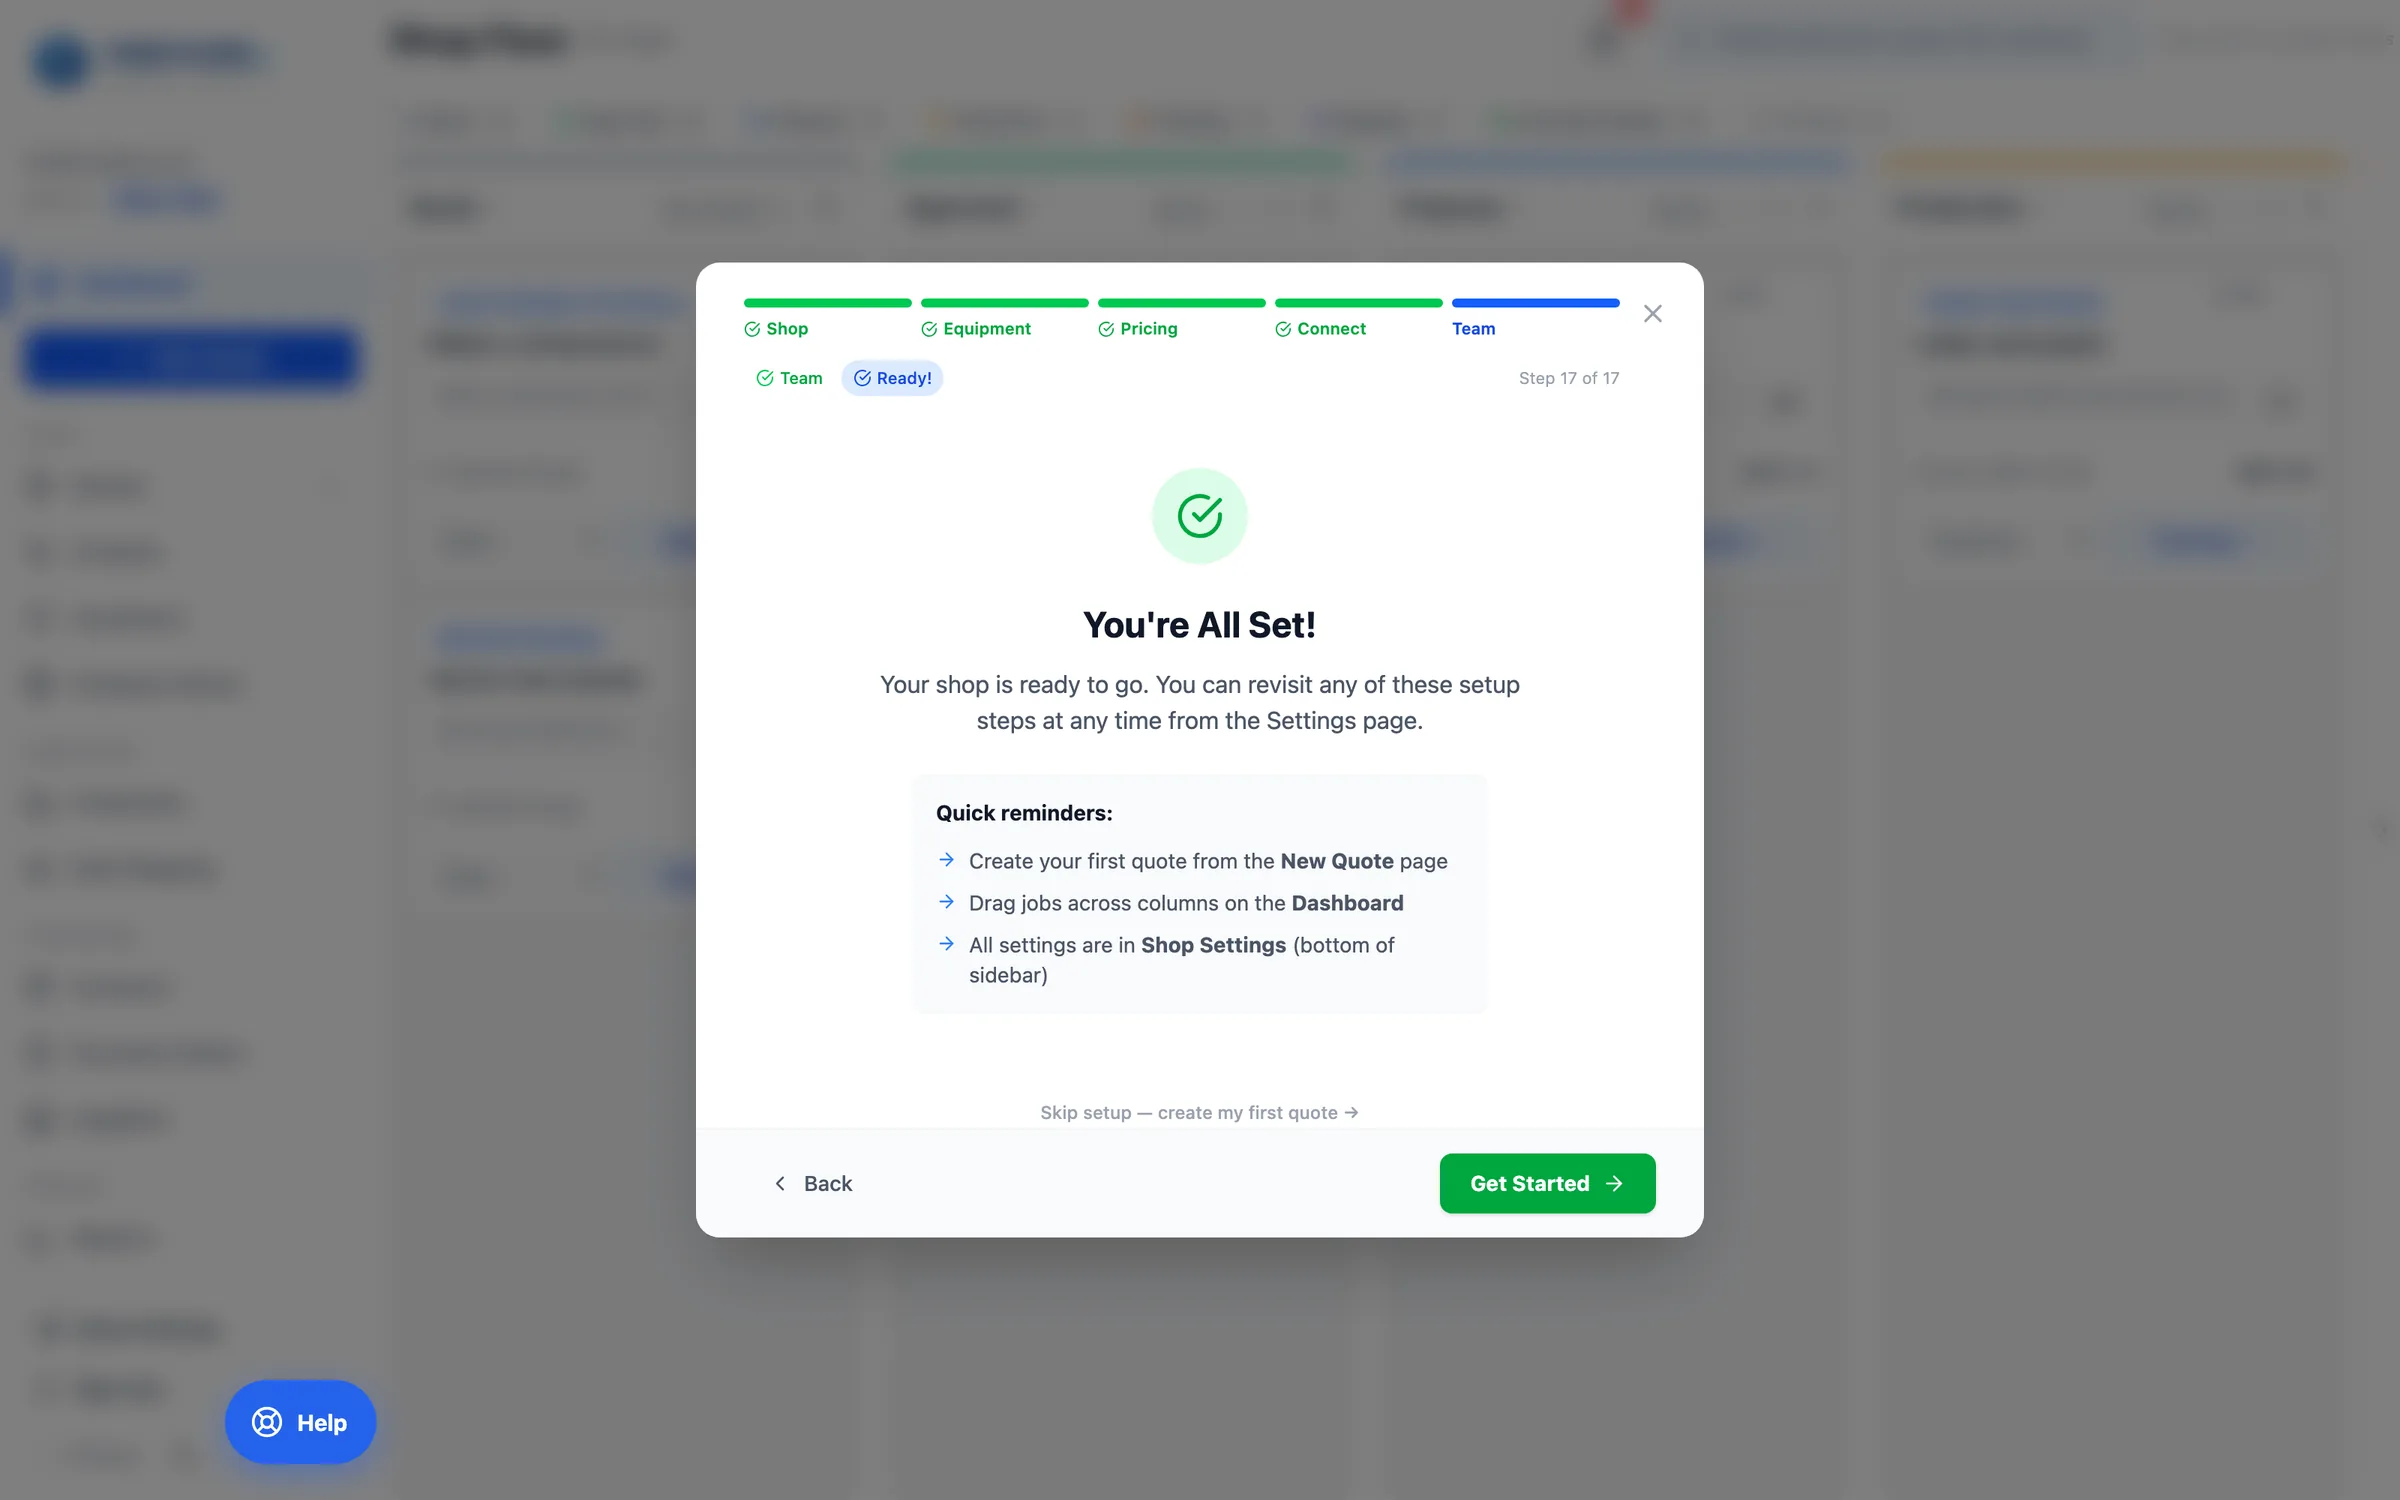
You're all set
The last step recaps where things live. Click Get Started and you land on the Shop Floor.
What to do
Click Get Started. Bookmark app.printcore.ai in your browser so you can come back fast.
Why it matters
Every screen you'll use in your daily work is one click away from the left sidebar — and each one has its own web address you can bookmark or share.
You're set up! 🎉
You've finished setup. Next, take a quick tour of the Dashboard — the home base for everything in your shop.