Step 1 of 7Production
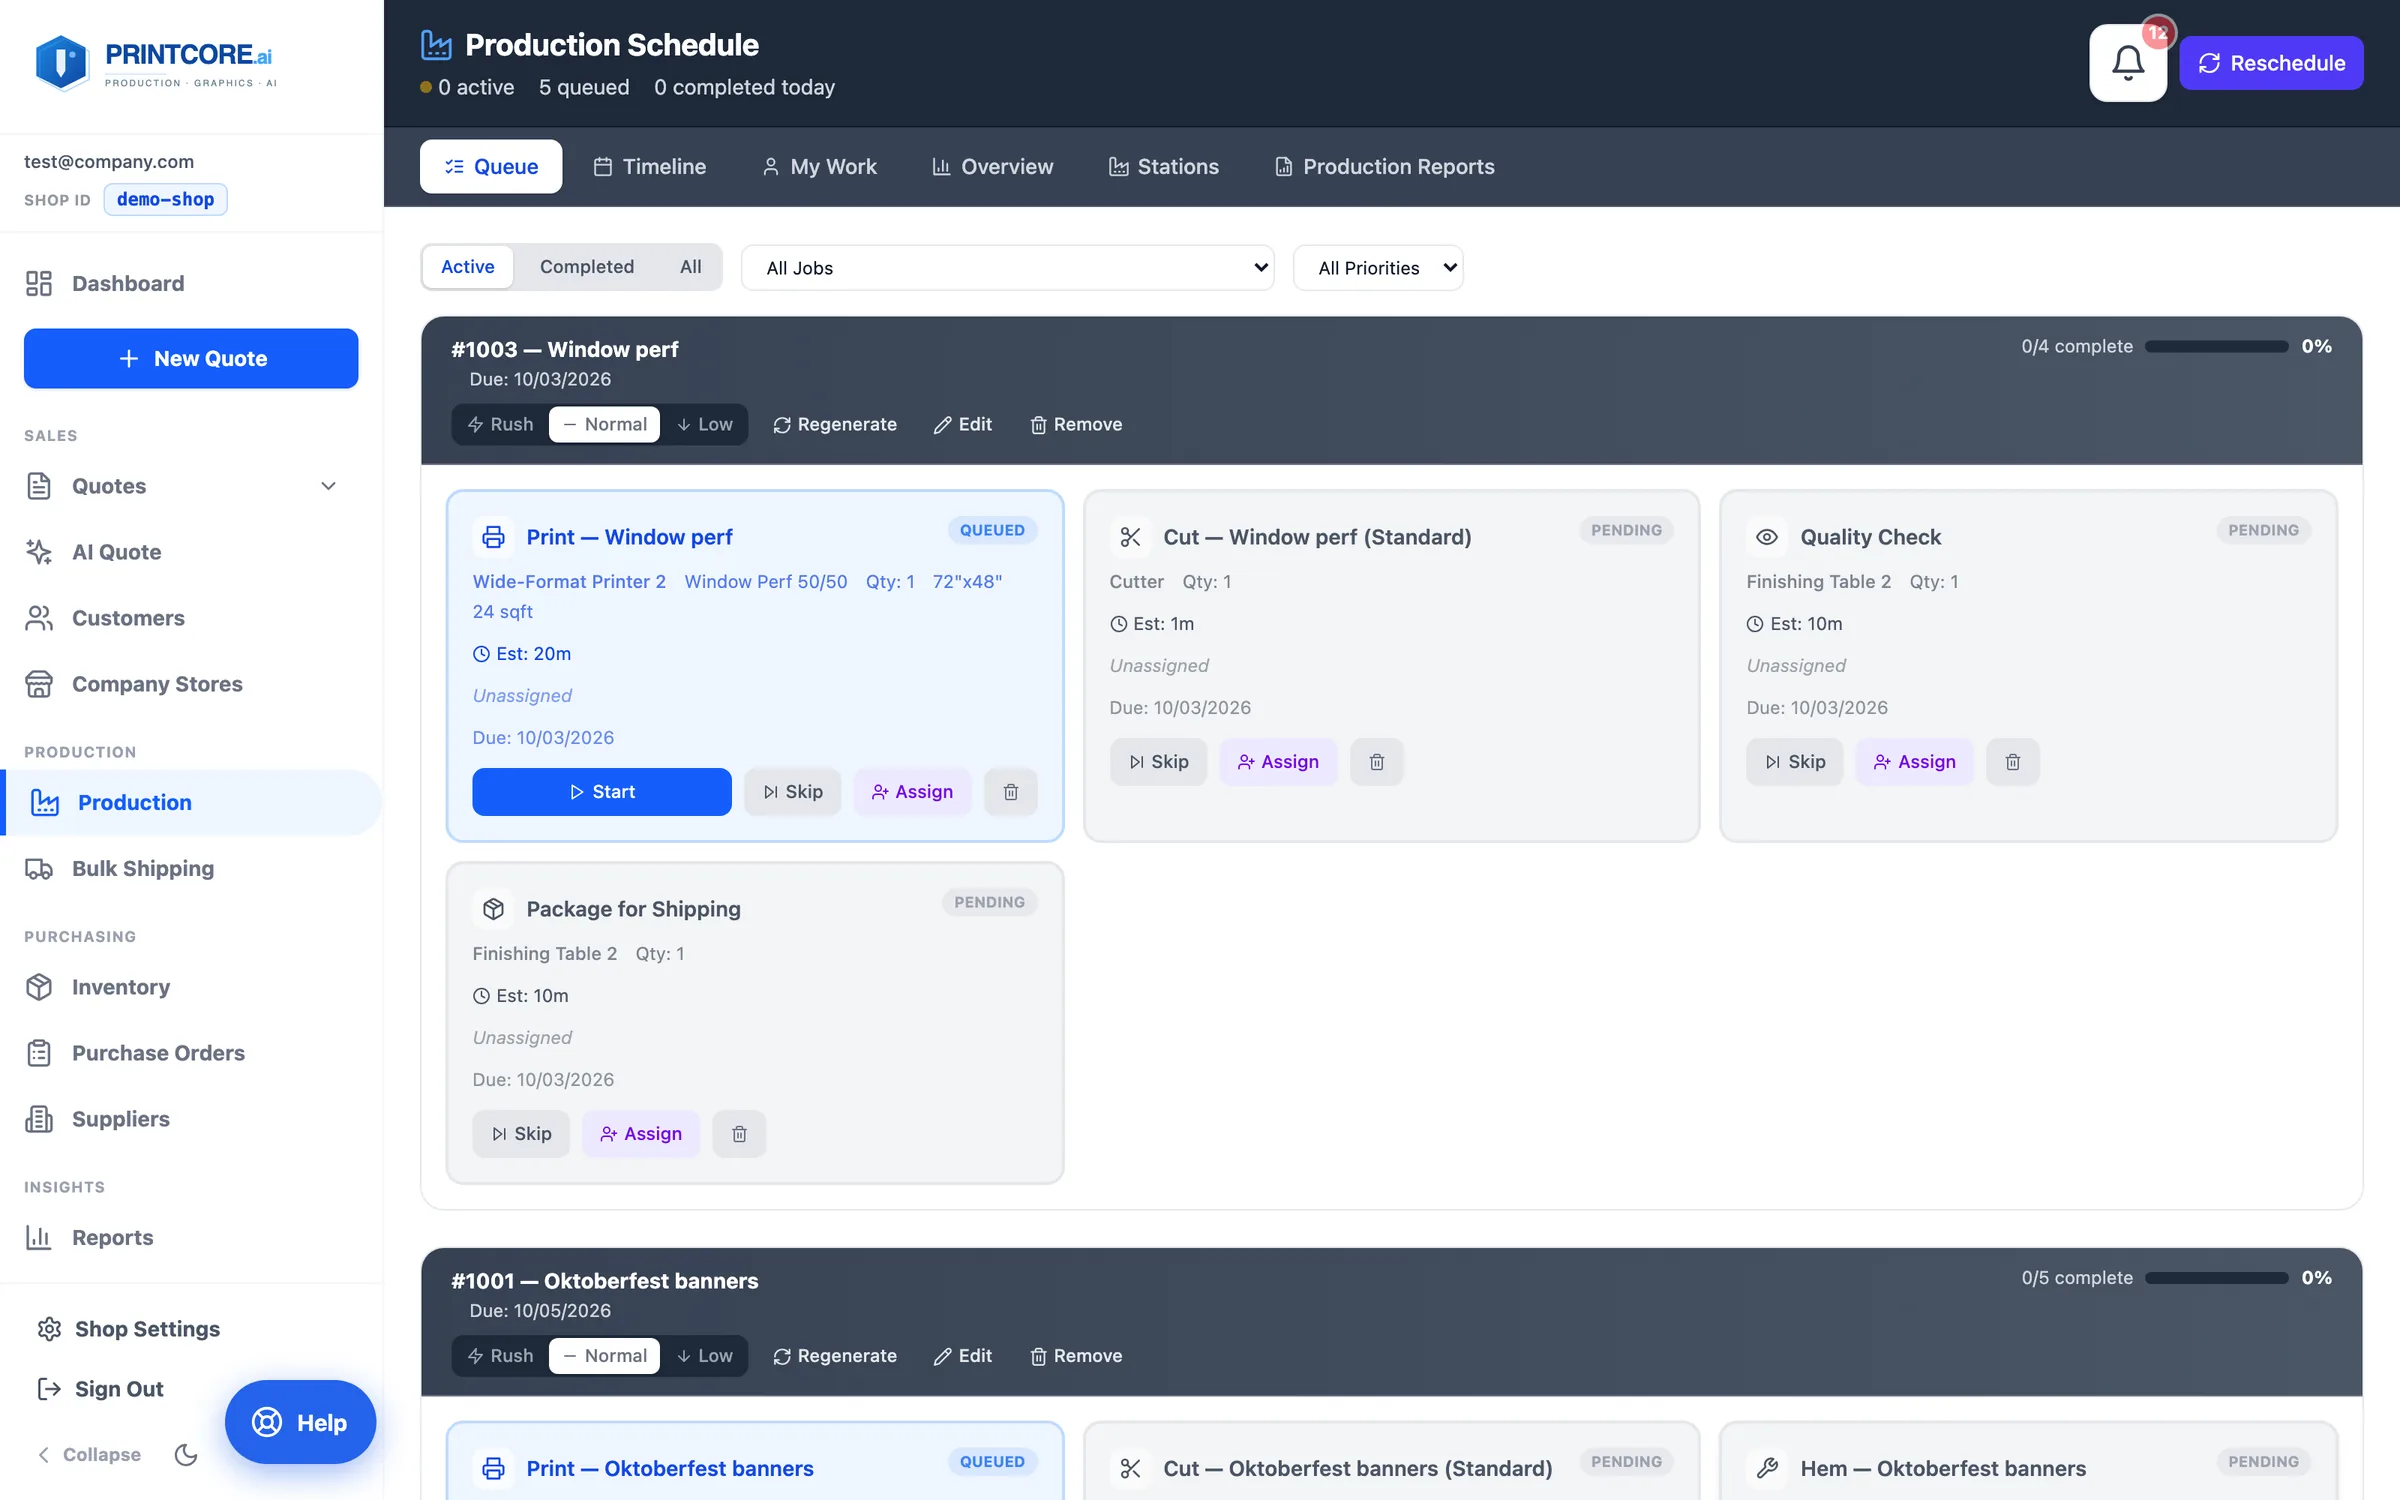
The Production Queue
A focused view of what's actually being worked on — sorted by due date and station. Each Production view has its own address: /production, /production/timeline, /production/my-work, /production/overview, /production/stations, /production/reports.
app.printcore.ai/production
What to do
Click Production in the side menu. The Queue opens first; each job shows its operations as cards with Start, Skip, and Assign, and rush jobs are flagged.
Why it matters
On the dashboard, every job is visible. The queue narrows to what your operators need to do today.
Step 2 of 7Production
Generate operations
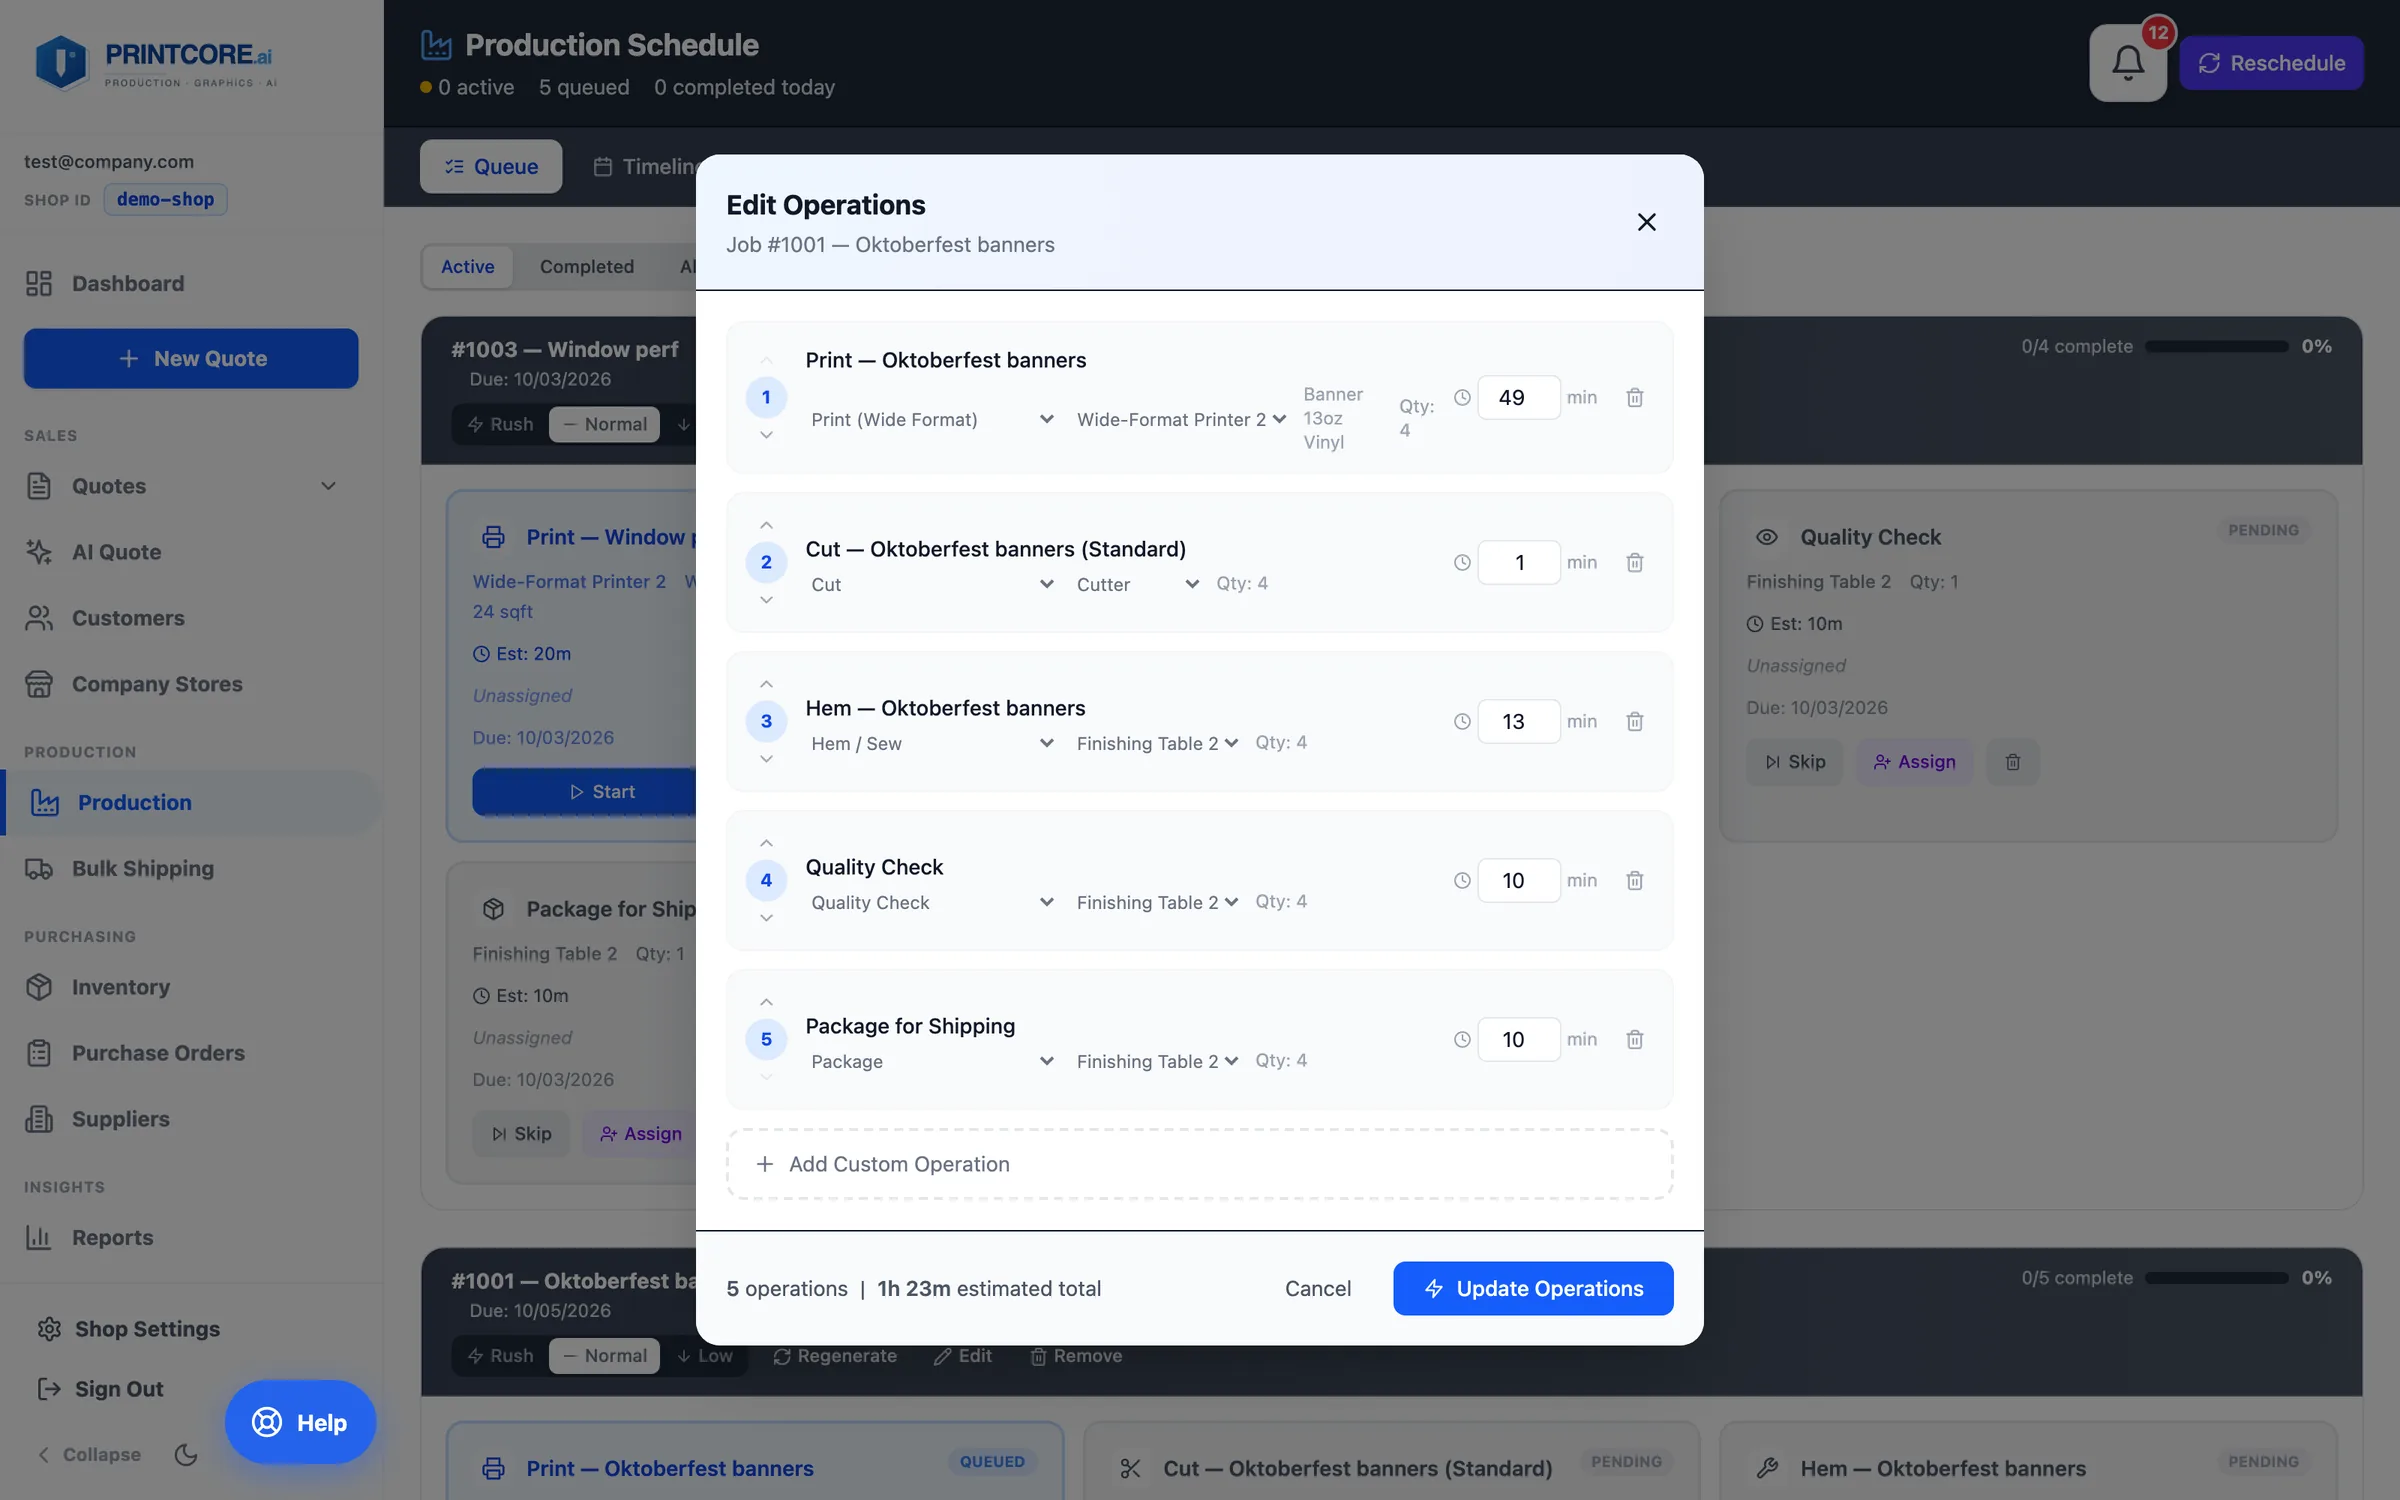
For any approved job, Printcore breaks the work into the discrete operations needed to produce it — print, laminate, cut, grommet, QC, package — with a time estimate for each, and routes them to stations that can actually run them.
app.printcore.ai/production
What to do
A banner at the top of the Queue lists approved jobs that still need operations. Click one to review its steps, stations, and minutes (managers and admins), add a custom operation if your shop runs an extra step, then Generate Schedule — or use Generate all. On a job that already has operations, Edit opens the same list to re-time or re-route a step.
Why it matters
Every operation is named, sequenced, and time-budgeted the way the work is really handled — the digital press and guillotine are timed per sheet, QC and packing count bundles and decal stacks rather than single pieces, and small decals are weeded by area — and the estimates get more accurate as your operators record real times.
Step 3 of 7Production
Timeline and My Work
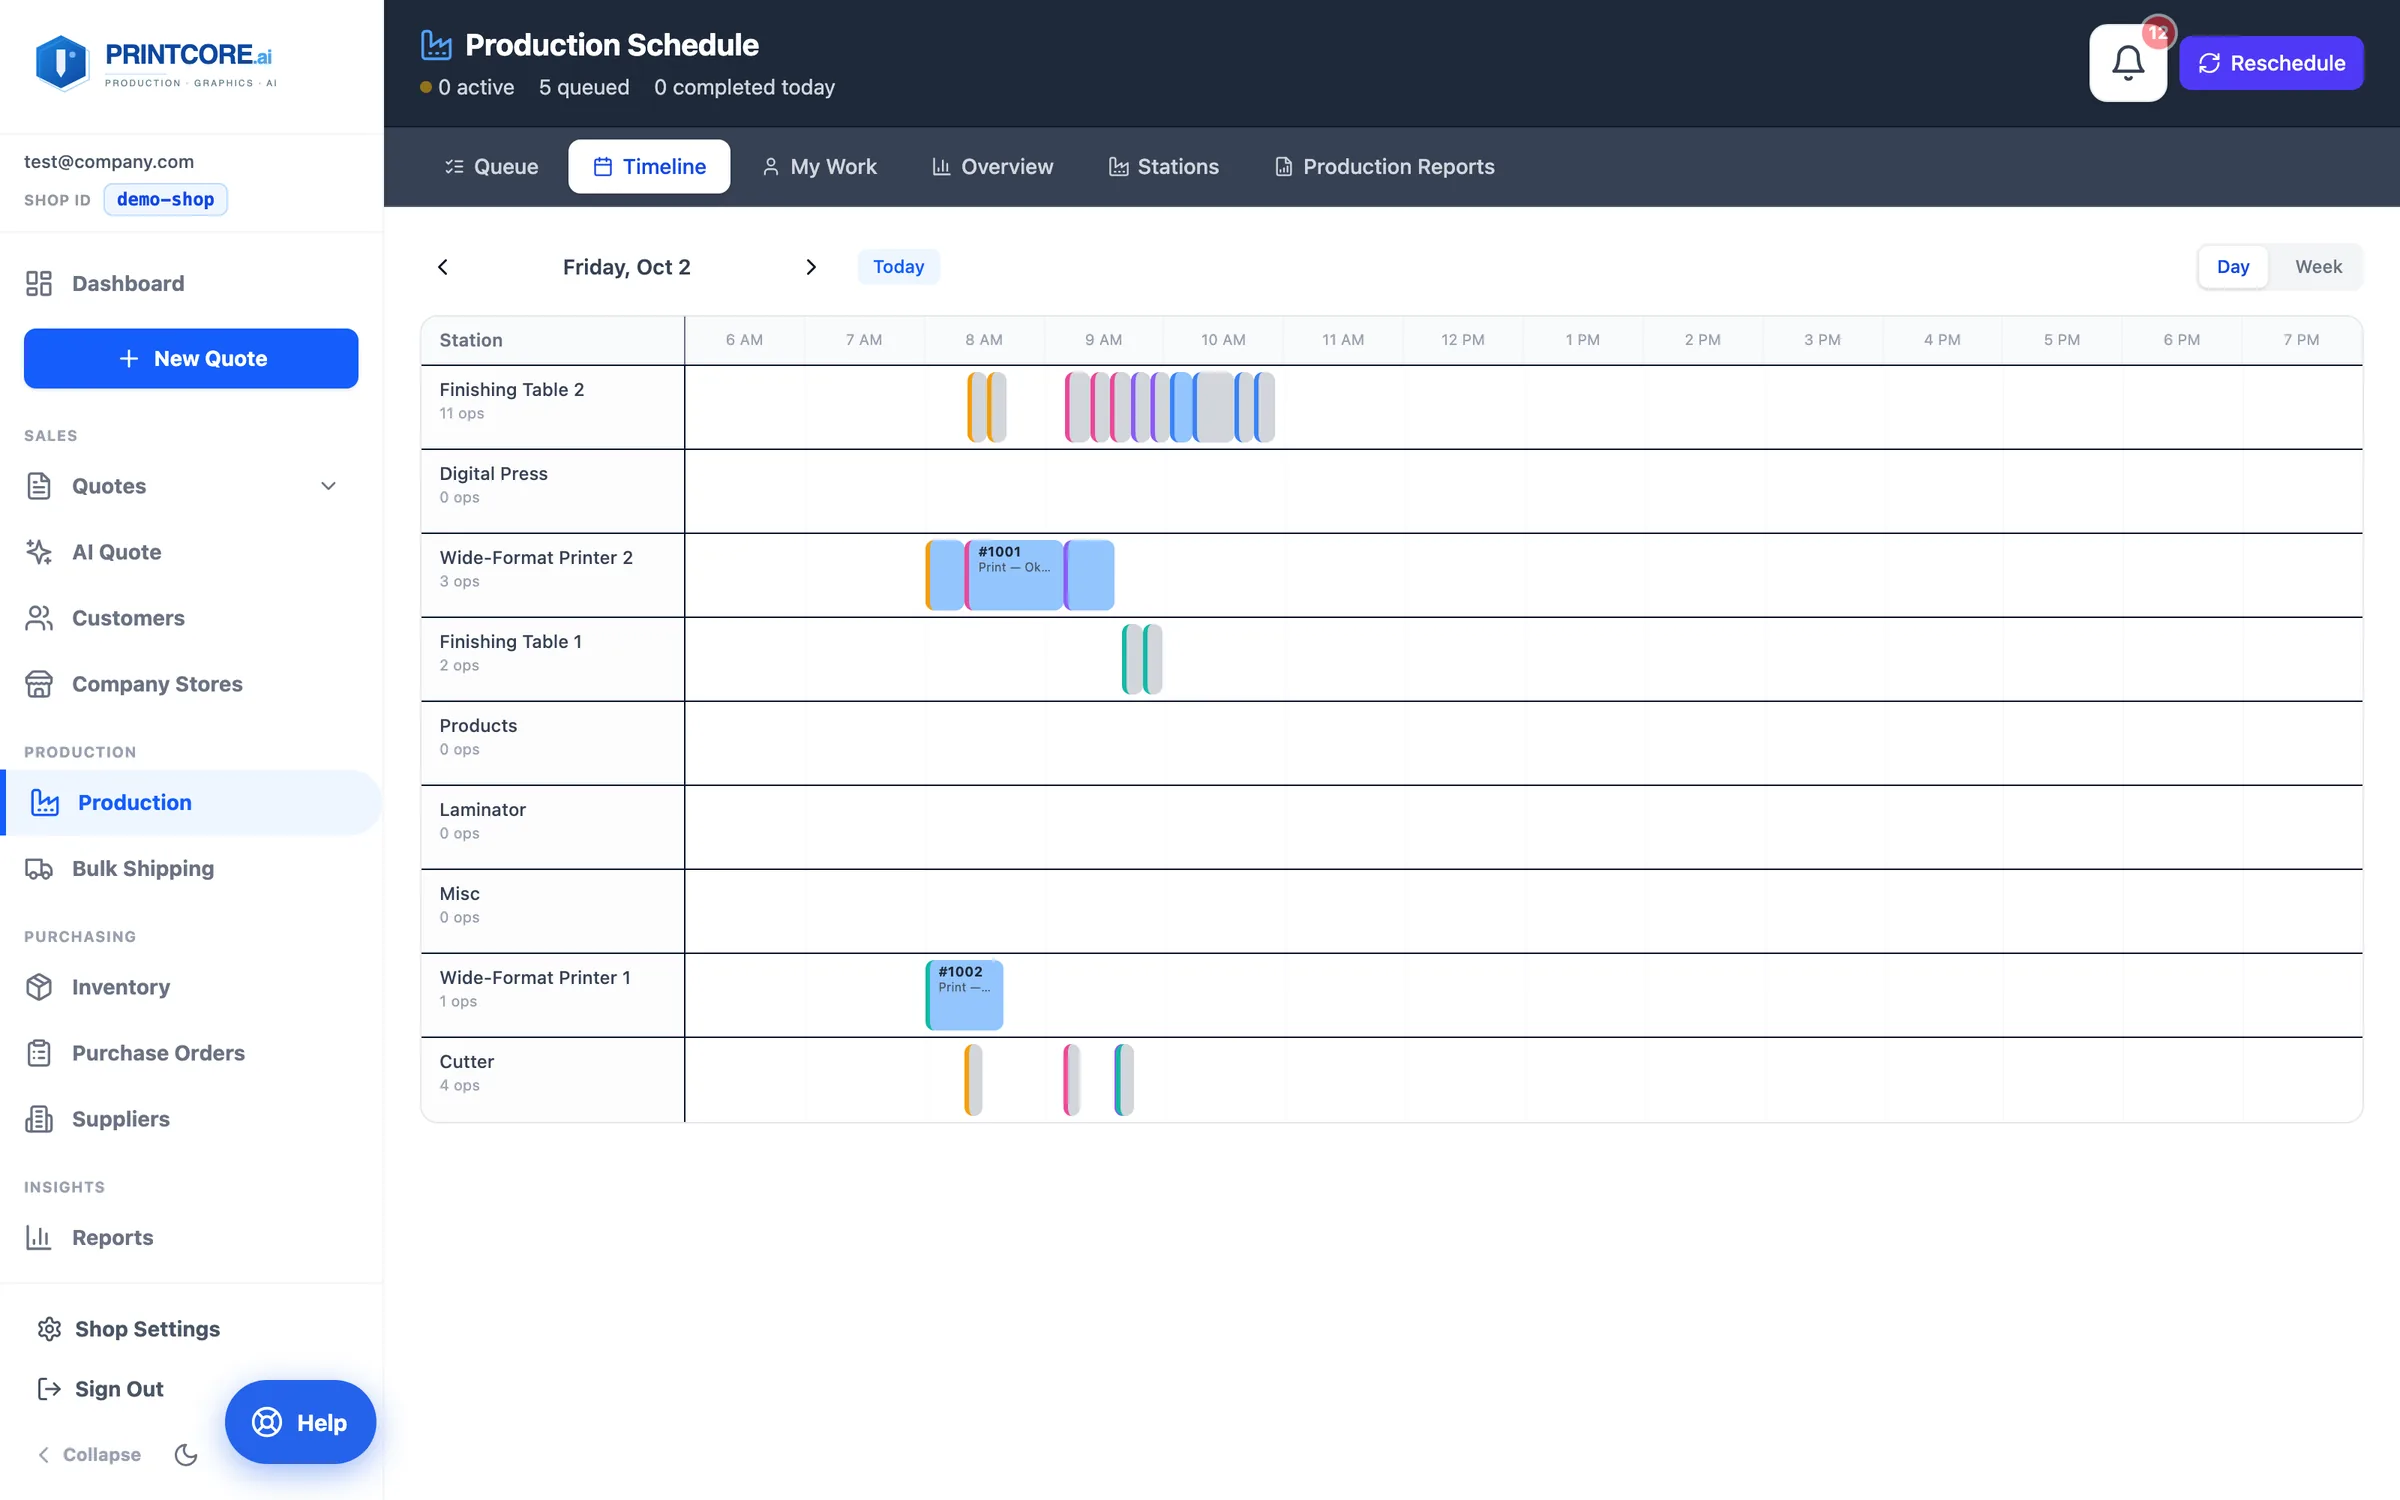
The Timeline is a Gantt view per station that opens on today. My Work is the operator's screen: their current job, what's next, Start / Pause / Complete with a live timer.
app.printcore.ai/production/timeline
What to do
Operators open My Work on their phone at the station — the layout fits a 375px screen with no sideways scrolling.
Why it matters
Operators don't see the noise of the whole shop — just what they need to print, cut, or finish next.
Step 4 of 7Production
Overview
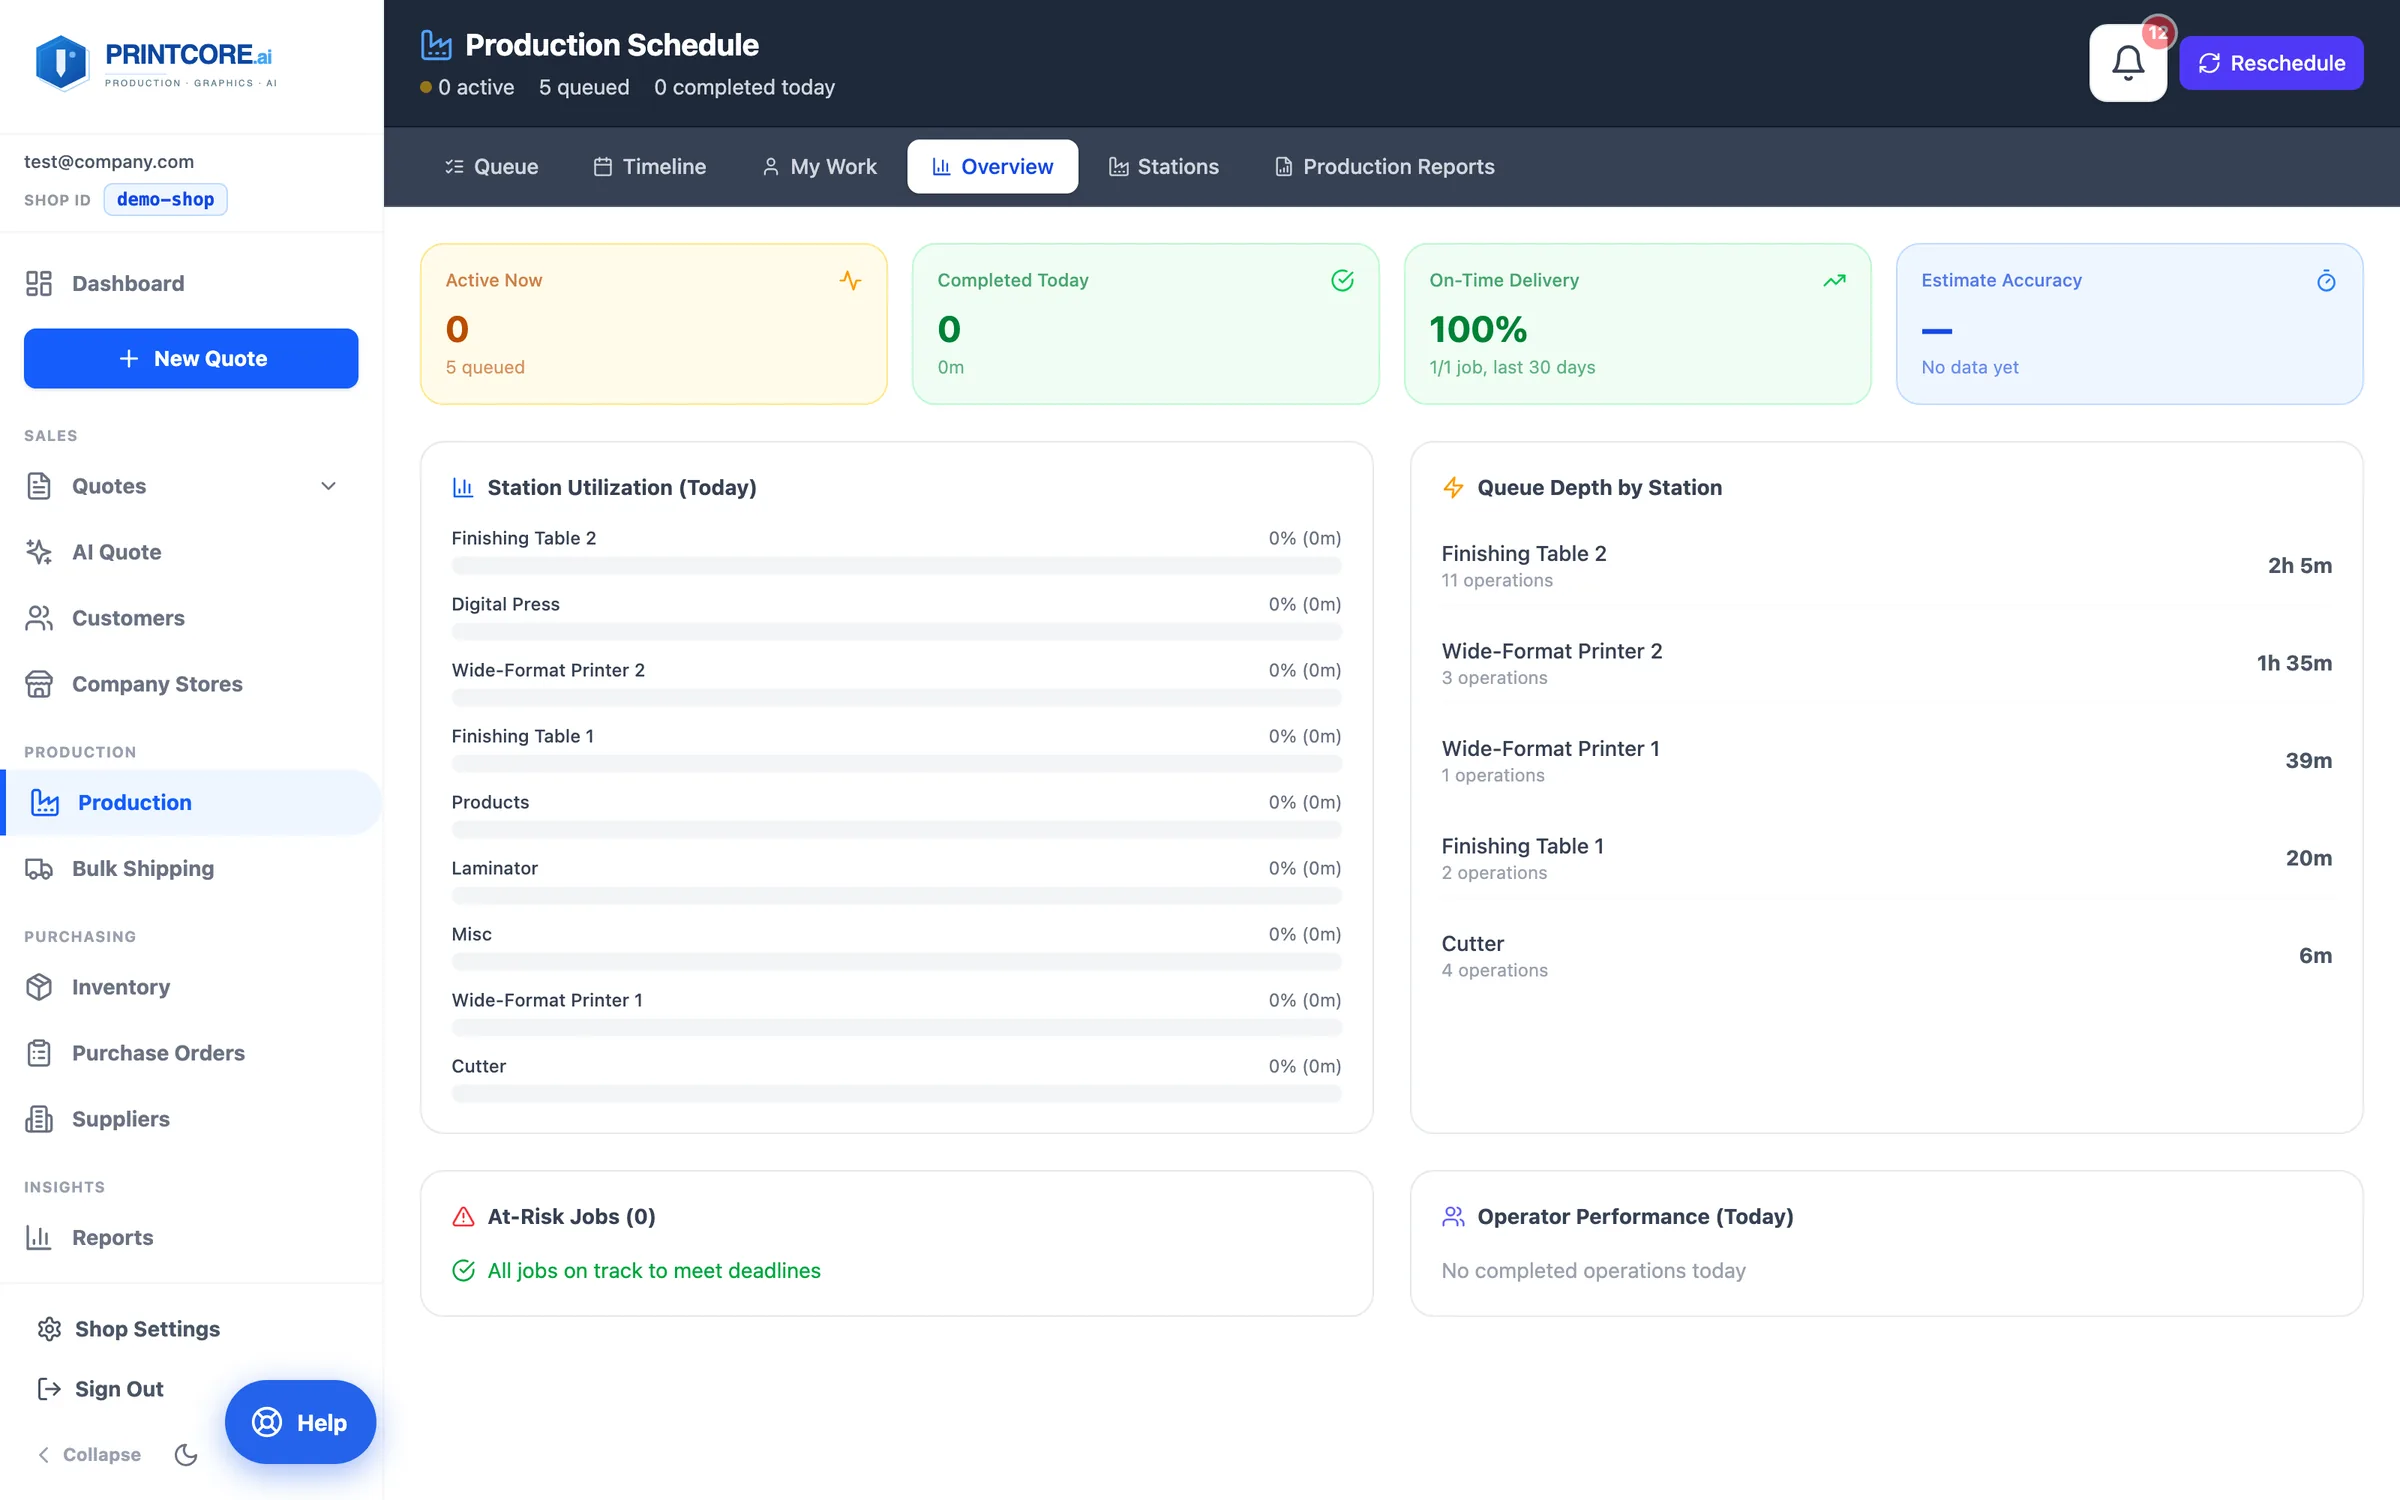
A cross-shop view: utilization per station with overload flags, queue depth, at-risk jobs, and estimate accuracy.
app.printcore.ai/production/overview
What to do
Click the Overview tab. Spot the press that's overloaded or the operator who needs help — before it becomes a missed deadline.
Why it matters
You manage from numbers instead of walking the floor asking.
Step 5 of 7Production
Equipment and its limits
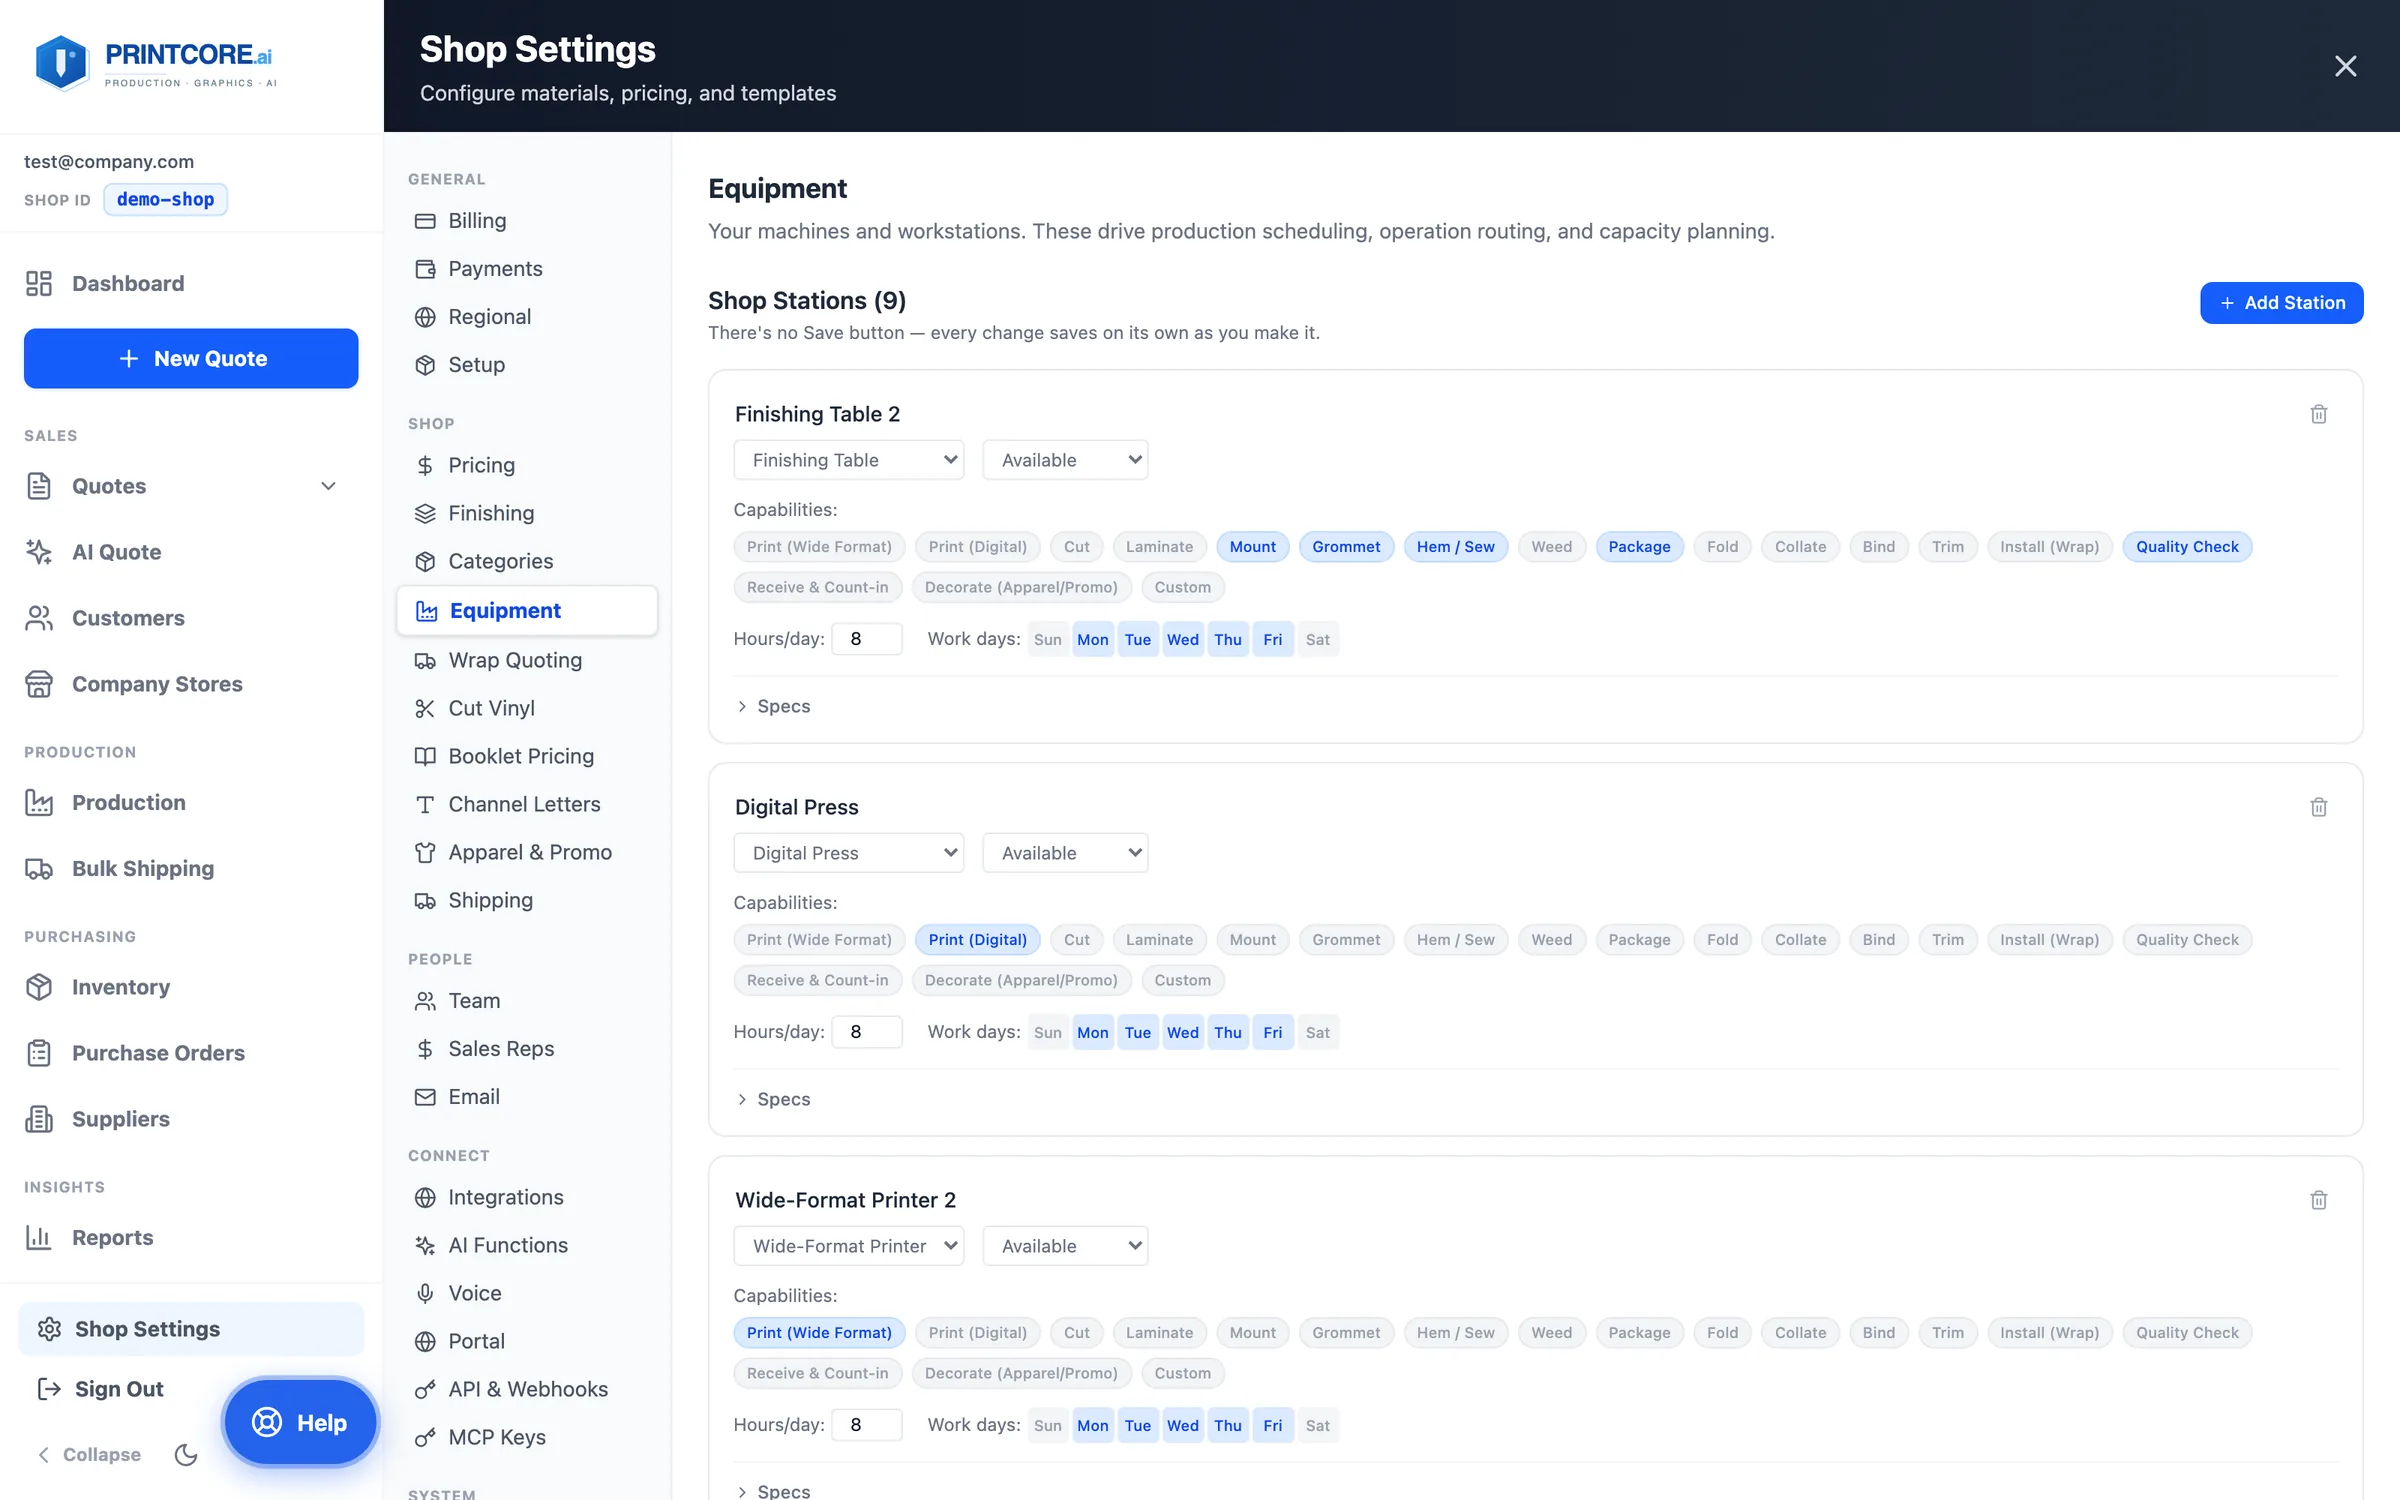
Each station has hours, work days, capabilities — and optional capability specs: max width, max length, max thickness, throughput. Blank means no limit.
app.printcore.ai/settings/equipment
What to do
Open Shop Settings → Equipment. Tick what each station can do, set its hours and work days, and open Specs to enter its limits. Every change saves as you make it.
Why it matters
Once entered, the limits are enforced in quoting and routing: a 5×10 sheet never gets priced onto a 4×8 flatbed, and operations route only to stations that can run them.
Step 6 of 7Production
Production reports
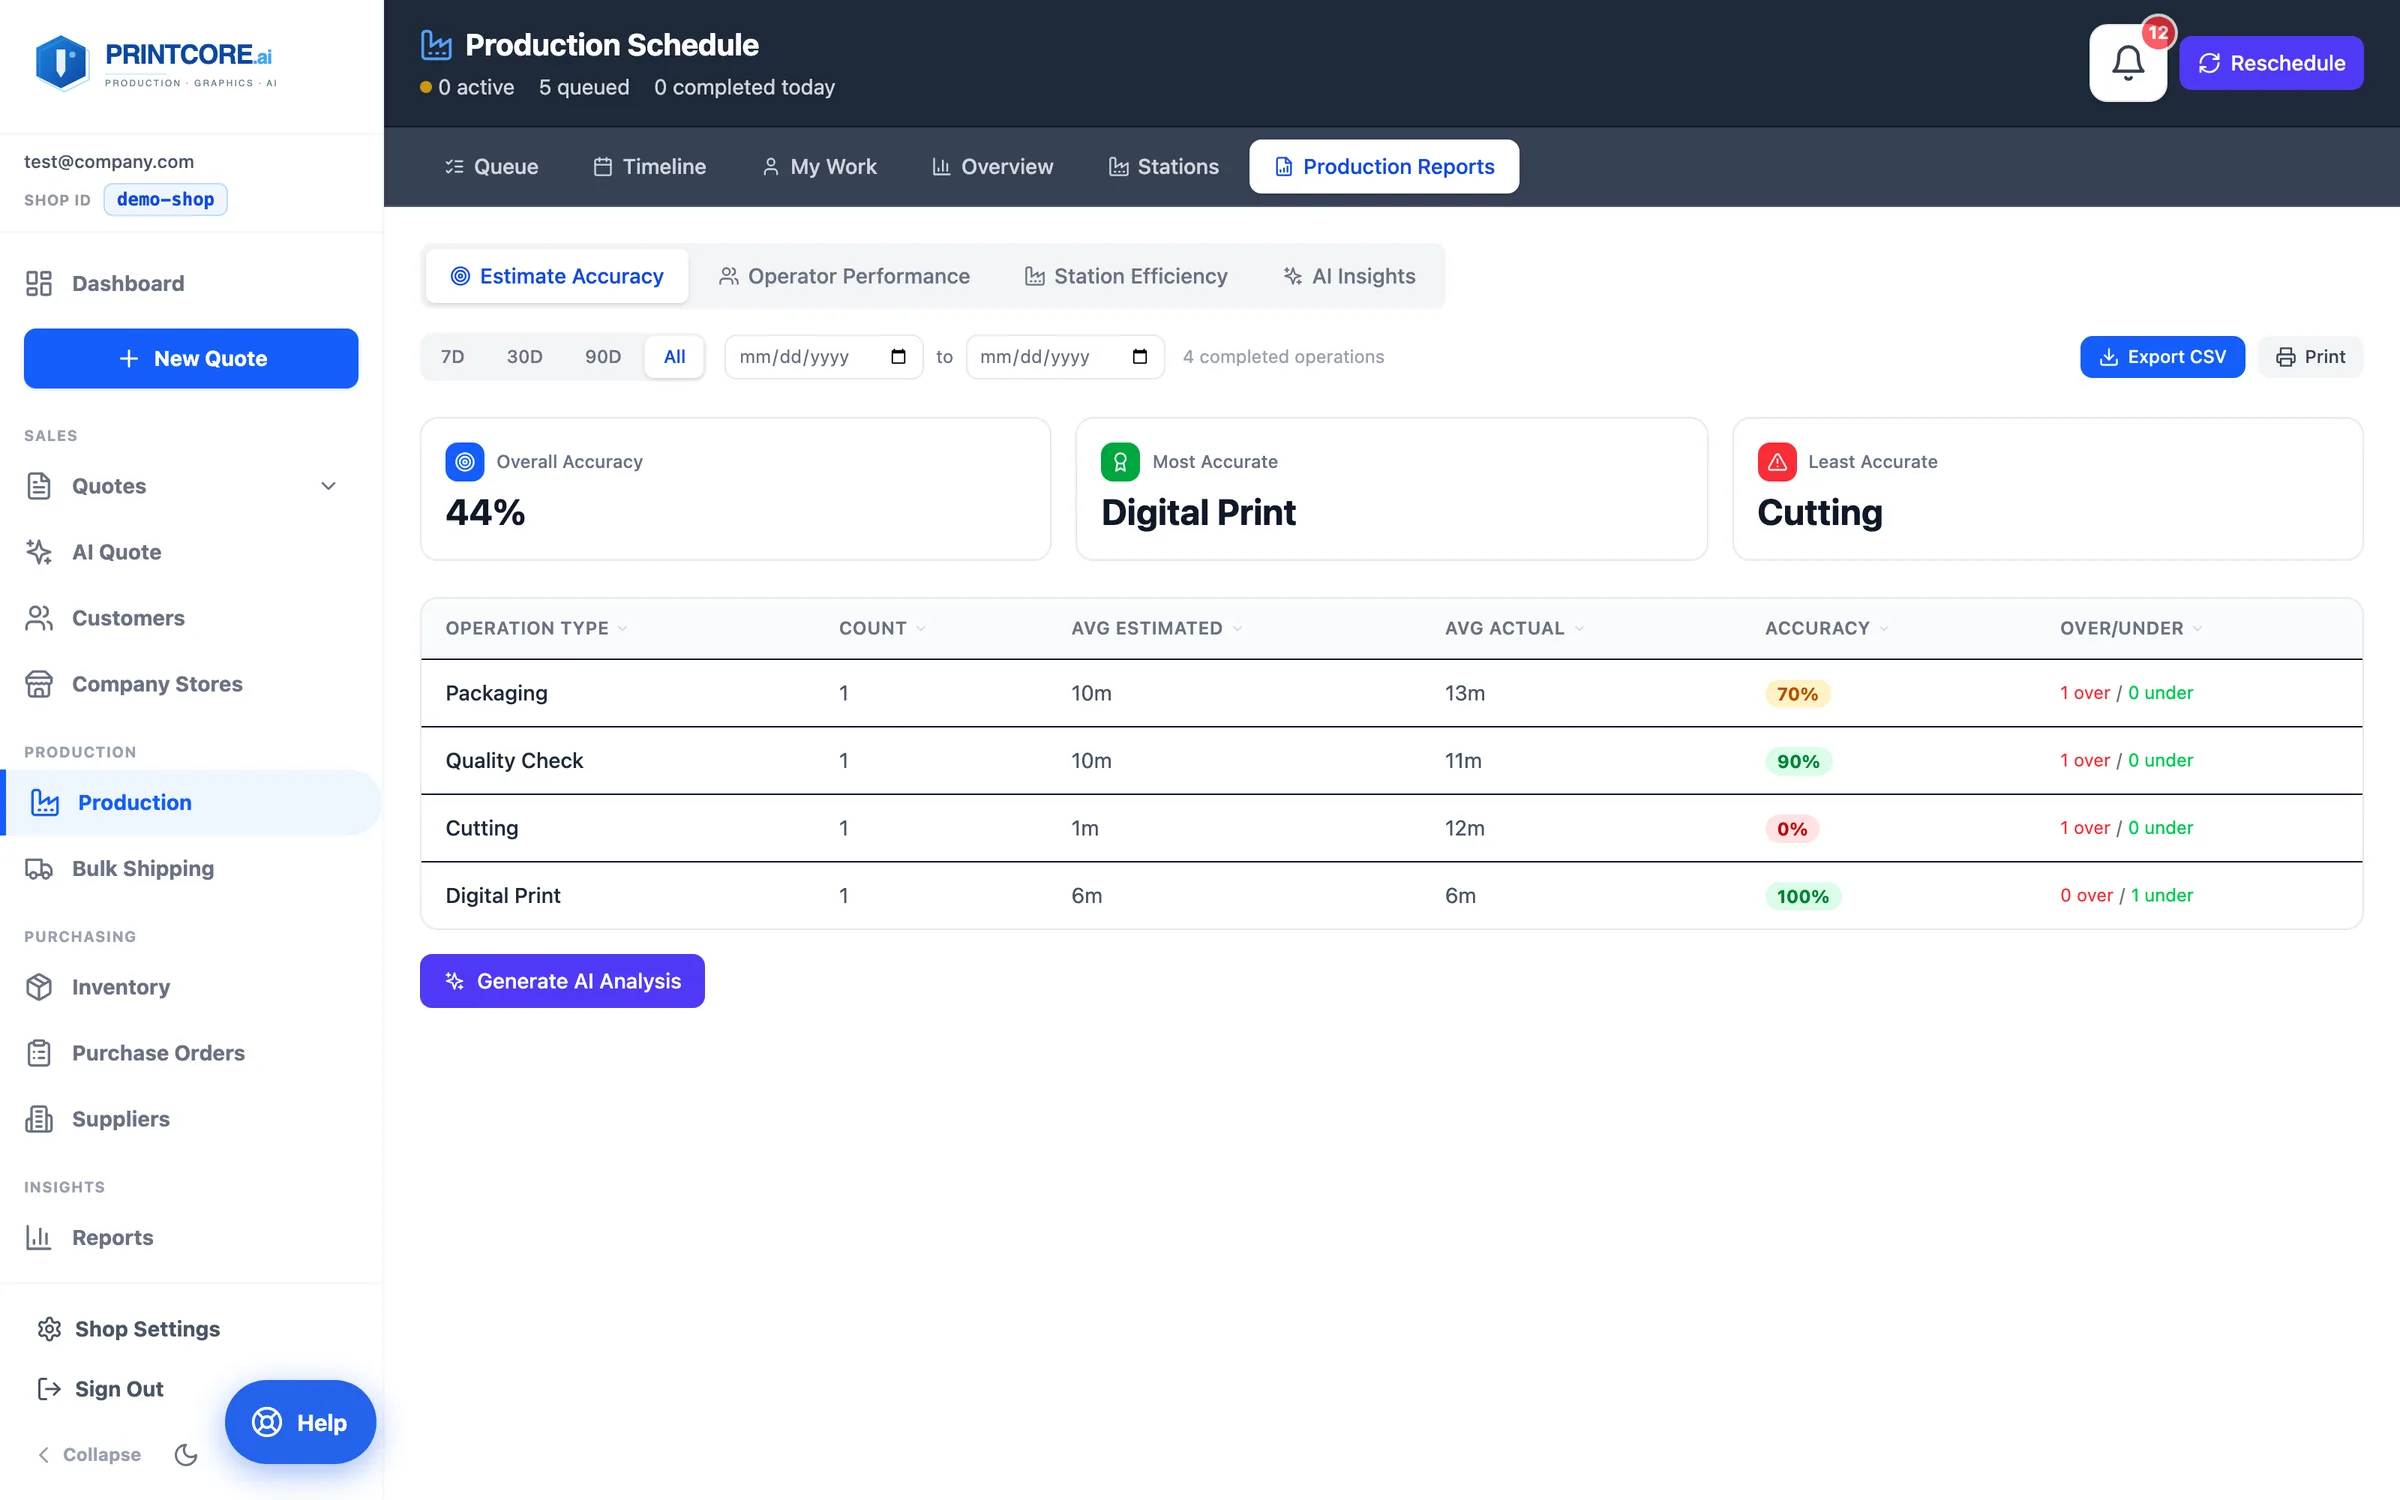
Estimate accuracy, operator performance, station efficiency, and an AI analysis of bottlenecks — all built from the real timings your operators record. Operations still open when a job is invoiced are closed automatically and kept out of these numbers.
app.printcore.ai/production/reports
What to do
Click the Production Reports tab. Filter by 7, 30, or 90 days and export to CSV.
Why it matters
You can spot the press that's always behind, the finishing step that always slips. Data > opinions.
Production runs itself 🏭
Next: keep your shelves stocked. Check out Inventory, Purchase Orders, and Suppliers.